How to create diagonal lines in Word tables?
When creating tables in Word, there will be many cases that require you to create diagonal lines in a cell to divide them into 2 parts. Each section in the diagonal box will enter different content, above and below to display different content. This will save table space without having to create a separate cell, while still separating the content and the columns clearly for users to follow. There are several ways to create slashes in cells of a Word table, and once created, users can write text on each part of the cell with the correct text alignment. The following article will guide you how to create diagonal lines in the Word box.
- Trick to quickly delete a table in Word
- Instructions on how to create diagonal lines in Excel cells
- How to delete horizontal lines in Word
- Instructions to delete table lines in Word
Video on how to cross a line in a Word table
1. Instructions to create diagonal lines in the Word box
First, we need to draw the Word table and then click on the cell to create diagonal lines to divide them into 2 different contents.
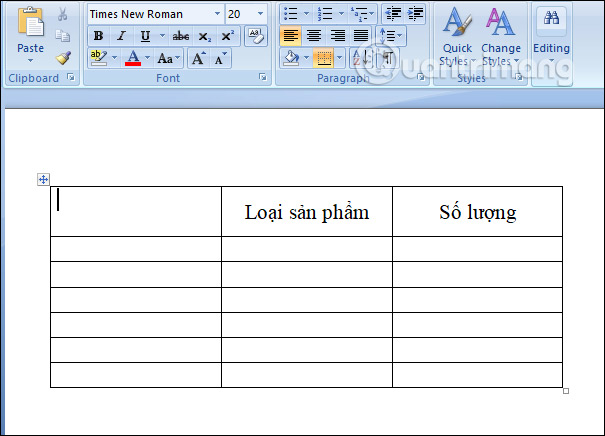
Method 1: Use Boder in Word to create diagonal lines
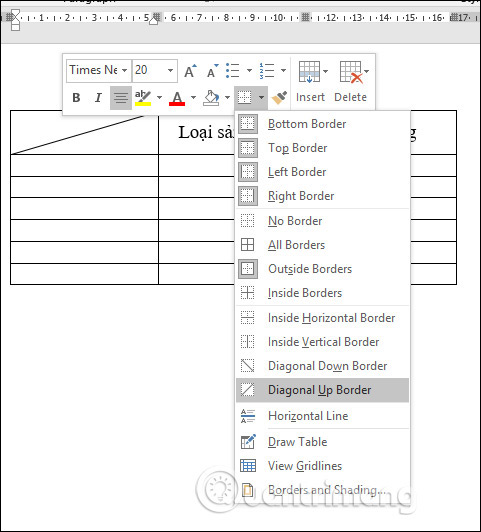
At the box that we want to diagonal, click and select the Home tab, and then click on the Border tool . In the displayed list, click Diagonal Down Border to create a diagonal line for the cell.
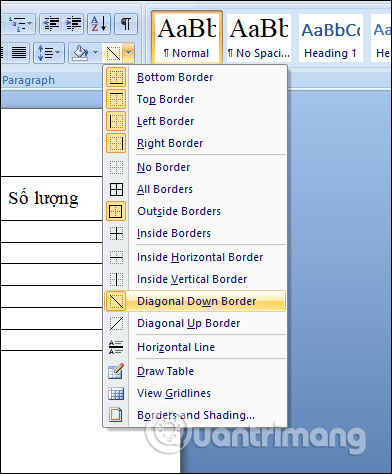
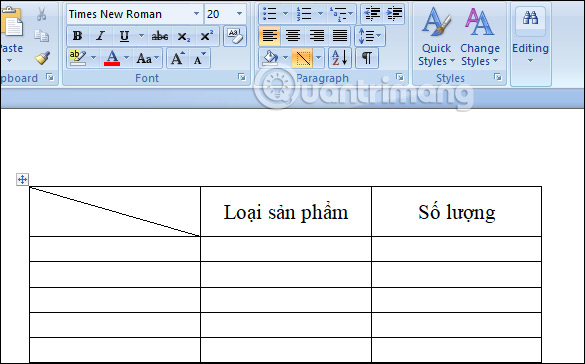
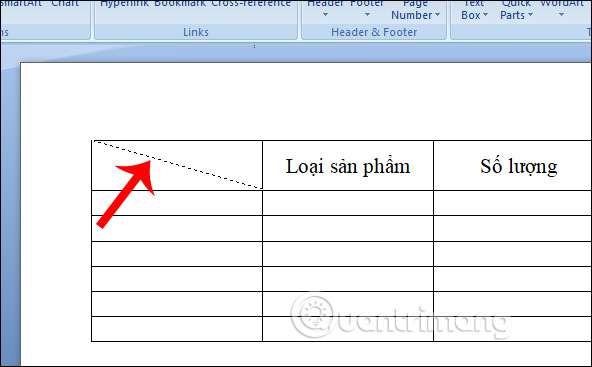
As a result, we have the diagonal line in the cell as shown below.
Method 2: Create diagonal lines with Draw Table
We click on Table and then display the list below, click on Draw Table .
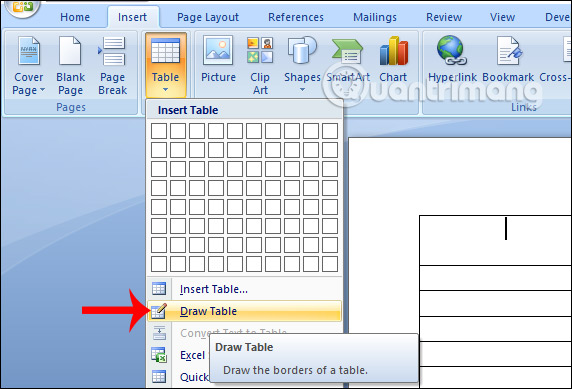
This will show the stylus so we can draw diagonal lines in the cell. You just need to click the mouse at the first point of the slash then connect to the opposite corner of the box to finish. Removing the mouse click will have a diagonal line in the cell.
Method 3: Use the Mini Toolbar diagonally
Mini Toolbar in Word is a quick formatting panel when we highlight words or paragraphs. From this Mini Toolbar, users can change the format of text with many different options.
We also select the cell that we want to diagonal, then right-click , select the Border icon and also click the Diagonal Down Border to create a diagonal line for the cell. Note this only applies to Word 2010 and above because the Mini Toolbar in Word 2007 does not have the Border option.
2. How to enter text in the diagonal box Word
When you enter text into a cell in Word table, manipulating text alignment in Word box is very simple. With the case of a diagonal cell, the adjustment is not too complicated.
Step 1:
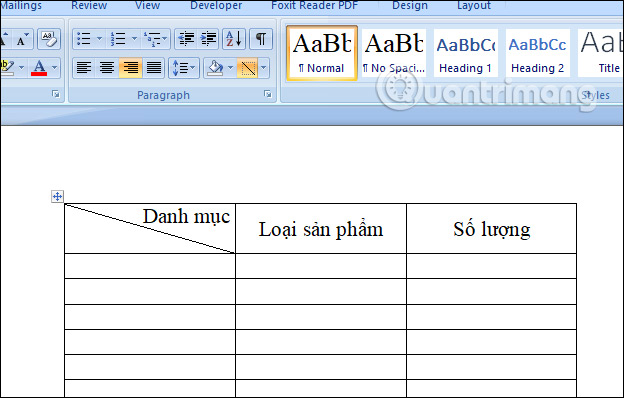
First enter the content for a part of the diagonal box, then highlight and click the Home tab, select the Align Right icon to align the right margin for the text.

The result is centered text as shown below.
Step 2:
Press Enter to enter a new line, and then enter another content for the cell. Then highlight the text and click the Align Left icon to align the text to the left. So the text in 2 parts in the box will display as shown below.
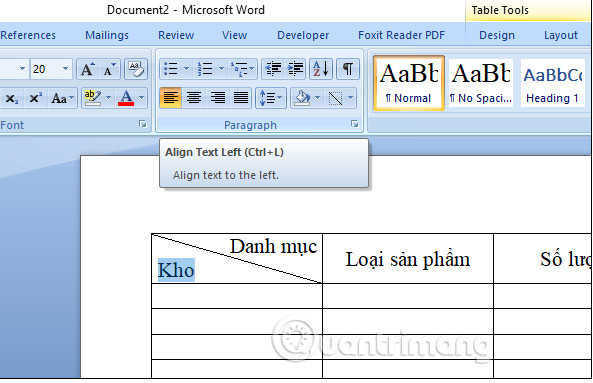
Note to readers, in some exceptions we drag diagonally from right to left, which is the Diagonal Up Border, we must perform the alignment of the text in the box opposite the steps above. This means you will adjust the Align Left to align the left first first, then adjust the Align Right later.
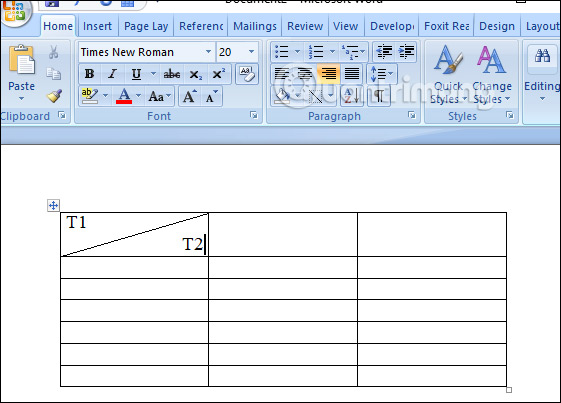
The operation of creating diagonal lines in Word table cell is very simple and easy to perform. We can do it in many different ways, and when aligning text into the diagonal box, just use the alignment symbols.
I wish you successful implementation!