Instructions for inserting horizontal and vertical lines in Google Docs
To increase the effect of the document, we can use up to a few lines, such as creating a Google Docs paragraph border, or using lines to separate paragraphs in the document.
Table of Contents
And in Google Docs there are also a few options available for us to use such as the option to create lines in Word. The following article will guide you to insert horizontal and vertical lines in Google Docs.
How to insert horizontal lines in Google Docs
Insert a horizontal line in Docs via the Insert menu
At the interface on Google Docs, click on the Insert menu and then select Horizontal Lines in the list displayed below.

Then a horizontal line is inserted into the Docs document.

Insert a horizontal line in Docs with a border
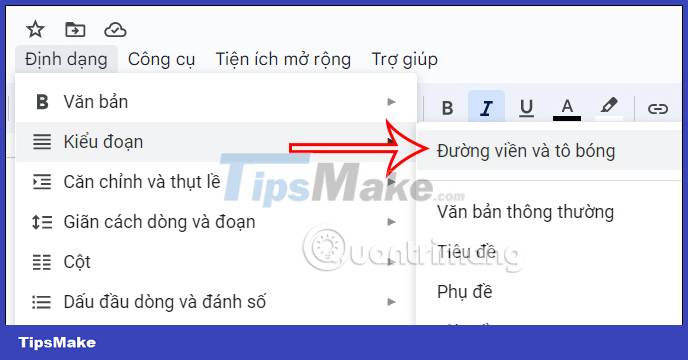
Step 1:
At the Google Docs interface, users click on the Format item and then select Lines and shading .
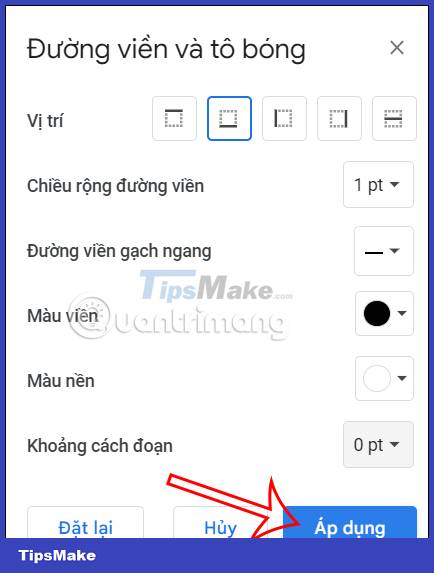
Step 2:
Now display the interface for you to select the border, we will choose the bottom line and then under the section Border width select 1 pt, Select paragraph spacing 0 pt. Then click Apply .
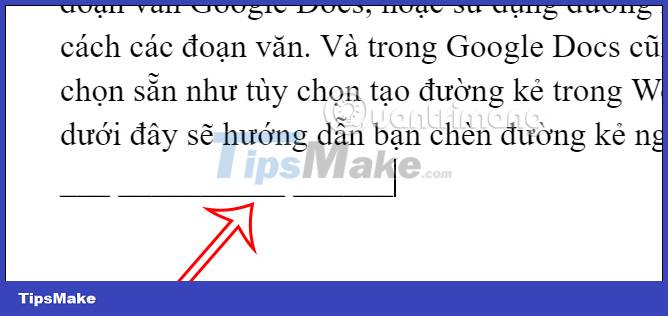
The results of a horizontal line also show up in Google Docs.
Use keyboard shortcuts to create horizontal lines in Docs
We hold down the Shift key and then press the - key to create a horizontal line with the desired length. You can align this line to the center to create a separator between paragraphs of text.
Use Google Drawing to create horizontal lines
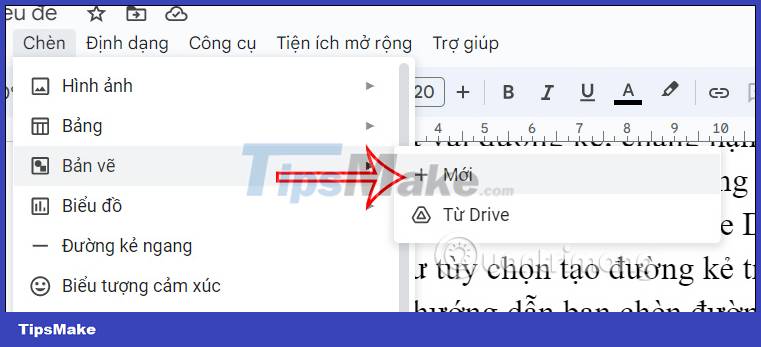
Step 1:
At the Google Docs interface, click on Drawing then click New to create a new drawing.
Step 2:
Now display the drawing creation interface, click on the Line icon , then select Line and then draw a line. When finished, click Save and close and the line is inserted into the document in Docs.
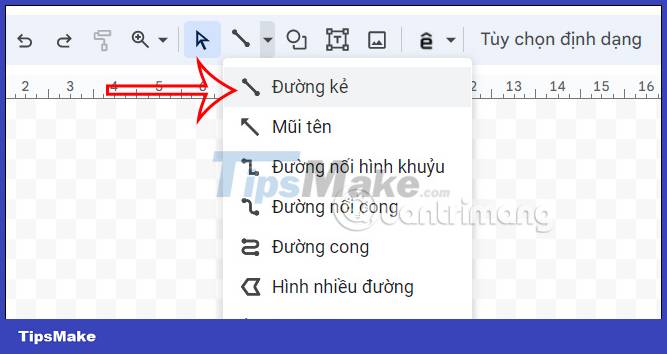
Instructions for inserting vertical lines in Google Docs
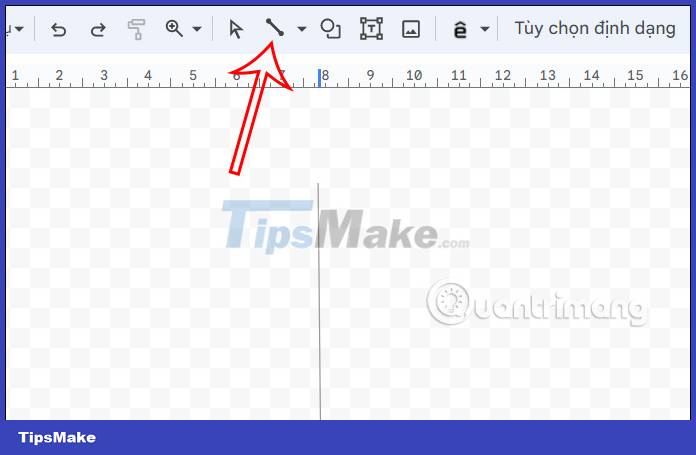
You also open the drawing interface in Google Docs , then click on the Line icon and then draw a vertical line into the drawing.
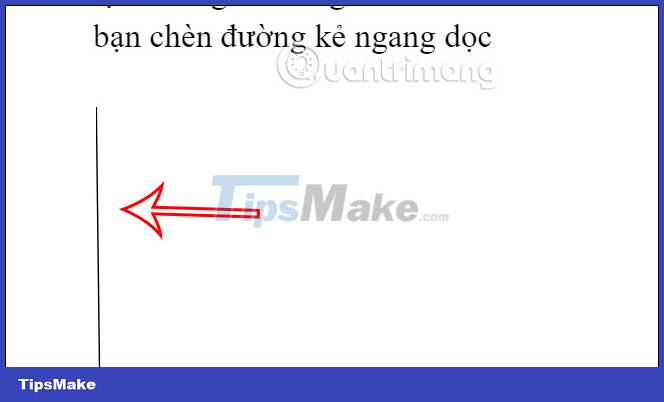
The result is a vertical line displayed in a Google Docs document as shown below.
Was this article helpful?
Your feedback helps us improve.
Related Articles
 How to redirect pages on Google Docs3 minutes read
 How to insert link links in Google Docs documents4 minutes read
 How to Create Double Spacing between Lines in Google Docs6 minutes read
 How to insert PDF into Google Docs2 minutes read
 How to insert watermark in Google Docs3 minutes read
 How to Insert Lines in HTML3 minutes read
Reader Comments 0
Sign in with email or Google to join the discussion.