How to create and use useful Snipping Tool shortcuts in Windows
Besides the basic Windows screen capture, Snipping Tool is one of the most convenient and useful tools. However, to use Snipping Tool more efficiently and quickly, you can use the built-in shortcuts in this application..
Besides the basic Windows screen capture, Snipping Tool is one of the most convenient and useful tools. However, to use Snipping Tool more efficiently and quickly, you can use the built-in shortcuts in this application. Please follow the article below to find out more details!
- How to use Snipping Tool on Windows 10 full set
Create shortcut to open Snipping Tool
To start the Snipping Tool, you need to access the Start menu or enter a search keyword. It is much faster if you create a shortcut to start Snipping Tool. You can create a shortcut to launch Snipping Tool in Windows 10/7. To create a shortcut, follow these simple steps:
In Windows 10
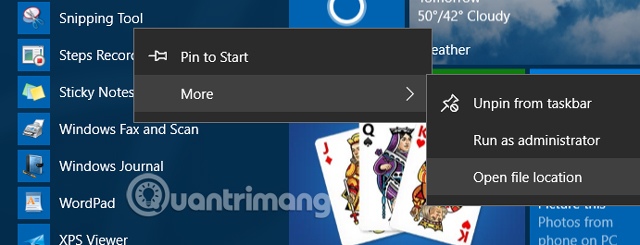
Step 1 . Navigate to Start> All Apps> Windows Accessories , right-click on Snipping Tool , select More , then click Open file location to open the Windows Accessorie s folder.
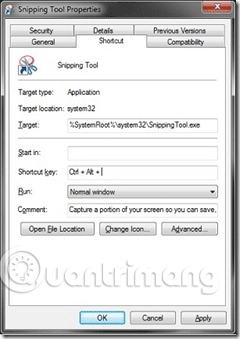
Step 2 : Right click on Snipping Tool, select Properties .

Step 3: On the Shortcut tab, click the field next to the Shortcut Key and then enter the shortcut you want to use to launch the Snipping Tool. Note, Windows will automatically add Ctrl + Alt before the shortcut you use. Therefore you only need to use one more character to create a shortcut.

Note, you can pin the Snipping Tool to the taskbar and then use the Windows key plus the number key to launch the tool. For example, if you pin the Snipping tool on the left side of the taskbar (next to the Start icon) then press Windows + 1 to launch Snipping Tool.
On Windows 7
Step 1 . Go to Start> All programs> Accessories , right-click on the Snipping Tool and select Properties .
Step 2. Go to the Shortcut tab, select the Shortcut box, and then press any key combination you want as the shortcut to launch the program.
Step 3 : Windows will define new shortcuts for Snipping Tool and will also add Ctrl + Alt in front of the shortcut. If you assigned the "S" key to Snipping Tool, you need to press Ctrl + Alt + S to start.
Step 4 : Click Apply and remember your new shortcut.
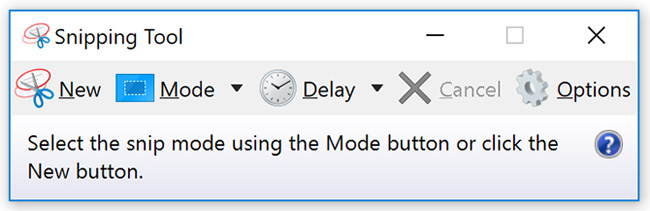
Use keyboard shortcuts in Snipping Tool
First, you need to open the Snipping Tool by searching for it in the Start menu or pressing the shortcut key as you assigned it to the Snipping Tool.
- Instructions for taking screenshots that contain mouse cursors in Windows
Useful shortcuts in Snipping Tool:
- Select screen capture mode: Alt + M (Use the arrow keys and press Enter to make your selection).
- Create a new shooting task with the same shooting mode: Alt + N
- Move the mouse pointer to select the rectangular shooting area: Shift + arrow keys.
- Slow shutter timer from 1 to 5 seconds: Alt + D (Use the arrow keys and Enter to make your selection).
- Copy snapshot to clipboard: Ctrl + C.
- Save photo: Ctrl + S.
- Print photos: Ctrl + P.
- Create a new snapshot: Ctrl + N.
- Remove photo: Esc.
If you have trouble remembering the shortcuts, you can use the keyboard to manage Snipping Tool after the screen capture is finished. You only need to access editing items with the shortcuts below:
File menu: Alt + F , then choose one of the following options:
- Press N to create a new snapshot.
- Press A to save the photo.
- Press P to print the photo.
- Press T to send photos via email.
Edit menu: Alt + E
- Press C to copy photos.
Menu Tools: Alt + T, then select one of the options below:
- Press P to open the Pen Menu and then use the arrow keys and Enter to make your selection.
- Click H to select Highlighter.
- Press E to select the delete button.
Menu Help: Alt + H
- Press H to open the online help page.
Hope the above shortcuts can help you manipulate faster when using Snipping Tool.
See more:
- Instructions for enabling or disabling Snipping Tool in Windows 10
- Edit photos with the Snipping Tool of Windows Vista
- How to capture a Windows 10 screen area using Snipping Tool