How to draw a frame around text using the Snipping Tool
Snipping Tool on Windows supports more features to help you take screenshots of your computer screen, such as drawing frames around text.
Table of Contents
Then the content in the computer screenshot with the text frame is more noticeable, more prominent than other surrounding content. Below is a guide to drawing a text frame using the Snipping Tool.
How to draw a frame around text using the Snipping Tool
Step 1:
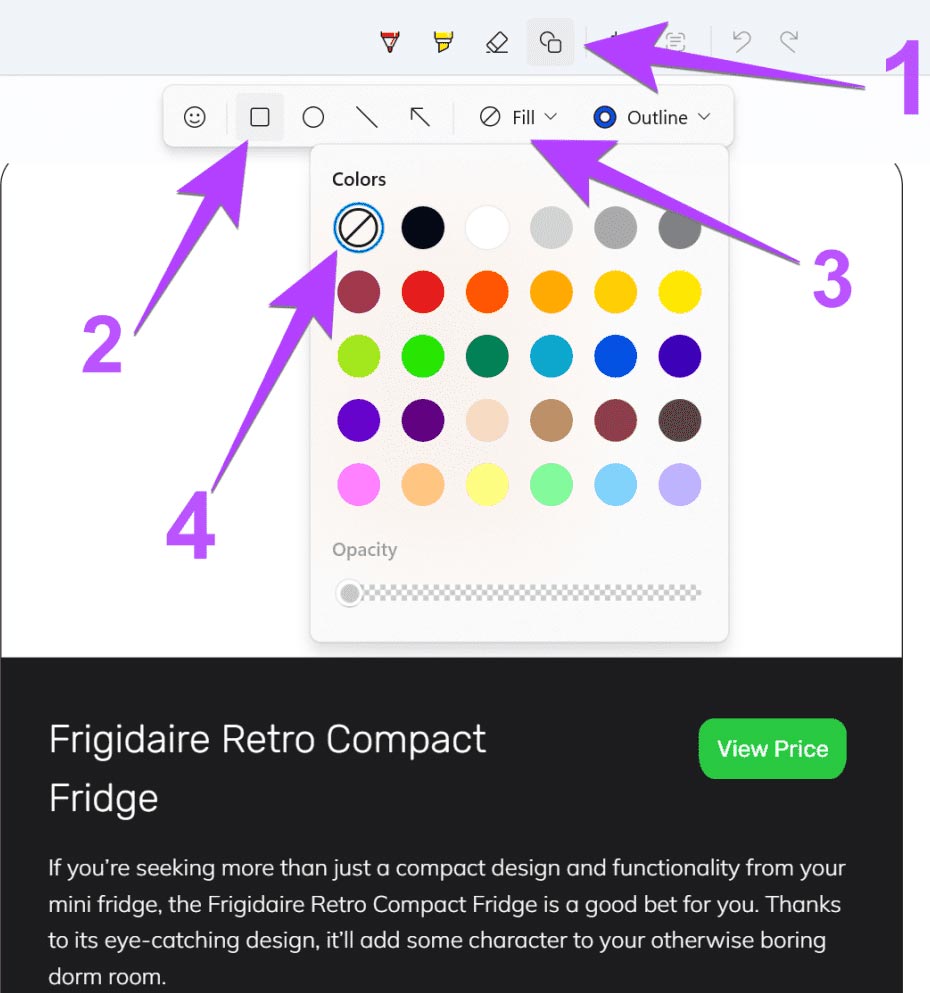
You take a screenshot using the Snipping Tool on your computer as usual. Next, click on the cube icon to open the shapes available in the Snipping Tool.
Here you select the rectangle , then select the color for the shape and select Fill with a cross to remove the background color of the shape.
Step 2:
In the custom interface for the frame, click on Outline and select red or other color you want.
Below are the items to adjust the size of the frame via the Size bar and adjust the opacity using the Opacity bar.

Step 3:
Once you have set up the frame, simply use your mouse to draw a frame around the text or whatever content you want.

Step 4:
We press the key combination Ctrl + S or the save icon above to save the image with the text frame to the computer.
Was this article helpful?
Your feedback helps us improve.
Related Articles
 How to use Text Actions in Snipping Tool on Windows 115 minutes read
 How to use Snipping Tool on Windows 10 full set9 minutes read
 How to draw a frame in Word4 minutes read
 Steps to Fix Snipping Tool Not Working Error On Windows4 minutes read
 Cannot find Snipping Tool on Windows 10? This is how to fix it7 minutes read
 How to fix Snipping Tool keeps showing error3 minutes read
Reader Comments 0
Sign in with email or Google to join the discussion.