How to use Snipping Tool to take screenshots on Windows 10
Windows 10 users have many ways to take screenshots like Paint, press PrtScn key or Alt + PrtScn key combination if you want to capture a running window. However, today TipsMake.com will introduce to you another screen capture tool that is already integrated with Win 10 that is Snipping Tool software.

Let's find out what the Snipping Tool is first.
Snipping Tool is a Windows application that allows users to create and edit screenshots. This application was developed by Microsoft and is available on all modern Windows operating systems, including Windows 7, Windows 8.1 and Windows 10.
How to use the Snipping Tool
To open the Snipping Tool, select the Start Menu or press the window key (Windows) (1) → type ' Snipping Tool ' (2) → Then the application will appear and click on the application (3)

The interface of the Snipping Tool application.

Snipping Tool supports you to take photos under 4 optional modes:
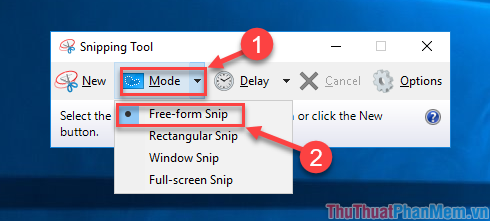
1. Free-from Snip : Allows you to take a shot with a drawn line, highlight the area you want to capture.
To select this mode, click the ' Mode ' button → click ' Free-form Snip '

When your screen is dimmed, use the mouse to highlight the area you want to take the picture.

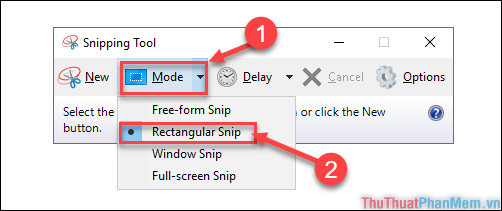
2. Rectangular Snip: Allows you to take photos that have a rectangular shape.
Similarly, select 'Mode' → click 'Rectangular Snip'

Interface when taking pictures:

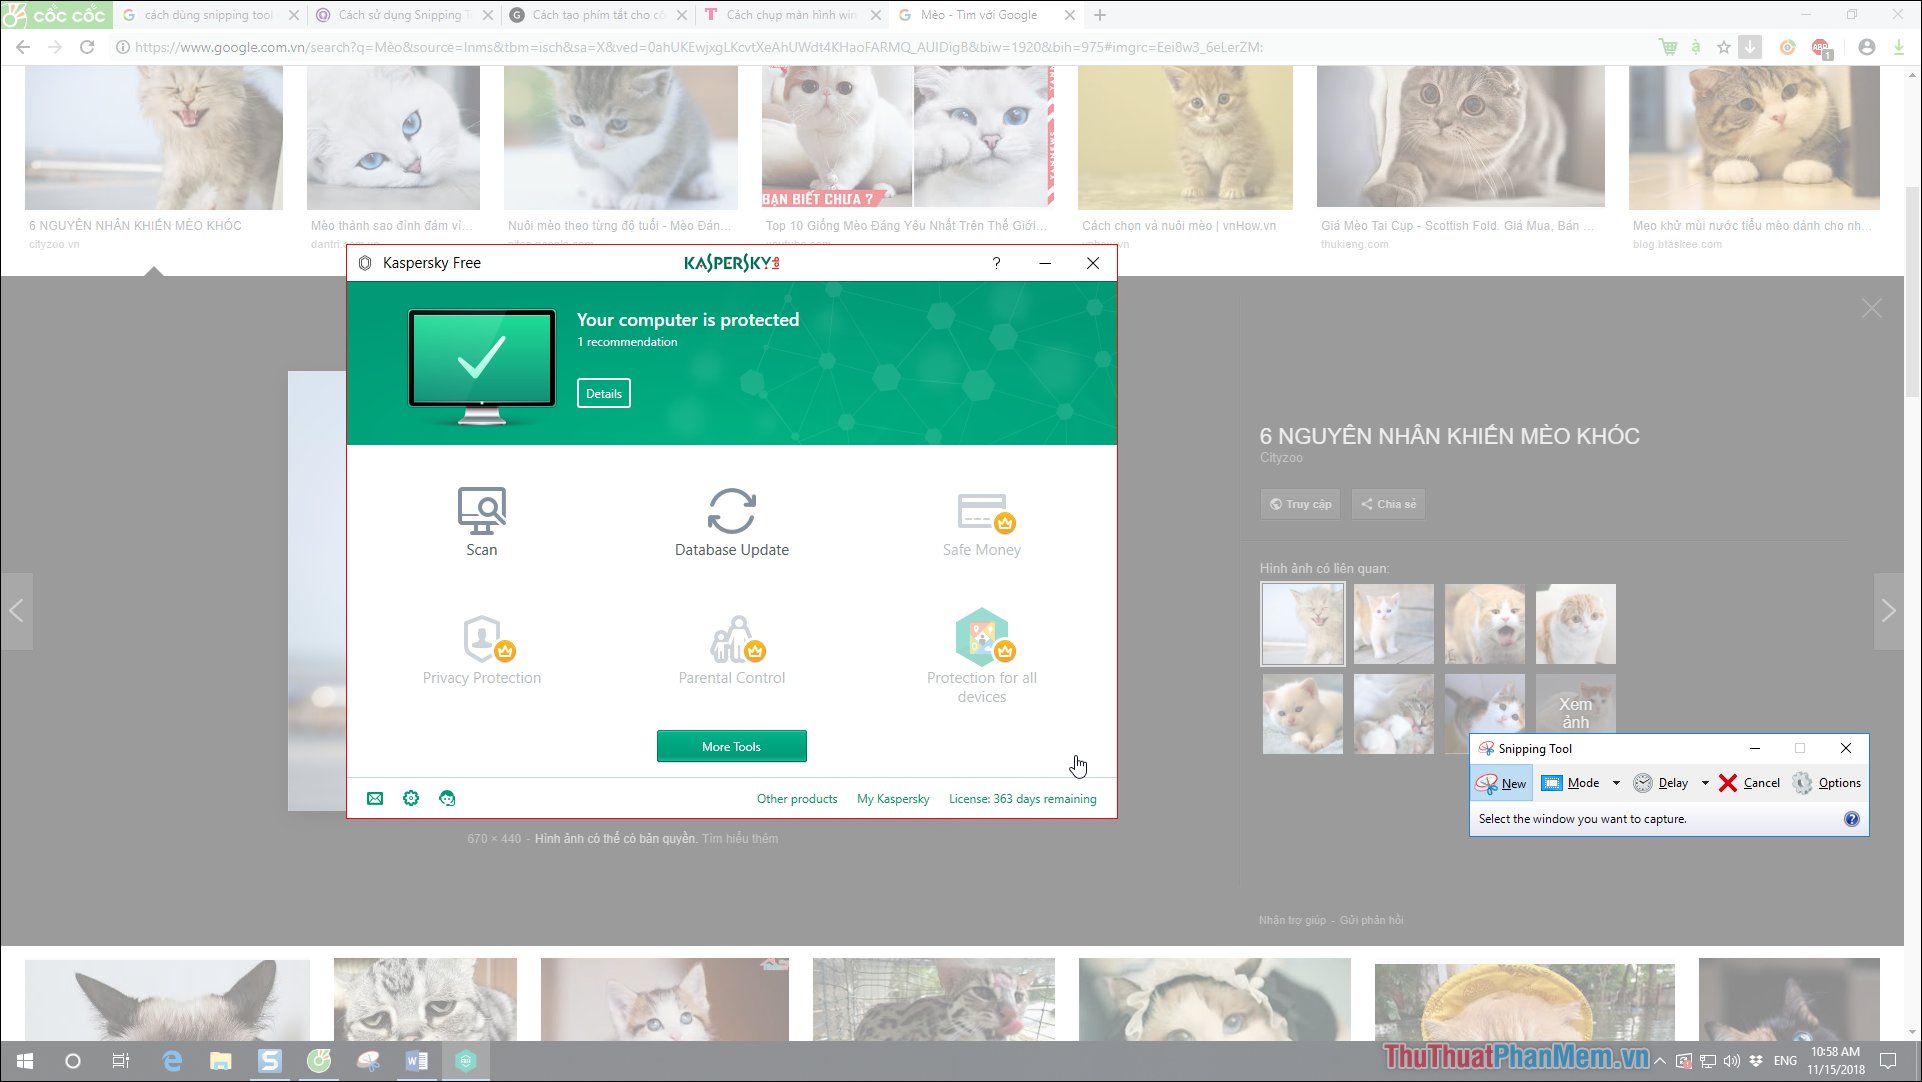
3. Window Snip: Allows you to capture a certain window or application.
You select 'Mode' → select the mode 'Window Snip'

Interface when taking pictures:

4.Full-screen Snip : Finally, a mode that allows you to take full screen shots.
Choose 'Mode' → select 'Full-screen Snip'
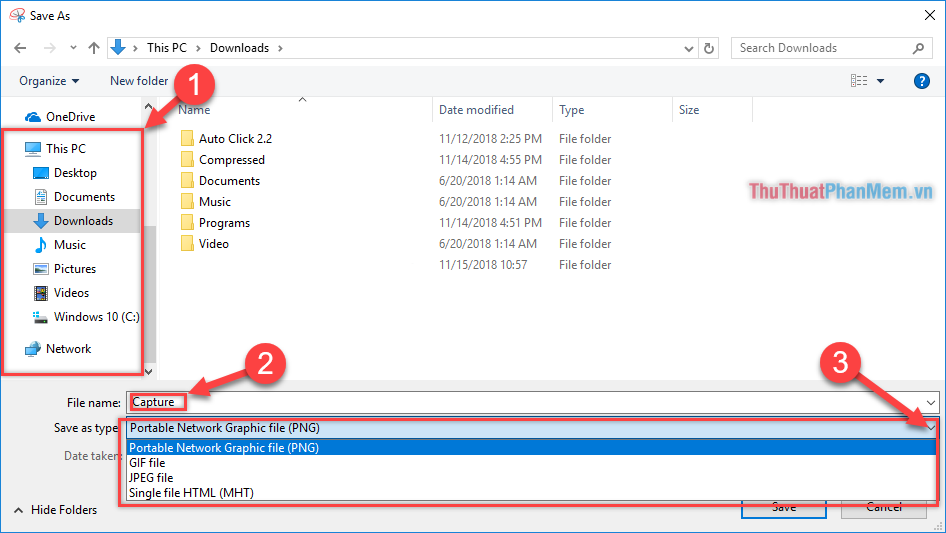
After you have selected the mode in which you want to take a photo and complete the shooting operation. A window will appear saving the image you have just taken. Please click 'Save' to save the captured image

(1) Select an image storage location
(2) Change the name, title image
(3) Select suitable image formats. You should choose PNG format for good image quality
Then select 'Save' is done.

Above is how to use Snipping Tool to take screenshots on Windows 10 that TipsMake.com would like to send to you. Very easy and helpful, right? If you find the article useful, please share it for everyone to know. Thank you for watching!
You should read it
- ★ Cannot find Snipping Tool on Windows 10? This is how to fix it
- ★ How to capture a Windows 10 screen area using Snipping Tool
- ★ Snipping Tool cannot be used, summarize effective ways to fix it
- ★ Instructions for enabling or disabling Snipping Tool in Windows 10
- ★ How to add borders to screenshots with Snipping Tool in Windows 11