How to fix a local account error cannot open Windows 10 application
Some Account Local accounts often encounter a situation where they cannot install applications that allow administrative rights (Administrator). This is essentially a feature on Windows, not a system error.
Table of Contents
On Windows, users can log into Microsoft account to be more convenient in using services such as Office, OneDrive, . Besides, users can also create a local account Account Local to log into the system. system.
However, many Account Local account users have a situation where they cannot run applications, software installed on computers, or even edit settings that require administrative rights (Administrator). So how to fix the error of not installing the application with a local account?
- Distinguish local accounts and Microsoft accounts on Windows 8
- How to control application installation on Windows 10 Creators Update
- Attractive features on Windows 10 Creators Update
How to fix the error of installing applications on Local Account
In fact, this is not a system error but a feature available on Windows. When this feature is enabled, the computer accesses the network, the Admin can block the installation of strange software onto the computer. And this feature can also be turned off when there is no need.

1. On Windows 10 Pro version: Change Local Policy
Step 1:
First, press Windows + R key combination to open Run window and enter secpol.msc keyword and click OK to access.

Step 2:
Switch to the Local Security Policy interface, please click on Local Policies> Security Options in the menu list on the left.
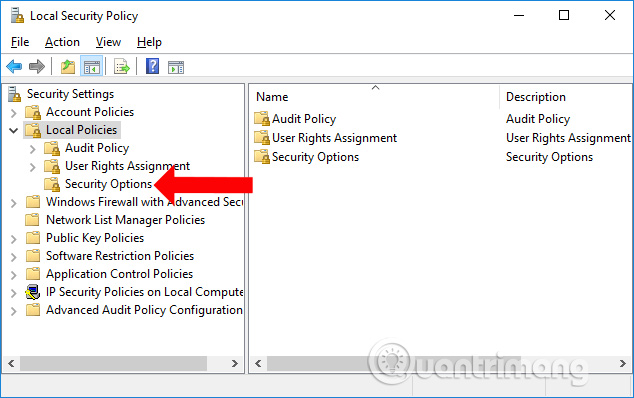
Step 3:
Look to the right, find the Policy item and then double-click the item named User Account Control Admin Approval Mode for the Built-in Administrator account .
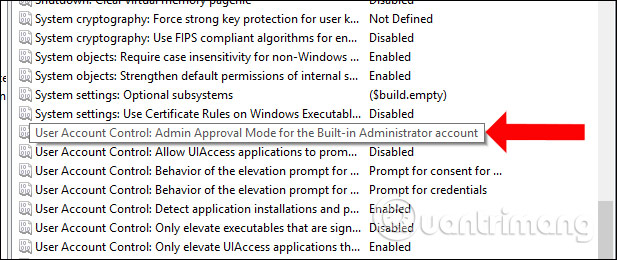
A new window will appear and click on Enable and click Apply then OK to take effect. Finally, you restart the computer and you're done.

2. Windows 10 Home: Change the Windows Registry
If you use Windows 10 Home, you can still fix it in the above way, but besides, you can fix it in the Windows Registry.
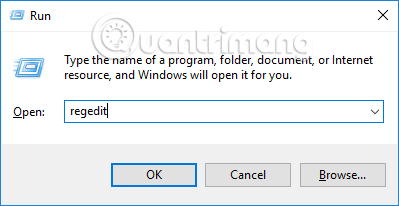
Step 1:
Also open the Run window and enter the keyword regedit and click OK .
Step 2:
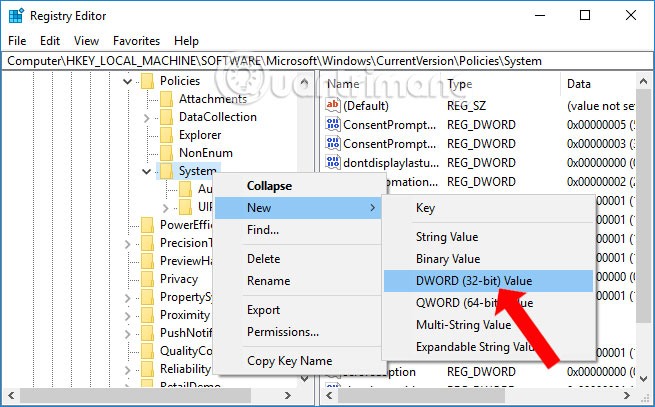
In the Registry Editor window interface, visit the HKEY_LOCAL_MACHINESOFTWAREMicrosoftWindowsCurrentVersionPoliciesSystem path
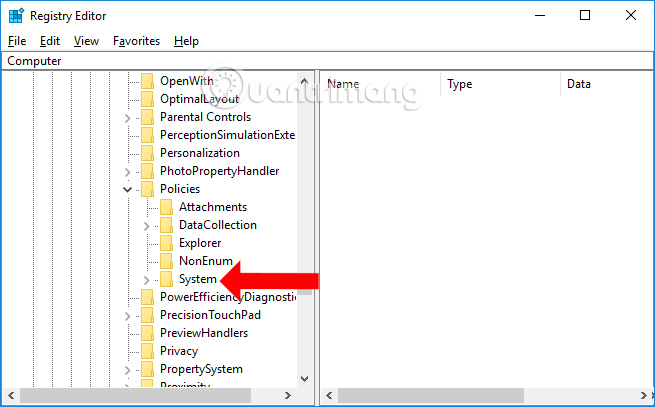
Step 3:
Then right-click the System key and select New> DWORD (32-bit) Value .
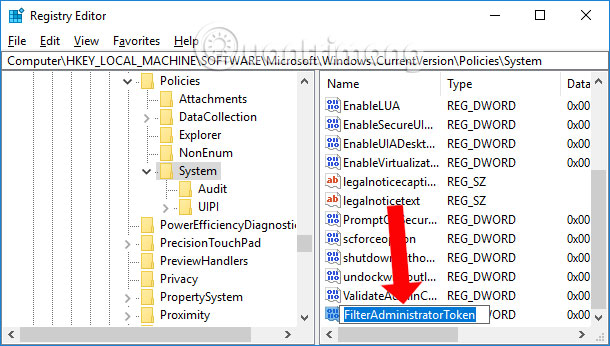
Name the newly created key FilterAdministratorToken .
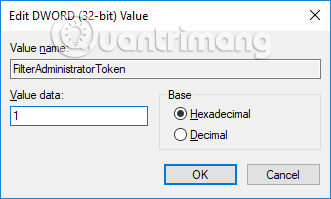
Finally, double click the FilterAdministratorToken key and change the value in Value data to 1 .
Step 3:
Next to access by HKEY_LOCAL_MACHINESOFTWAREMicrosoftWindowsCurrentVersionPoliciesSystemUIPI path
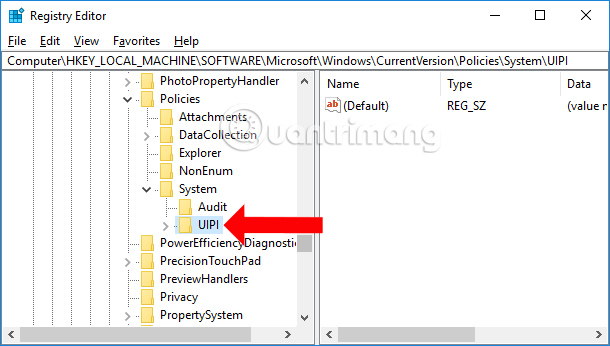
To the right, double-click on the Default key , then edit the value to 0x00000001 (1) at Value data.

So you have fixed the error of not running the application from a local account on Windows 10. You can fix it in two ways via the Windows Registry or Local Policy.
See more:
- Instructions for fixing 100% Full Disk error on Windows 10
- Don't miss out on useful tools available on Windows 10!
- Fixed a bug that could not change the default application or browser on Windows 10
I wish you all success!
Was this article helpful?
Your feedback helps us improve.
Related Articles
 Steps on how to create a local user account in Windows 107 minutes read
 Instructions to transfer Microsoft account to Local account on Windows 10 / 8.14 minutes read
 Distinguish local accounts and Microsoft accounts on Windows 85 minutes read
 4 tips to open Local Group Policy Editor on Windows 8 / 8.13 minutes read
 Disadvantages of using a local Windows account5 minutes read
 9 Ways to Open Local Group Policy Editor on Windows 117 minutes read
Reader Comments 0
Sign in with email or Google to join the discussion.