Instructions for creating pin code in Windows 10
Setting pin for Windows 10 will shorten the password login operation that you usually do, but security is still guaranteed.
Table of Contents
Usually to create a computer protection barrier, we still think about how to set a password. However there is a much simpler way that is to use that battery on Windows 10 to log on the computer. When installing the pin, you will access the operating system faster, while the computer is still secure.
- Download Windows 10 operating system
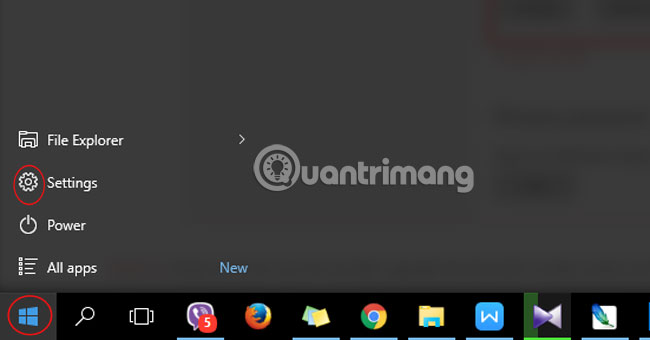
Step 1:
Click your mouse on the Windows icon at the bottom, select Settings .
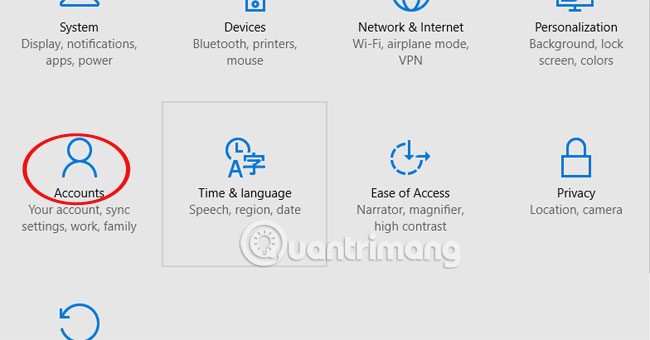
Step 2:
Here, click on Accounts.
Step 3:
Access Sign-in options and in the PIN section, select Add to install the pin code.

Step 4:
The window that appears requires you to enter the login account into the system. Click Ok.

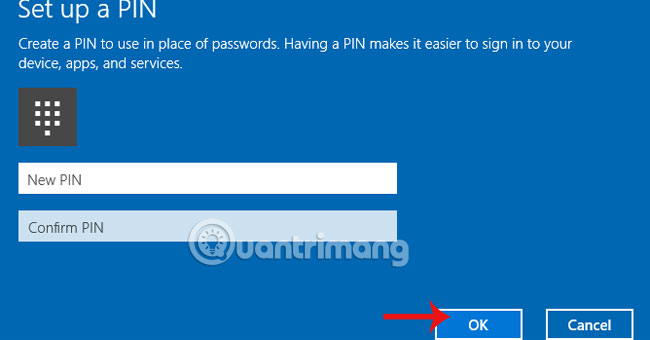
Step 5:
The Set up a PIN setting table appears. Enter your PIN and click OK when done. Notice that the PIN code needs at least 4 characters from 0-9, does not contain letters and special characters. The length of pin code is not limited.
Refer to the following article:
- Tips or help you master the Start Menu on Windows 10
- How to open the virtual keyboard in Windows 10
- Ways to turn off your computer on Windows 10
I wish you all success!
Was this article helpful?
Your feedback helps us improve.
Related Articles
 Instructions for fixing device Usb error not recognized Code 437 minutes read
 Sample prompt for creating source code documentation.8 minutes read
 What is a QR code? Instructions for creating QR Code quickly14 minutes read
 Instructions for creating QR codes on Canva3 minutes read
 JavaScript code to create a combined area and line chart.1 minutes read
 How to use Qrabber to scan and create QR codes on iPhone5 minutes read
Reader Comments 0
Sign in with email or Google to join the discussion.