How to Convert .Numbers to .Xls
This wikiHow teaches you how to convert an Apple Numbers document into a Microsoft Excel (.XLS) file on a Mac, a Windows computer, and an iPhone, as well as within the iCloud website. Go to https://www.icloud.com/ in a web browser. You can...
Table of Contents
Method 1 of 4:
Using iCloud
-
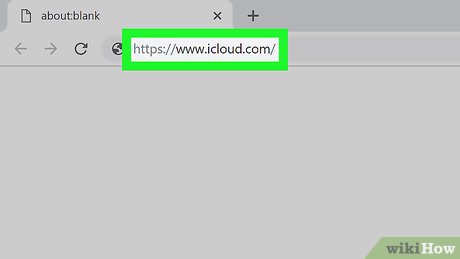 Go to https://www.icloud.com/ in a web browser. You can access your iCloud account on any modern browser, including Opera and Internet Explorer.
 -
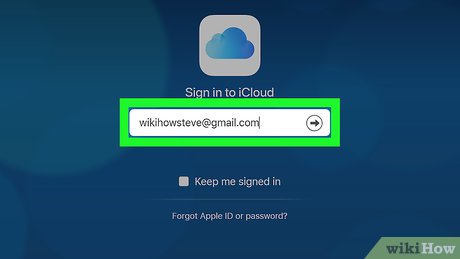 Enter your Apple ID email address and password. These are the credentials you'll use to sign into the App Store.
- If you don't have an Apple ID, first create one.
-
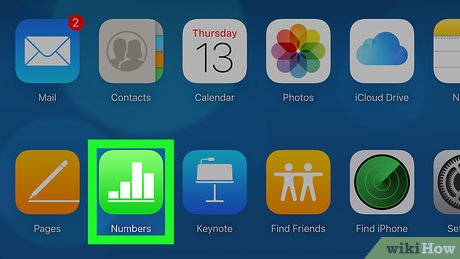 ClickNumbers. It's a green app with white bars on it.
-
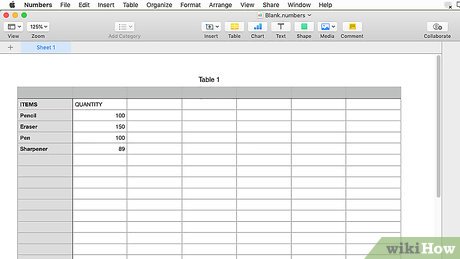
 Open your Numbers document. If it's in iCloud, it will appear on the Numbers page.
- If you have to upload the document from your desktop: click the green gear icon, click Upload a Spreadsheet, and select your Numbers document.
-
 Click the wrench icon. It's in the top-right side of the document's page.
 -
 Click Download a Copy. This is the top option in the drop-down menu.
 -
 Click Excel. It's on the right side of the Download a Copy window. Doing so will prompt a .xls version of the Numbers file to download onto your computer.
Method 2 of 4:
On Mac
-
 Make sure your Numbers document is open. You should see the "Numbers" heading in the top-left corner of the Mac menu bar.
 -
 Click File. It's in the top-left area of your Mac's screen. Doing so will invoke a drop-down menu.
 -
 Select Export To. This option is near the middle of the File drop-down menu. Selecting it invokes a pop-out menu.
 -
 Click Excel. It's in the Export To pop-out menu.
 -
 Click Next. It's in the bottom-right corner of the "Export Your Spreadsheet" window.
 -
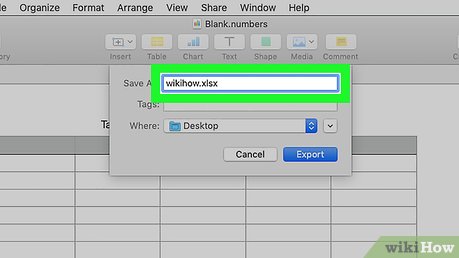 Enter a name for your file. This is how your file will appear in both Numbers and Excel.
 -
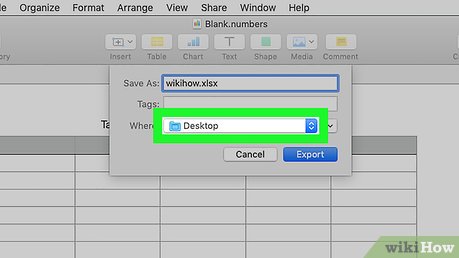 Select a save location. You'll do so by clicking a folder (e.g., "Desktop").
 -
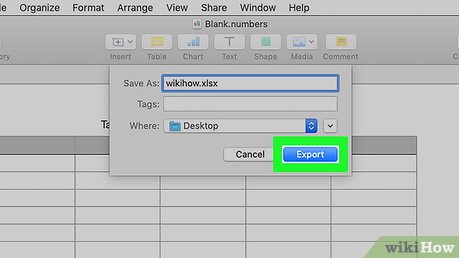 Click Export. It's in the bottom-right corner of the window. This will save your Numbers document as an Excel document. You can double-click the document on any computer with Excel installed to open it in Excel.
Method 3 of 4:
On Windows
-
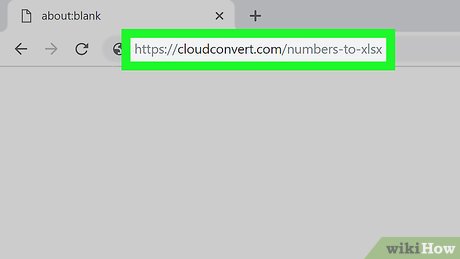 Go to CloudConvert's website. It's at https://cloudconvert.com/numbers-to-xlsx. While there isn't a native way to change a Numbers document to an Excel document in Windows, you can use CloudConvert's services to make the conversion.
 -
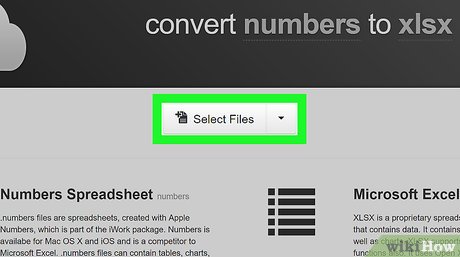 Click Select Files. This button is near the top of the page. Doing so will open a file selection window.
 -
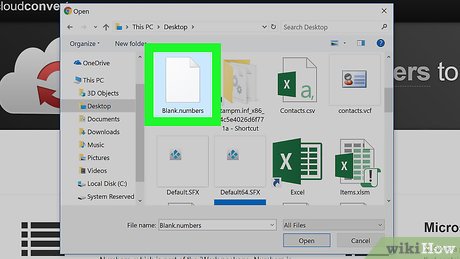 Select the Numbers file. The file selection window will likely open to your desktop folder, so if the Numbers file isn't there, you'll first have to select the Numbers file's location from the left-hand sidebar.
 -
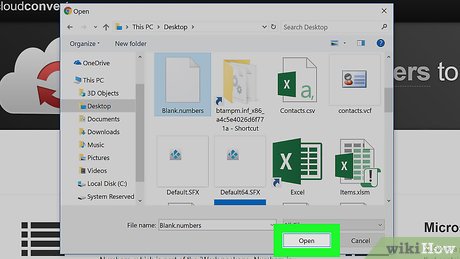 Click Open. Doing so will upload the Numbers file to CloudConvert's website.
 -
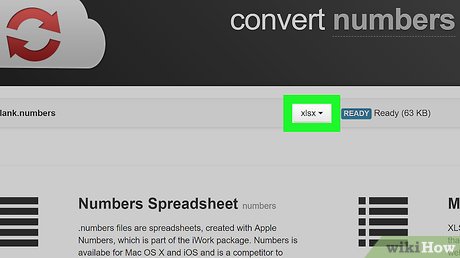 Click select format. It's near the top of the page. Doing so will prompt a drop-down menu.
- The select format bar may already say ".xls" or ".xlsx", in which case you can skip the next two steps.
-
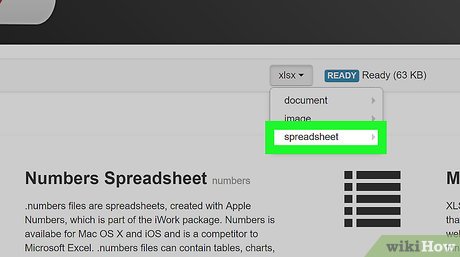 Select Spreadsheet. It's at the bottom of the "file selection" drop-down menu.
 -
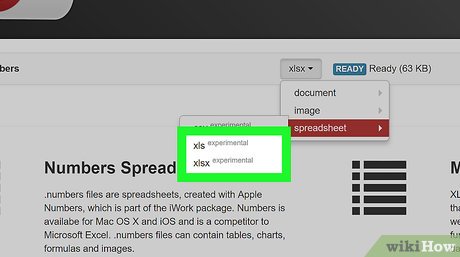 Click xls or xlsx. XLS pertains to older versions of Excel documents, while XLSX documents are formatted for newer versions of Excel.
 -
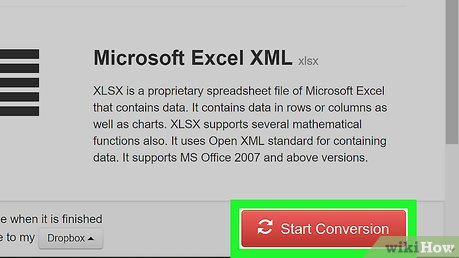 Click Start Conversion. It's the red button in the bottom-right corner of the page. This will convert your Numbers document into your selected Excel document format.
 -
 Click Download. This green button is in the upper-right area of the site's page. Doing so will download your converted document in Excel format.
- You can double-click the newly converted Excel document to open it in Excel, provided your computer has Excel installed.
Method 4 of 4:
On iPhone
-
 Open Numbers. This is the green app with white bars on it.
 -
 Select a document to open. You may first have to tap the "Back" button in the top-left corner of the screen if Numbers opens to an existing document.
 -
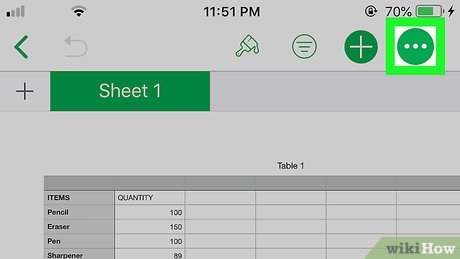 Tap …. It's in the top-right corner of the screen.
 -
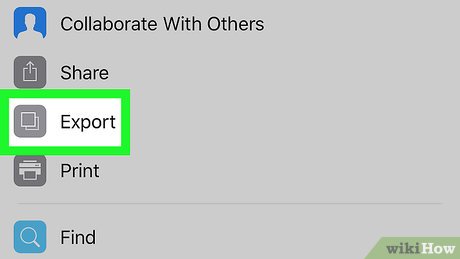 Tap Export. This option is near the top of the screen.
 -
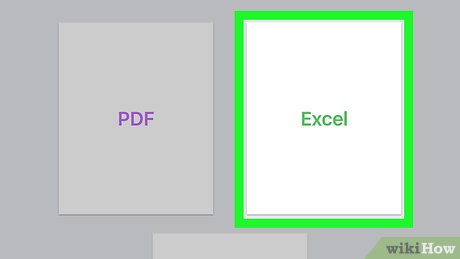 Tap Excel. It's the lower-left option on this page.
 -
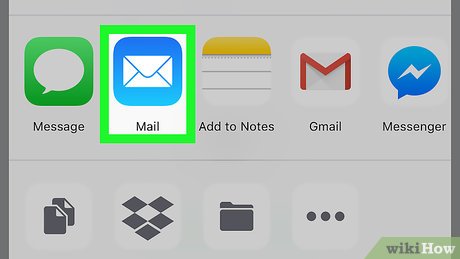 Tap Mail. You'll see the mail icon, which resembles a white envelope on a light-blue background, in the top row of the pop-up menu that's at the bottom of the screen.
 -
 Enter your email address. This should go in the "To" field, which is at the top of the screen.
 -
 Tap Send. It's in the top-right corner of the screen. Doing so will send the Numbers document in .XLS format to your email inbox, from which you can download it to a computer that uses Excel.
Was this article helpful?
Your feedback helps us improve.
Related Articles
 5 ways to convert numbers to words in Excel6 minutes read
 Instructions to change phone numbers associated with home banking9 minutes read
 Zalo, Viber will automatically convert the subscription number from 11 numbers to 10 numbers2 minutes read
 Convert numbers to text in Excel4 minutes read
 How to convert Apple Numbers documents to Microsoft Excel4 minutes read
 Instructions for converting numbers to words in Excel3 minutes read
Reader Comments 0
Sign in with email or Google to join the discussion.