How to Transfer Data from a Flash Drive to a Computer
Method 1 of 2:
On Windows
-
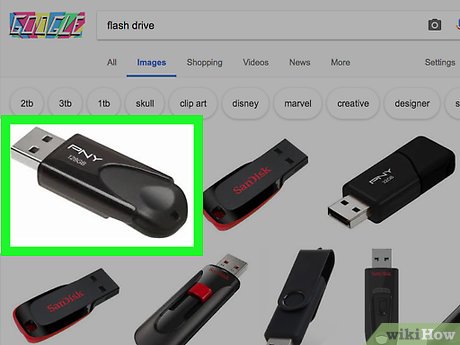
 Plug the flash drive into your computer. Your flash drive should plug into one of the rectangular USB ports on your computer's housing.
- Most flash drives only fit one way, so don't force the flash drive; if it won't fit, rotate it 180 degrees and try again.
-
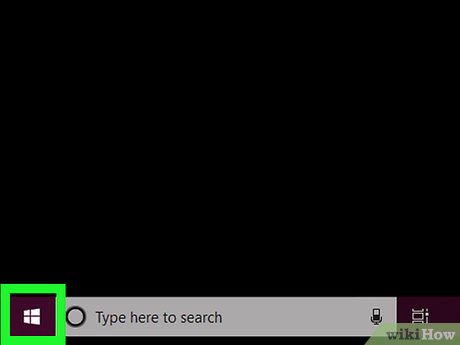
 Open Start. Click the Windows logo in the bottom-left corner of the screen.
-
 Open File Explorer. Click the folder-shaped icon in the lower-left side of the Start menu.
-
 Click This PC. It's a computer-shaped icon on the left side of the File Explorer window. This will open a list of your computer's attached drives, including your flash drive.
- You may have to scroll down on the left-hand column of options in order to find This PC.
-
 Open your flash drive. Under the "Devices and drives" heading, double-click the name of your flash drive. This will usually be the flash drive's manufacturer's name and/or the model number.
- The flash drive usually has the "(F:)" drive letter assigned to it.
-
 Select files to move. Click an individual file to select it, or hold down Ctrl while clicking each file that you want to select.
- You can also select every file in the flash drive by pressing Ctrl+A.
-
 Click Home. It's a tab in the upper-left side of the flash drive's window. Doing so prompts a drop-down toolbar at the top of the window.
- If you're comfortable with Windows' click-and-drag feature, you can instead click and drag the selected files onto your desktop or into your preferred folder. If you do this, skip to the last step in this method.
-
 Click Move to. You'll find this option in the "Organize" section of the toolbar. A drop-down menu will appear.
 -
 Click Choose location…. It's at the bottom of the drop-down menu. Doing so opens a new window.
 -
 Select a folder. Click the folder into which you want to transfer the selected folder.
- You can also create a new folder by selecting a destination folder, clicking Make New Folder, and entering a name for the folder.
-
 Click Move. It's in the bottom-right corner of the window. Your files will begin transferring into the selected folder; once they complete, you can proceed.
 -
 Eject your flash drive. In the flash drive's window, click the Manage tab at the top of the window, then click Eject in the resulting toolbar. Once you receive a notification that the flash drive is safe to remove, you can physically remove it from your computer by gently pulling on it.
Method 2 of 2:
On Mac
-
 Plug your flash drive into your Mac. Your flash drive should fit into one of the rectangular ports on the side of your Mac (MacBook) or the back of the Mac's monitor (iMac).
- Most flash drives only fit one way, so don't force the flash drive; if it won't fit, rotate it 180 degrees and try again.
- If your Mac has a set of oval ports instead of a traditional rectangular USB port, you'll need to buy a USB 3.0 to USB-C (or Thunderbolt 3) adapter in order to plug your flash drive into it.
- Disregard this step if you have a USB-C flash drive.
-
 OpenFinder. Click the Finder app icon, which resembles a blue face, in your Mac's Dock.
-
 Open your flash drive. Click your flash drive's name in the left-hand column of options in the Finder window. This will cause your flash drive's contents to display in the Finder window.
 -
 Select files to move. Click an individual file to select it, or hold down ⌘ Command while clicking each individual file that you want to select.
- You can also press ⌘ Command+A to select every file in the flash drive.
-
 Click Edit. This menu item is at the top of your Mac's screen. Clicking it prompts a drop-down menu to appear.
- If you're comfortable with your Mac's drag-and-drop feature, you can instead click and drag the selected files onto your Mac's desktop or into your preferred folder. If you do this, skip to the last step in this method.
-
 Click Copy. It's near the top of the Edit drop-down menu. This will copy your file(s).
- If you're copying one file, you'll see the file's name after Copy (for example, if you're copying a file named "New", you'd click Copy "New" here).
- If you're copying multiple files, you'll click Copy [number] Items (e.g., Copy 4 Items) here instead.
-
 Open a transfer location on your Mac. Go to the folder into which you want to move the files that you copied.
- If you want to move the files onto the desktop, for example, you'd go back to the desktop.
-
 Move the copied files. Press ⌥ Option+⌘ Command+V at the same time to paste the files into your current folder and remove them from the flash drive.
 -
 Eject your flash drive. Go back to the Finder window, find your flash drive's name on the left-hand side, and click the "Eject"button to the right of the flash drive's name. Once the flash drive's name disappears, you may safely remove the flash drive from your computer by gently pulling on it.
Share by
Kareem Winters
Update 24 March 2020


