How to Connect Windows 8 to Windows 7
If you have two or more computers in your house running a combination of Windows 7 and 8, you can quickly network them together so that you can access files and printers across all the computers. The easiest way to do this is by using a...
Table of Contents
Method 1 of 3:
Using HomeGroups
-
 Connect each computer to the same home network. If you have multiple networks in your home, make sure that both computers are connected to the same one. One or both of the computers can be connected wirelessly as long as they are on the same network.
- Click here for detailed instructions on connecting your computer to a network.
- Using a HomeGroup is the fastest and most pain-free way to share files and printers between two or more Windows computers.
-
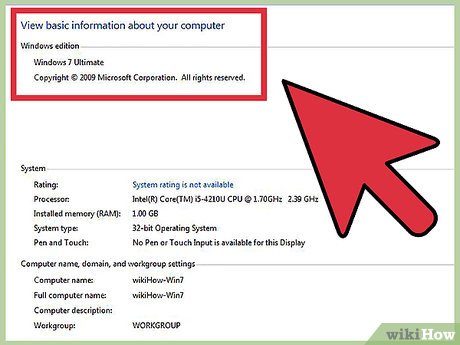 Determine which computer will be creating the HomeGroup. It usually doesn't matter too much which computer creates the HomeGroup, but there are a few restrictions you should be aware of:[1]
- Windows 8.1 RT can join HomeGroups but it cannot share files or create a HomeGroup.
- Windows 7 Basic and Starter can join HomeGroups but they cannot create one.
- All other versions of Windows 7, 8, and 8.1 can join and create HomeGroups.
-
 Open the Control Panel on the computer creating the HomeGroup. You can access the Control Panel from the Start menu in Windows 7, or by opening the Windows 8 Charms bar, selecting Settings, and then Control Panel.
 -
 Select HomeGroup. If you are in Category view, select "Network and Internet" and then click HomeGroup.
 -
 Click the .Create a homegroup button. This will launch the HomeGroup wizard.
 -
 Select what you want to share with the HomeGroup. Your libraries will be listed, along with drop-down menus allowing you to pick what you want to share with the other computers connected to the same HomeGroup. You can also select the share any connected printers or other devices.
 -
 Write down the displayed password. Windows will generate a password that you can use to allow other computers to connect to the HomeGroup.
 -
 Open the HomeGroup tool on the other computer. Open it from the Control Panel like you did on the computer that created the HomeGroup.
 -
 Click the .Join now button. After opening the HomeGroup tool, your computer will scan for any available HomeGroups. When the group you just created is found, you'll see the Join now button. Click it and enter the password that was generated when the HomeGroup was created.
 -
 Select what you want to share. Once you are connected to the HomeGroup, you can select what libraries you want to share and if you want to share your connected printers and devices.
 -
 Access shared resources. Now that you have both computers connected to the HomeGroup, you can access the shared files from your Explorer window. Expand the "Homegroup" section of the navigation frame and expand the trees to see all of the shared libraries for each computer.
 -
 Print to a shared printer. If both computers are connected to the same HomeGroup, you can select the shared printer from the Print window on any of your programs as if the printer was connected directly to your computer.[2]
- The computer that the printer is connected to will need to be turned on and logged in to access the printer.
Method 2 of 3:
Sharing Specific Folders
-
 Open the Control Panel on the computer that is sharing the folder. In order to share folders, you'll need to enable sharing on the system level.
 -
 Open the Network and Sharing Center. If you are using Category view, select "Network and Internet" and then click "Network and Sharing Center".
 -
 Click the "Change advanced sharing settings" link. This is located on the left side of the Network and Sharing Center.
 -
 Expand the Private section. This is the profile for your Home network.
 -
 Select "Turn on file and printer sharing". This will enable the computer to share folders with other computers on the network. Click the Save changes button.
 -
 Navigate to the folder you want to share. Once you have turned on file sharing, find the folder that you want to share with the other computers.
 -
 Right-click on the folder and select "Properties". Click the Sharing tab.
 -
 Click the .Share... button. Select "Everyone" from the drop-down menu and click Add. If you want other users to be able to write to the folder instead of just read from it, click the arrow next to "Read" and select "Read/Write". Click Share to save your changes and allow Windows to index the folder.
- If the Share... button is grayed out, then you are trying to share a protected folder. Instead, click Advanced Sharing..., check the "Share this folder" box, and then click the Permissions button. You can check the boxes if you want the other connected computers to be able to write to documents or make changes to the folder.
-
 Access the shared folder. Ensure that the second computer is connected to the same network and open Windows Explorer. The shared folders can be found in the Network tree in the left navigation frame.
 -
 Repeat the process for any other folders you want to share. Each folder will need to be shared individually.
Method 3 of 3:
Sharing Printers
-
 Open the Control Panel on the computer that is connected to the printer. In order to share printers, you'll need to enable sharing on the system level for the computer that has the printer installed.
 -
 Open the Network and Sharing Center. If you are using Category view, select "Network and Internet" and then click "Network and Sharing Center".
 -
 Click the "Change advanced sharing settings" link. This is located on the left side of the Network and Sharing Center.
 -
 Expand the Private section. This is the profile for your Home network.
 -
 Select "Turn on file and printer sharing". This will enable the computer to share its installed printers with other computers on the network. Click the Save changes button.
 -
 Open the "Devices and Printers" option in the Control Panel. If you are in Category view, click the "View devices and printers" link.
 -
 Right-click on the printer you want to share and select "Printer properties". Don't select the "Properties" option, as it won't open the correct window.
 -
 Click the .Sharing tab. Check the "Share this printer box" and click Apply.
 -
 Open the Control Panel on the computer accessing the shared printer. Now that the printer has been shared, you can connect to it from the second computer.
 -
 Select "Devices and Printers" in the Control Panel. If you are in Category view, click the "View devices and printers" link.
 -
 Click the .Add a printer button.
 -
 Select "Add a network, wireless, or Bluetooth printer". Select the newly-shared printer from the list and click Next to install the software. You can now select the printer when printing a document as long as the computer the printer is installed on is turned on and logged in.[3]
Was this article helpful?
Your feedback helps us improve.
Related Articles
 KDE Connect - Download the latest KDE Connect here3 minutes read
 How to install Miracast Connect app on Windows 102 minutes read
 How to Connect to WiFi in Windows 104 minutes read
 How to fix Windows cannot connect to the printer error, cannot connect to the printer5 minutes read
 How to connect a computer to Wi-Fi without a password on Windows 104 minutes read
 Connect 2 Windows XP laptops without cables7 minutes read
Reader Comments 0
Sign in with email or Google to join the discussion.