How to Take a Screenshot using Firefox and Windows
Method 1 of 4:
Using Firefox Screenshots
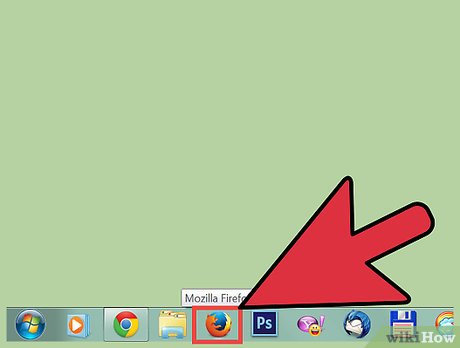
- Open the Firefox browser. Navigate to the webpage that you want to make a screenshot.
- Click the Page actions menu in the address bar, then click Take a Screenshot.
- Capture parts of the page or select a region of the page.
- Save it.
Method 2 of 4:
Using an Extension
-
 Know why you would use an extension. The biggest benefit of using a screenshot extension is the ability to take a single screenshot of an entire page, even if it stretches outside of your viewing area. Screenshot extensions also allow you to quickly upload screenshots to various image hosting sites, and some include editing tools.
 -
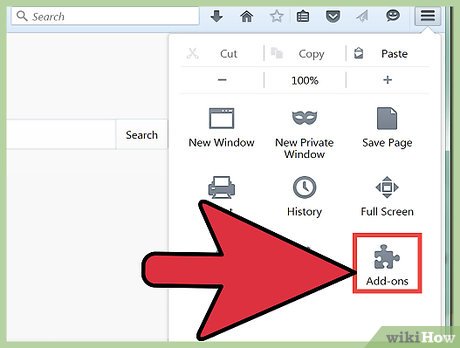
 Click the Firefox Menu button (☰) and select "Add-ons". This will open the Add-ons Manager.
 -
 Search for "screenshot". This will display a variety of different screenshot extensions, most of which behave very similarly. This guide will discuss "Nimbus Screen Grab". Other popular options include "Screengrab (fix version)" and "Lightshot".[1]
 -
 Click the "Install" button next to the extension you want to install. You can double-click an extension to see more details, including user reviews. Check out a few different extensions before choosing the one you want to install.
- Some extensions require you to restart Firefox after installing.
-
 Visit the site you want to screenshot. Once you've got the extension installed, visit the site that you want to capture in a screenshot. With the extension, you'll be able to screenshot the visible area, a manual selection, or the entire page.
 -
 Click the screenshot extension's button. You may also be able to access it by right-clicking on the page. You'll be presented with the various screenshot options that are available for that extension.
 -
 Select the area you want to screenshot. Chose your screenshot boundary from the menu. If you are manually setting the area, you can click and drag a rectangle to select what you want captured.
 -
 Edit the screenshot. If the extension supports editing, the editing tools will appear after you have selected what you want to capture. You can then make notations, highlight important areas, scribble, and more. The editing tools will appear beneath the Firefox address bar. Click "Done" when you are finished making changes.
 -
 Save the screenshot. Once you are done editing, you can choose where you want to save or upload the screenshot. You can also copy the screenshot to your clipboard instead of saving it if you want to paste it into a document.
 -
 Adjust your screenshot options. While the default options for these extensions are usually fine for most users, you can adjust the settings by clicking the extension's button and selecting Options or Settings. Here you can change the format that you want the screenshots to be, adjust the quality, change the naming conventions, and more depending on your screenshot extension.
 -
 Find your saved screenshot. You saved screenshots are typically saved in your Pictures or Documents folders. You can check your screenshot extension Options page to change the default location.
Method 3 of 4:
Using Windows Shortcuts
-
 Understand when you would want to use shortcuts. Screenshot extensions are the most convenient way to screenshot web content, but if you need to take a screenshot of the Firefox window itself, you'll want to use the Windows shortcuts. This is also the quickest way to take a screenshot when you can't install extensions.
 -
 Press .⊞ Win+PrtScn to take a screenshot of your entire display (Windows 8 and newer). The screen will dim for a moment, and the screenshot will be created as a file in a folder called "Screenshots". The Screenshots folder can be found in your Pictures folder.
- PrtScn may be labeled differently on your computer, such as "Print Screen", "Prnt Scrn", "Prt Sc", or other variations. It can usually be found between the ScrLk and the F12 keys. On a laptop, you may need to press Fn as well.
-
 Press .PrtScn to copy an image of your display to the clipboard (Any Windows). Pressing the PrtScn key will copy an image of everything currently displayed on your monitor to your clipboard. You can then paste this screenshot into a program like Paint or Word to save it as a file.
- After taking the screenshot, open paint by pressing ⊞ Win and typing "paint". Press Ctrl+V to paste the copied screenshot into the blank Paint document. Save the file to save the screenshot to your computer.
-
 Press .Alt+PrtScn to take a screenshot of your active window. If you just want to take a screenshot of your Firefox window, make sure it is active and press Alt+PrtScn. This will copy the image of the Firefox window to your clipboard, allowing you to paste it into Paint.
 -
 Edit your screenshot in Paint. If you've saved your screenshot using the ⊞ Win+PrtScn command, right-click on the file and select "Edit". This will open it in Paint. If you pasted the screenshot into Paint, you can edit it before saving. use the Paint tools to highlight important parts, add notes, and more.[2]
Method 4 of 4:
Using the Snipping Tool
-
 Open the Snipping Tool. This utility is available in Windows Vista and later. The quickest way to open the Snipping Tool is to press the ⊞ Win key and type "snipping tool". The Snipping Tool allows you to create screenshots of the entire screen, specific windows, or a custom area. You can also perform basic edits with Snipping Tool.
 -
 Select the kind of screenshot you want to take. Click the ▼ next to the "New" button to select the type of screenshot you want to take.
 -
 Take your screenshot. Depending on the screenshot method you chose, the process for taking the screenshot will vary:
- Free-form - Draw the shape of the screenshot you want to take. This mode lets you create a screenshot in any shape you want.
- Rectangular - Click and drag to create a rectangle on the screen. Anything inside of this rectangle will be captured in the screenshot.
- Windows - Click the window that you want to capture in a screenshot.
- Full-screen - The entire display will be instantly captured.
-
 Edit the screenshot. After the shot is captured, it will be displayed in the Snipping Tool window. You'll be provided basic editing tools, including a Pen and a Highlighter tool.
 -
 Save the screenshot. Click the Disk button to save the screenshot to your computer. You can also attach directly to an email from the Snipping Tool if you use the Windows Mail program.
Share by
David Pac
Update 04 March 2020


