Table of Contents
Use Windows 7 Homegroup to Share Files and Printers is easier to understand when the core ideas are paired with practical examples. The sections below explain the topic clearly, highlight useful steps, and point out details that can prevent common errors.
The HomeGroup feature makes it easier to share files and printers between Windows 7 computers. This guide we will introduce you more about this new feature, especially how to conduct resource sharing.
Set up HomeGroup
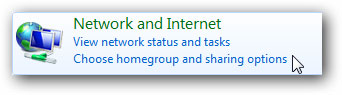
There are many ways to access the HomeGroup feature, you can go to Control Panel and click 'Choose homegroup and sharing options' or just type 'homegroup' (without quotes) in the search box in the Start menu.
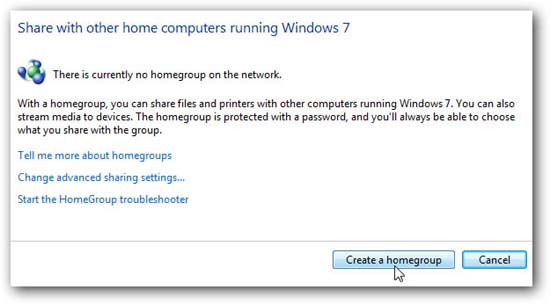
Next, click the Create a homegroup button.
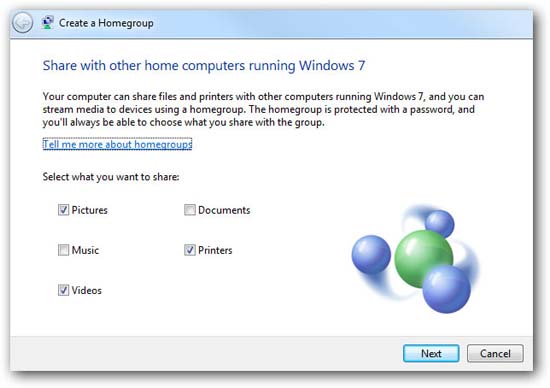
In the Create a homegroup screen, select what you want to share with other computers.
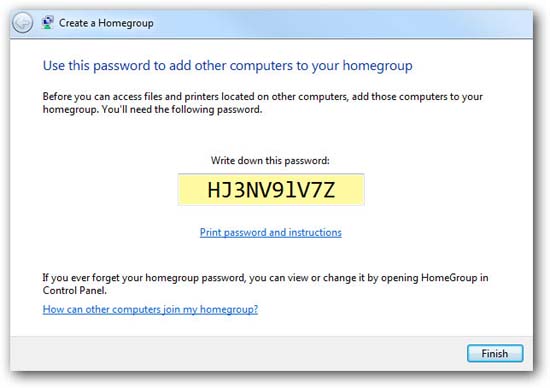
After the group is created, you will receive a password to access it from other computers.
After receiving the Password, you will be returned to the HomeGroup screen, where you can make some additional changes if you want.
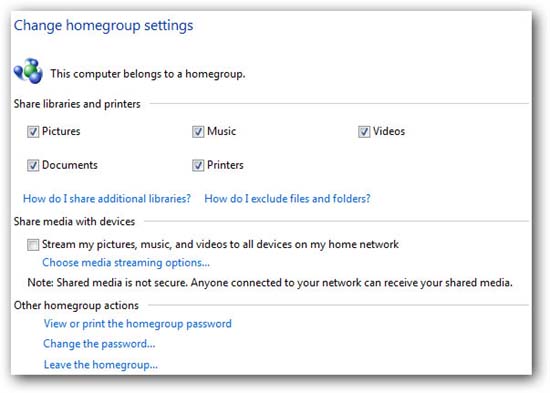
Connect to the HomeGroup
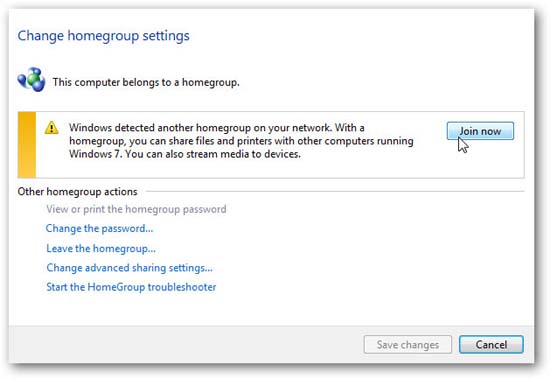
On other Windows 7 computers, visit the HomeGroup feature and click to join the group you created.
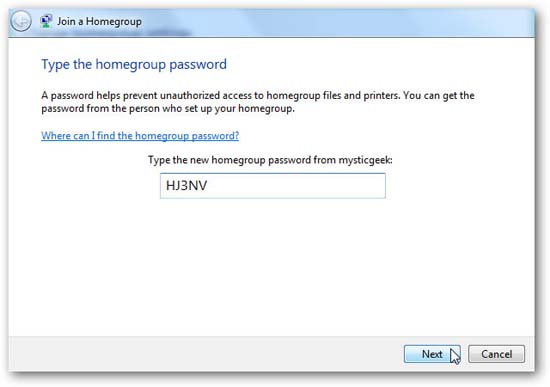
Enter the password created for the HomeGroup.
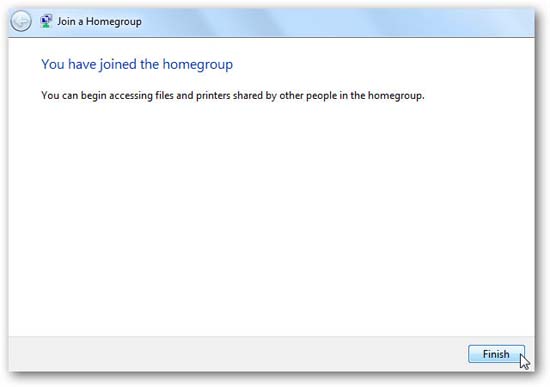
Once the password is accepted, the connection will take place, at which point you have completed your work.
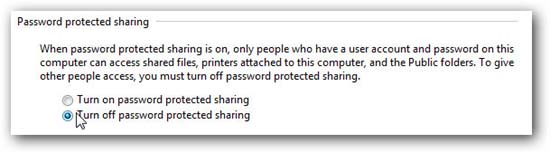
However, if you do not want to use this password anymore, go to the advanced options in the Network and Sharing Center and turn off sharing using a password ( turn off password protected sharing ).
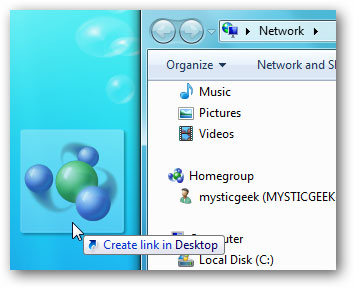
Another thing you might want to do here is create a shortcut to the HomeGroup. Just go to Network and copy its icon to the desktop. Alternatively, you can use another method for this to create shortcuts directly from the shared folder.
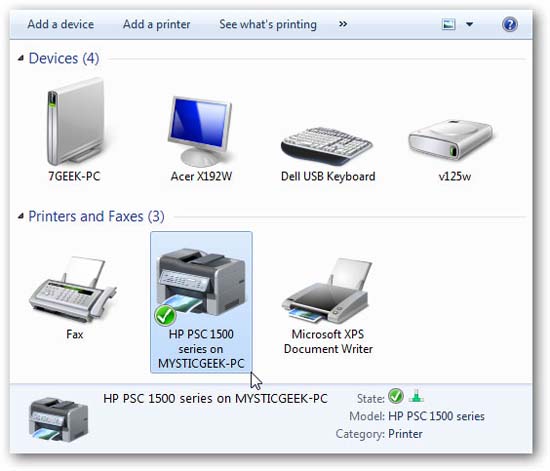
To share the printer, you need to select Printers when creating the group and then, when you go to Devices and Printers in the Start menu, you will see it and can set it as default if you want.
Here is an introduction to show you how to share files and printers between Windows 7 computers on your home network. If you have XP or Vista on your network, then you might want to refer to some other ways to perform sharing between these computers on the network.
Access data in HomeGroup from Vista and XP.
FAQ
What is Use Windows 7 Homegroup to Share Files and Printers?
The HomeGroup feature makes it easier to share files and printers between Windows 7 computers.
Why is Use Windows 7 Homegroup to Share Files and Printers important?
A clear understanding of Use Windows 7 Homegroup to Share Files and Printers helps you make informed decisions, avoid common mistakes, and use the relevant tools or techniques more effectively.
How should beginners approach Use Windows 7 Homegroup to Share Files and Printers?
Start with the fundamental concepts, follow the examples step by step, and test each change in a safe environment before applying it to important systems or data.
Related Articles
 Instructions for Setting Up and Managing Homegroup on Windows 1010 minutes read
 Share Printers: Share Files and Printers Windows 7 and Windows Xp8 minutes read
 Connecting to the HomeGroup Network, the Home Network in Windows 75 minutes read
 Hide and Turn Off the Homegroup Feature on Windows 74 minutes read
 How to Share Printers Between Windows 7 Computers Without7 minutes read
 What Is HomeGroup? How to Use and Set Up on Windows6 minutes read
Reader Comments 0
Sign in with email or Google to join the discussion.