Network connection with Windows 7 HomeGroup
Microsoft has made a lot of efforts to make home networks easier to use with automatic connections and access to shared files or folders. Can tell the HomeGroup feature in Windows 7, they succeeded.
Microsoft has made a lot of efforts to make home networks easier to use with automatic connections and access to shared files or folders. Can say with the "HomeGroup" feature in Windows 7, they succeeded.
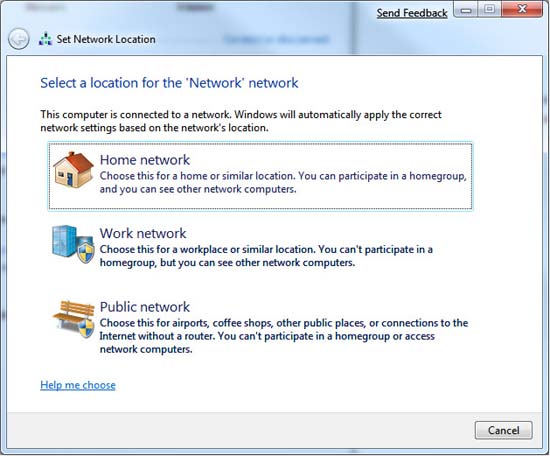
HomeGroup lets you create a home network with built-in and expandable access and sharing features. It is a great feature of Windows 7 - only works with Windows 7, so users of Vista, XP, Mac and Linux operating systems cannot join this network. Windows 7 lets you set up three types of networks - Home, Work and Public - and the homegroup can only exist if the networks on all your computers are set to Home. To configure the network of your Windows 7 computers to be Home network, open Control Panel and select Network and Internet, then select Network and Sharing Center (you can also access the Network and Sharing Center by right-clicking Network icon in system tray). Verify that in the Network icon you see "Home network". If not, click on the link - Public network or Work network - and select Home Network instead.
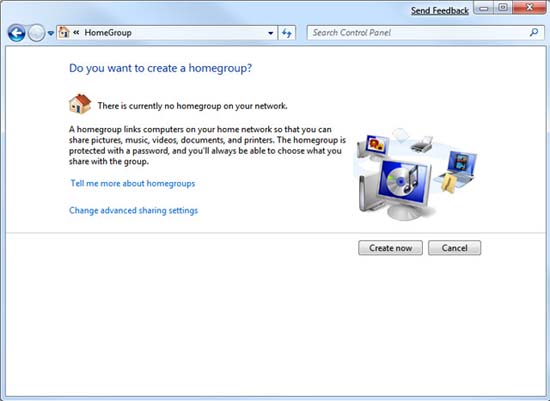
From here, you can create a homegroup network. After setting up your network as Home, in fact Windows 7 will take you directly to the Create a homegroup dialog box. If your network is set to Home, click on the Choose homegroup and sharing options link and in the following dialog box, click Create.

The next step is to choose the type of communication you want to share with other members of the homegroup. The options for you here are pictures, music, videos, documents and even printers. These options correspond to the libraries that Windows 7 creates by default when it installs on each computer and the default folders in each user's profile. Essentially, what you are doing by choosing to share any of these items will allow other computers in the homegroup to access the specified folders in your user profile. You can also add some shared locations to the homegroup.

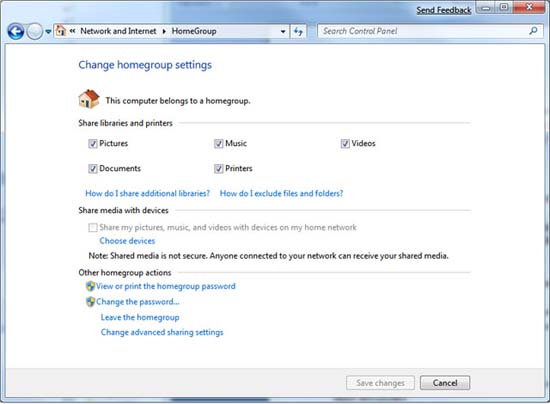
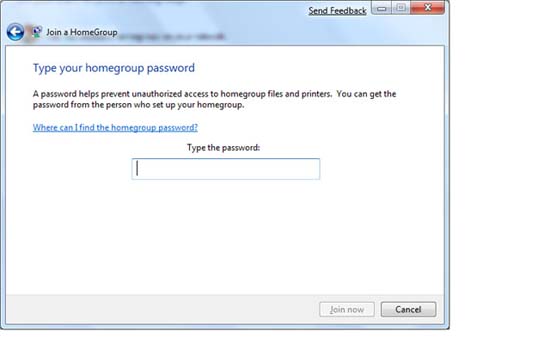
When you finish this step, Windows 7 will open a window containing a password for your homegroup; As you can see, the second computer will require that password to join the homegroup. Now, you need to save the password (you can just mark it and copy it to a text file or an e-mail, for example).

Click Finish and your homegroup is now set. The last Properties dialog box , which allows you to change the password you have set up and access the Advanced Sharing Settings screen, however it does not allow you to do it - at least from here - to add more libraries, folders or files into the homegroup.
Here, although not really necessary, check the Advanced Sharing Settings screen by clicking Change advanced sharing settings. On the dialog box that appears, click the arrow next to Home or Work.
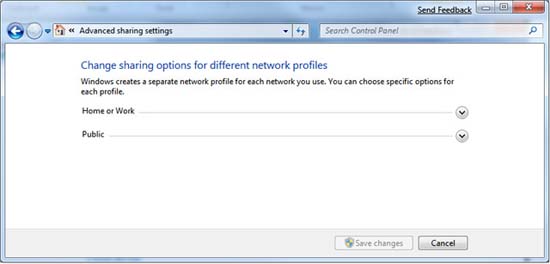

Here you will see a screen containing 6 options, how to configure Windows 7 home networks (in fact, all Windows 7 networks use configuration options. simple). The most important points to note in Advanced Sharing are that it allows other computers to find you (network discovery), file sharing and printers, and sharing media. If you do not enable this feature, you will lose a lot of advantages in using a homegroup: sharing files that are saved in a central location or a large hard drive that contains frequently added files smoothly between computers in your home.
Once you've set up your homegroup, computers that see your network can join it. To do so, users of each other computer must open the Network and Sharing Center from Control Panel on their computer and click "Choose homegroup". Click Join Now to become a member of the homegroup
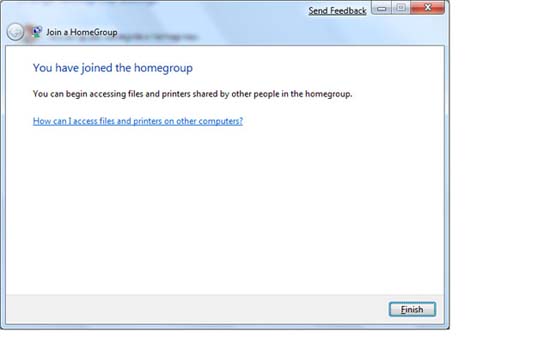
When your computer has joined the homegroup, a link on the dialog box will take you to the Windows Help screen to introduce resource access on the homegroup. This is a guide for any user who is not yet familiar with the type of resource sharing, especially those who are unfamiliar with creating their own resources available.
By default, all the folders created with the Windows 7 installation are shared on the homegroup. However, you are not limited to these libraries when sharing. When you and other members add libraries, you can share one of those libraries manually. Open the Libraries window from the taskbar and find a library you want to share. Right-click it and select Share With | Homegroup. There are two options: Read and Read / Write. If you want other users to be able to access certain folders but cannot write data to that folder from their computers, select Read; If you want them to write and read, select Read / Write. You can also share individual folders or even files on the homegroup.
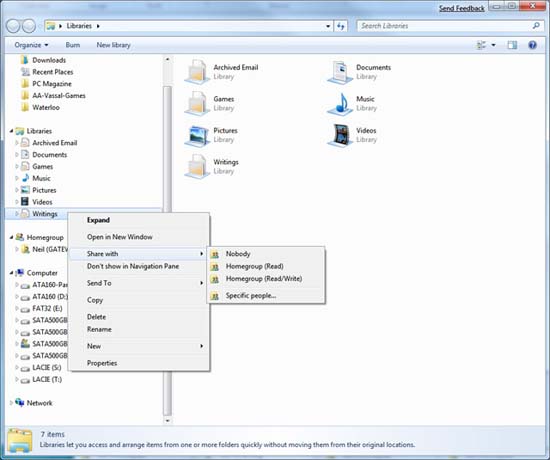
To change existing folder sharing, right-click the library and select the Share With option again, then select the option you want.
Neil Randall
Was this article helpful?
Your feedback helps us improve.
Related Articles
 Connecting to the HomeGroup network, the home network in Windows 7.4 minutes read
 What is HomeGroup? How to use and set up on Windows5 minutes read
 Instructions for setting up and managing HomeGroup on Windows 109 minutes read
 How to replace Windows HomeGroup8 minutes read
 Hide and turn off the HomeGroup feature on Windows 73 minutes read
Reader Comments 0
Sign in with email or Google to join the discussion.