Table of Contents
This guide explains how to turn on / Off Automatically Wireless Network Connection in Windows, with clear steps, practical tips, and important checks before you begin.
This guide will show you various ways to enable or disable the automatic connection to wireless networks in Windows 10.
Turn on automatically connect to wireless networks
While connecting to the wireless network, check the Connect automatically box .
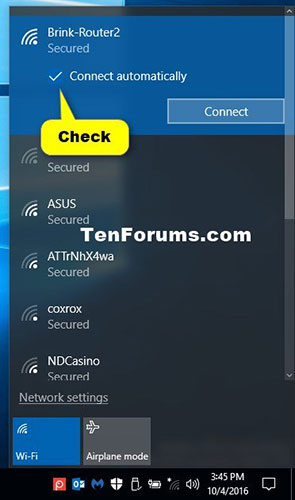 Select Connect automatically
Turn off automatically connect to the wireless network by disconnecting
Please disconnect the wireless network. You will need to manually connect to this wireless network when you want to reconnect to that network.
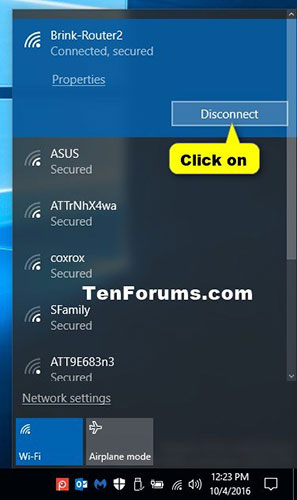 Turn off automatically connect to the wireless network by disconnecting
Turn on / off automatic connection to the wireless network in Settings
1. Open Settings and click on the Network & Internet icon.
2. Click on Wi-Fi on the left and click on the connected wireless network (eg "Brink-Router2") on the right.
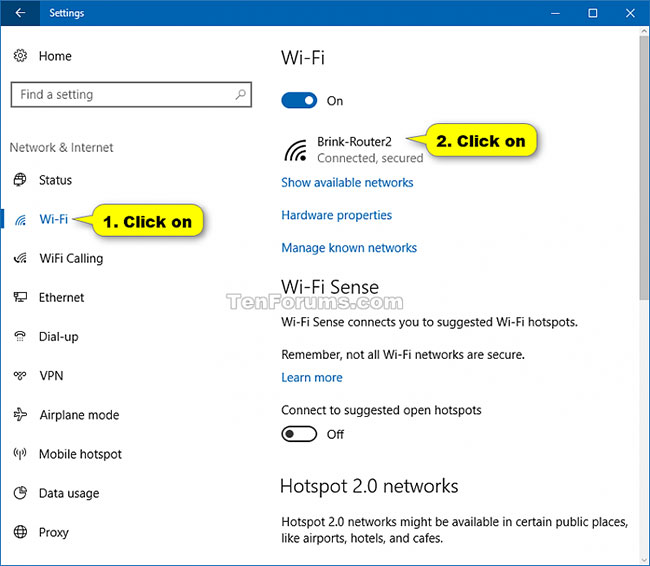 Click on Wi-Fi on the left and tap on the connected wireless network
3. Turn on or off the Connect automatically when in range option, depending on what you want for this wireless network.
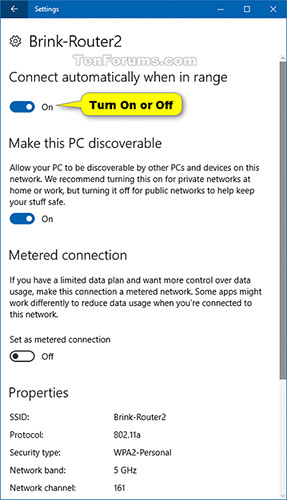 Turn on or off the Connect automatically when in range option
4. You can now close Settings if desired.
Turn on / off automatic connection to the wireless network in Network Connections
1. Press the Win+ keys Rto open Run , type ncpa. cpl in Run and click OK to open Network Connections.
2. Click on the wireless network (for example, "Brink-Router2").
3. Click the Wireless Properties button .
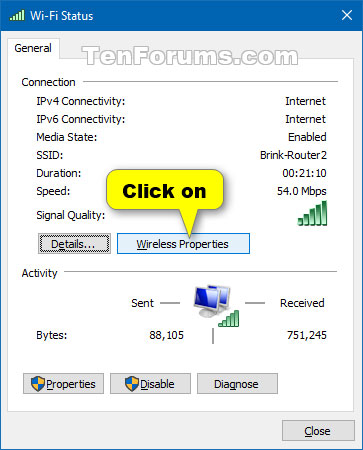 Click the Wireless Properties button
4. Select (to enable) or deselect (to disable) Connect automatically when this network is in range , depending on what you want and click OK.
5. Click Close.
6. You can now close Network Connections if you like.
Turn on / off automatic connection to the wireless network in Command Prompt
1. Open Command Prompt.
2. Copy and paste the command netsh wlan show profilesinto the Command Prompt, press Enterand make note of the name of the wireless network profile (eg "Brink-Router2") that you want to enable or disable the connection automatically.
3. Enter the command below into the Command Prompt, press Enterand see Connection mode of this wireless network is now set to Connect automatically or Connect manually.
netsh wlan show profile "name"Note: Replace the name in the above command with the actual name of the wireless network profile from step 2.
For example:
netsh wlan show profile "Brink-Router2"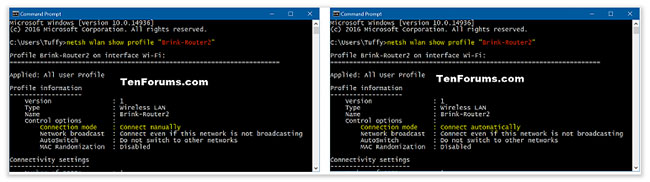 See if Connection mode is set to Connect automatically or Connect manually
4. Enter the command you want to use below into the Command Prompt and press Enter.
- To turn on automatic connectivity to wireless networks:
netsh wlan set profileparameter name="name" connectionmode=auto- To turn off automatic connection to wireless networks:
netsh wlan set profileparameter name="name" connectionmode=manualReplace the name in the above commands with the actual name of the wireless network profile from step 2.
For example:
netsh wlan set profileparameter name="Brink-Router2" connectionmode=autonetsh wlan set profileparameter name="Brink-Router2" connectionmode=manual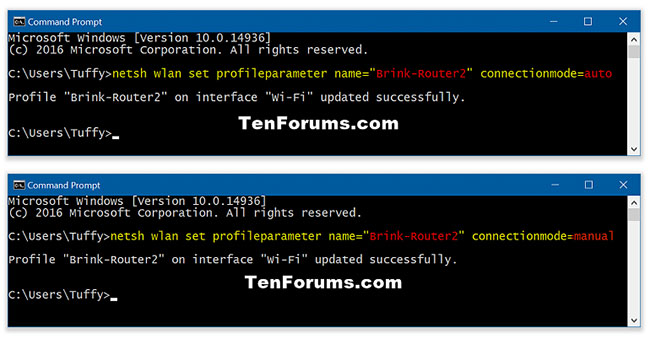 Enter the command to turn on / off the wireless connection automatically
5. You can now close the Command Prompt if you like.
FAQ
What should I know about Turn on / Off Automatically Wireless Network Connection in Windows?
Focus on the key features, requirements, limitations, and practical use cases explained in this guide.
How do I get the best results with Turn on / Off Automatically Wireless Network Connection in Windows?
Follow the recommended steps, use current software or information, confirm compatibility, and review settings before major changes.
Are there any risks or limitations?
Potential limitations depend on compatibility, data quality, cost, privacy, support, and how the product or method is used.
Related Articles
 How to Arrange Network Connection on Windows 105 minutes read
 How to Share Internet Connection: Turn Windows 8 Laptop Into4 minutes read
 Wireless Connection: Set up Wireless Network2 minutes read
 Set up Ad Hoc Wireless Network to Play Wi-Fi Without Software12 minutes read
 How to Share an Internet Connection14 minutes read
 How to Set Up a Wireless Network (Wi-Fi) Connection10 minutes read
Reader Comments 0
Sign in with email or Google to join the discussion.