Share files and printers Windows 7 and Windows XP
Sharing folders between two Windows 7 computers is quite simple, you can use the HomeGroup feature. However, the HomeGroup feature is not compatible on Windows XP and Windows Vista.
Table of Contents
If you have a Windows XP / Vista computer, connect to the printer, and have another computer using Windows 7, connect to the local network (or modem), you want to share the printer there. So how to set up printer sharing on Windows 7 and Windows XP. Please refer to the following article of Network Administrator.
Note : Windows 7 must be installed with the printer driver to be able to use.
1. Share files on Windows 7 and Windows XP
Sharing folders between two Windows 7 computers is quite simple, you can use the HomeGroup feature. However, the HomeGroup feature is not compatible on Windows XP and Windows Vista.
However, if you want to share files on Windows 7 and Windows XP, you can refer to the steps below:
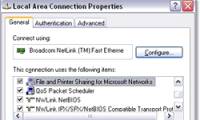
First, make sure that your 2 computers are members of Workgroup.

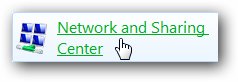
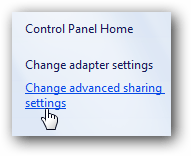
On a Windows 7 computer, go to Control Panel => All Control Panel Items => Network and Sharing Center and then click Change advanced sharing settings .
Next check the settings under Advanced Sharing Settings for Home or Work and Public profiles .
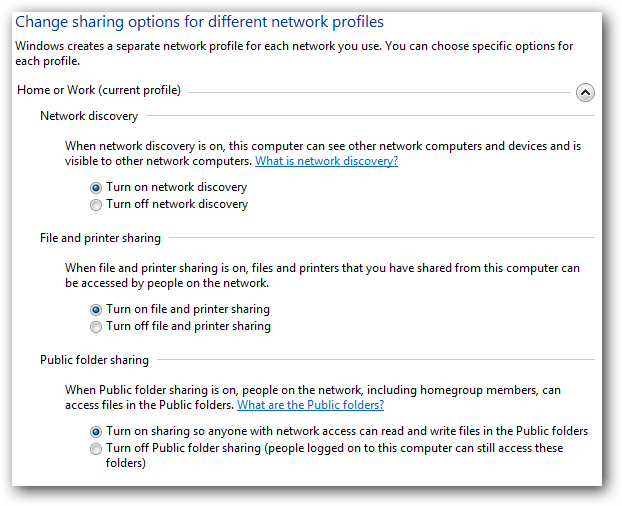
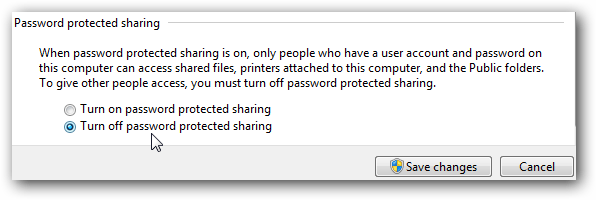
If you want any user to be able to access the shared folders without password protection, you can set up under the Advanced Sharing Settings section at the bottom of the list.
If you wish, you can activate your account login on Windows XP and use the login password:
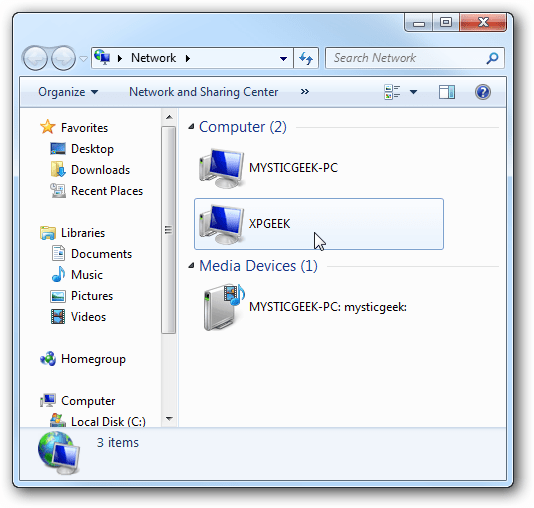
Access Network on Windows 7, where you will see Windows XP computers and Windows 7 computers, in the example below is Mysticgeek-PC.
To share a printer on a Windows 7 computer, go to Start and click Devices and Printers , then double-click the printer icon.
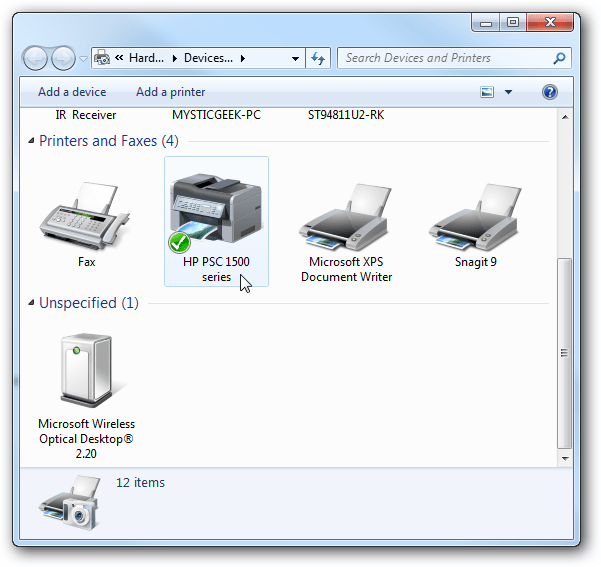
Next, double click on Customize your printer.
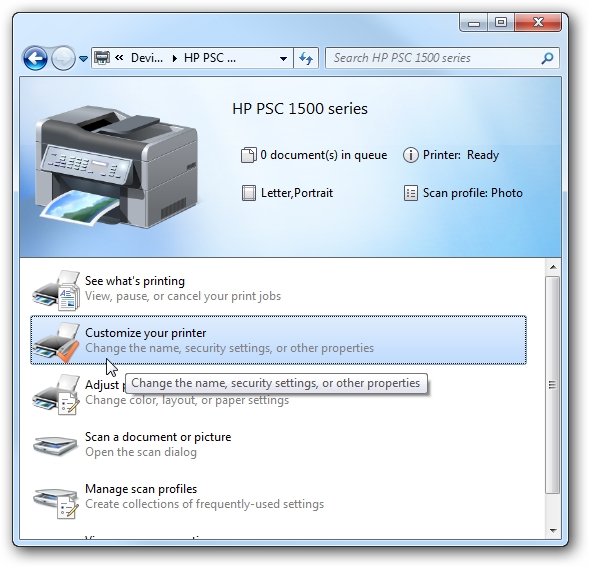
On the Properties window, click the Sharing tab, then check the box to choose Share this printer and enter the device name you want to share.

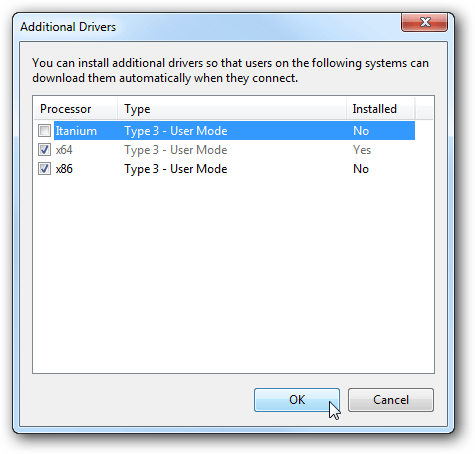
If your Windows XP computer is an x86 operating system, you can install Additional Drivers before setting up your Windows XP computer.
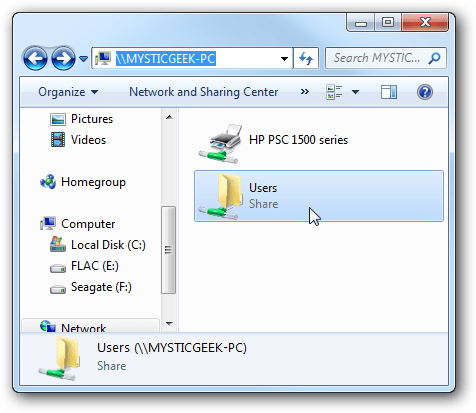
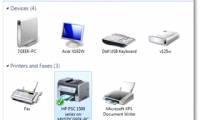
To find shared folders and devices, double-click the Network icon (Windows 7 computer icon and have the network icon below). Here you will see the printer connected to the Windows 7 computer and the Users folder .
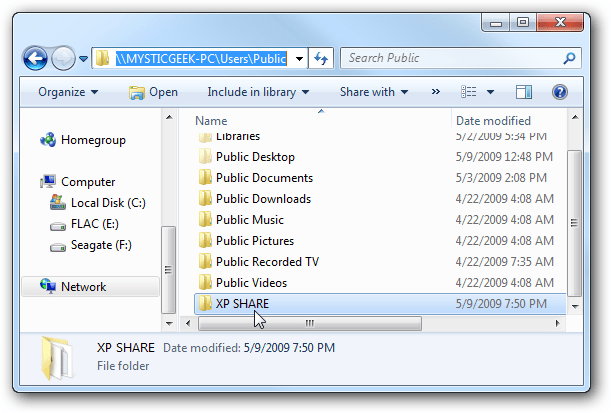
Go to the Users and Public folder to see the shared folders, where you can create a new folder and name this folder XP Share to save the shared folders.
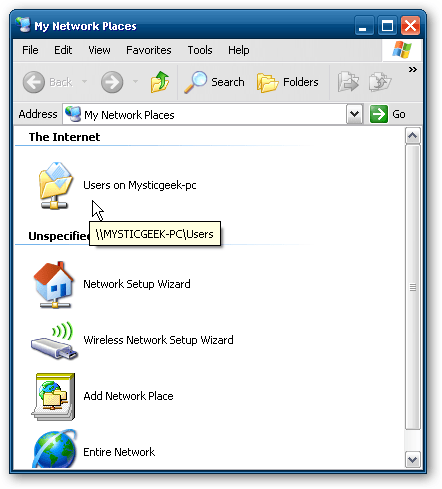
On your Windows XP computer, open My Network Places to find shared folders from Windows 7 (mysticgeek-pc).
Double click on the Share folder to see a list of shared folders in the Public folder on Windows 7. If you enable password protection, you must first enter the username (username) and account password user on Windows 7 computer.
2. Set up Windows XP printer sharing
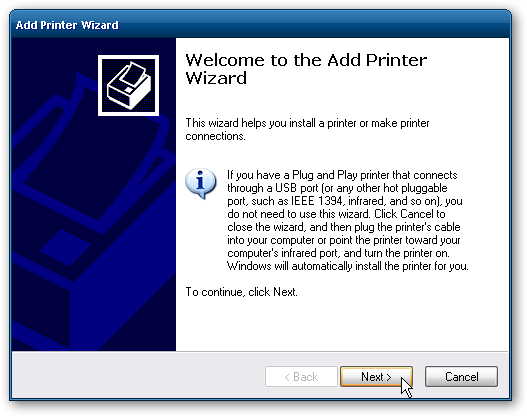
To set up printer sharing from Windows XP, go to Start and select Printers and Faxes . At this time, the Add Printer Wizard window will appear.
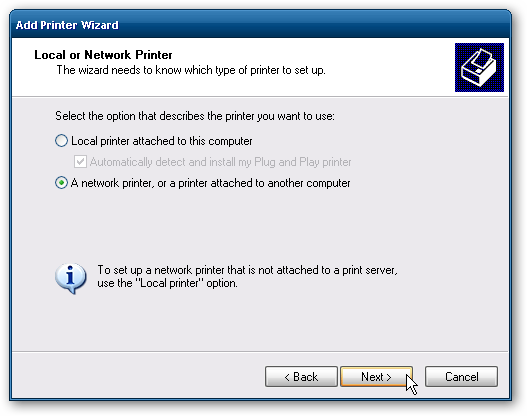
Next select A network printer, or attached to another computer, then select Next.
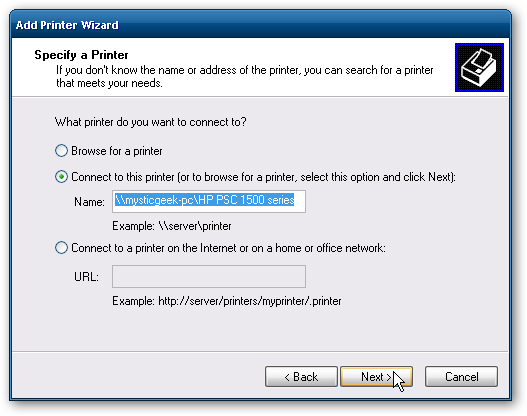
Select Connect to this printer . and enter the printer connection path on the Windows 7 computer and click Next .
At this time, a confirmation dialog will appear, your task is to click Yes.

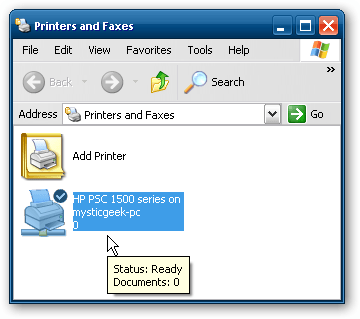
Finally click Finish to finish the installation process.

In some cases you have to install the x86 XP driver to share the printer, the reason is that the Windows 7 driver is not compatible with Windows XP. After installing the x86 XP driver, open Printers and Faxes to find a shared printer.
3. Share printer from Vista
If the printer is connected to a Windows Vista-based computer, follow the steps below to share it with another computer using Windows 7.
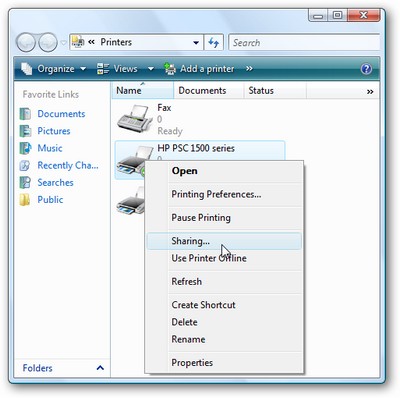
- First, click the Start button, enter printer into the search dialog box and press Enter.
- At the list window of the printer appears, right-click the printer you want to share and select Sharing .
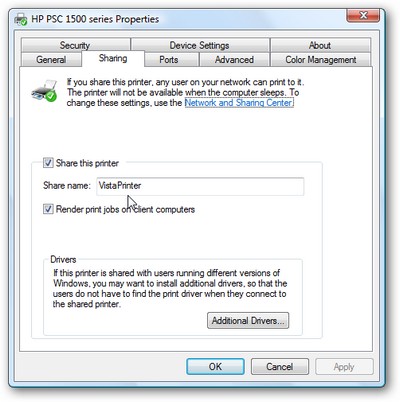
- In the printer Properties dialog box that appears, select the Sharing tab, check the Share this printer option , give the printer a name and click OK .
Note : you should only choose a simple name for the printer, and there are no white characters in it.
4. Connect the printer from Windows 7
After you have finished sharing the printer from Windows XP / Vista, follow the steps below to use the printer from Windows 7:
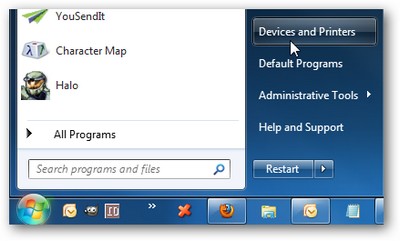
- Click the Start button, select Devices and Printers .
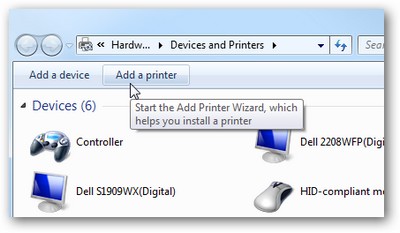
- In Devices and Printers window appears, click Add a printer button.
- Click Add a network, the wireless or Bluetooth printer in the dialog box appears after that.
- Windows 7 will perform the process of searching for shared printers on the local network. Once you find it, click Next so that Windows 7 adds the selected printer to the list of available printers.
Note : The correct type of printer you have shared above must be selected to continue.
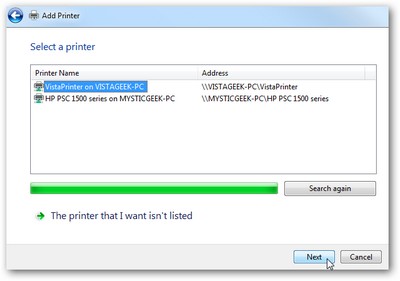
- After the process of adding the printer is complete, click Next in the next step.
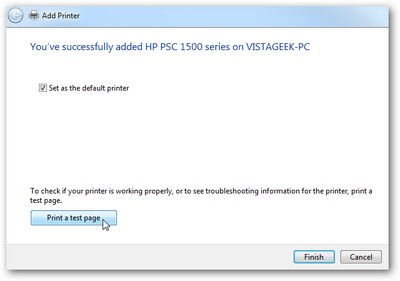
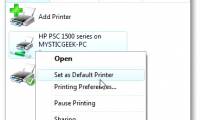
- Now, you can check the Set as the default printer option to have the newly shared printer become the default printer for Windows 7. Click the Print a test page button to check if the printer is working properly. not yet If all processes are OK, click Finish to finish.
5. Other ways
If the above setting does not work, you can use the second method below:
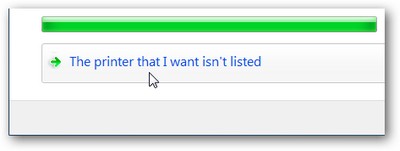
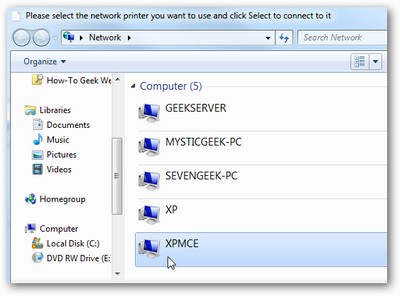
- At the step of searching for a printer from Windows 7, if you can't find the shared printer from Windows XP / Vista, click on The Printer that I want isn't listed after the search process finishes. .
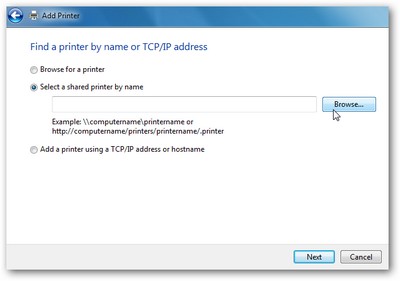
- Add Printer window appears, select the option Select a shared printer by name , click the Browser button to start searching manually.
- In the example below, the printer is shared from a computer called XPMCE , double-click this computer icon.
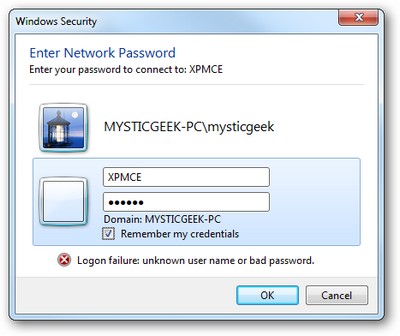
Note : the computer needs to have a user account with a password available .
- Enter your username and password to access the computer.
- At the window that appears, you will see a printer in the shared state. Click on this printer and select Select .
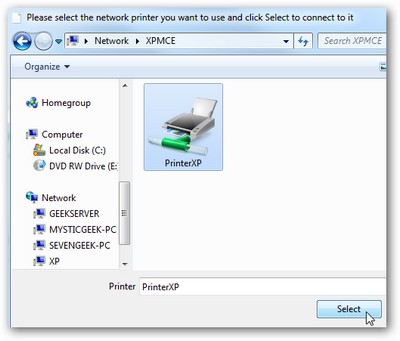
- Returning to the Add Printer window, you will see the printer's name and path displayed in the Select a shared printer by name field . Click Next to continue.
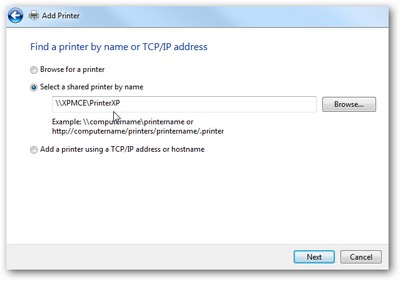
- Wait a moment for Windows to connect to the printer. After the connection process is complete, click Next in the dialog box that appears afterwards, and you can begin conducting a test print to check if the printer is working properly (as the last step instructed at on).
Now, when you return to the Windows 7 Devices and Printers window, in the Printers and Faxes section , you will see a new printer appear in the list of available printers.
Refer to some of the following articles:
- Use Windows 7 Homegroup to share files and printers
- Tips for sharing printers in the network
- How to share printers between Windows 7 computers without Homegroup?
Good luck!
Was this article helpful?
Your feedback helps us improve.
Related Articles
 Use Windows 7 Homegroup to share files and printers3 minutes read
 Share Files and Printers between Windows 7 and Vista5 minutes read
 How to share printers in LAN on Windows, Mac, Linux5 minutes read
 Top 6 best mobile photo printers 20197 minutes read
 Share folders and printers in the network11 minutes read
 Instructions on how to share a printer6 minutes read
Reader Comments 0
Sign in with email or Google to join the discussion.