Instructions for setting up and managing HomeGroup on Windows 10
HomeGroup feature is a great feature on Windows operating system. This feature helps users to share files and printers with multiple computers running Windows 10 operating system extremely quickly and simply. In the following article, Network Administrator will show you how to create and manage HomeGroup on Windows 10 operating system.
Table of Contents
HomeGroup feature is a great feature on Windows operating system.This feature helps users to share files and printers with multiple computers running Windows 10 operating system extremely quickly and simply.In the following article, Network Administrator will show you how to create and manage HomeGroup on Windows 10 operating system.

1. Before starting
To ensure that all your settings are correct, turn off all other connected computers on the Network, leaving only your computer to create a new HomeGroup.
1. Press Windows + X key combination to open the Power User Menu, then click Network Connection s.
2. Right-click the Network Adapter (network card) that you use to connect to the Internet and select Properties .
3. Make sure you have checked the Internet Protocol Version 6 (TCP / IPv6) option .

4. Click OK.
2. Instructions on how to create HomeGroup on Windows 10
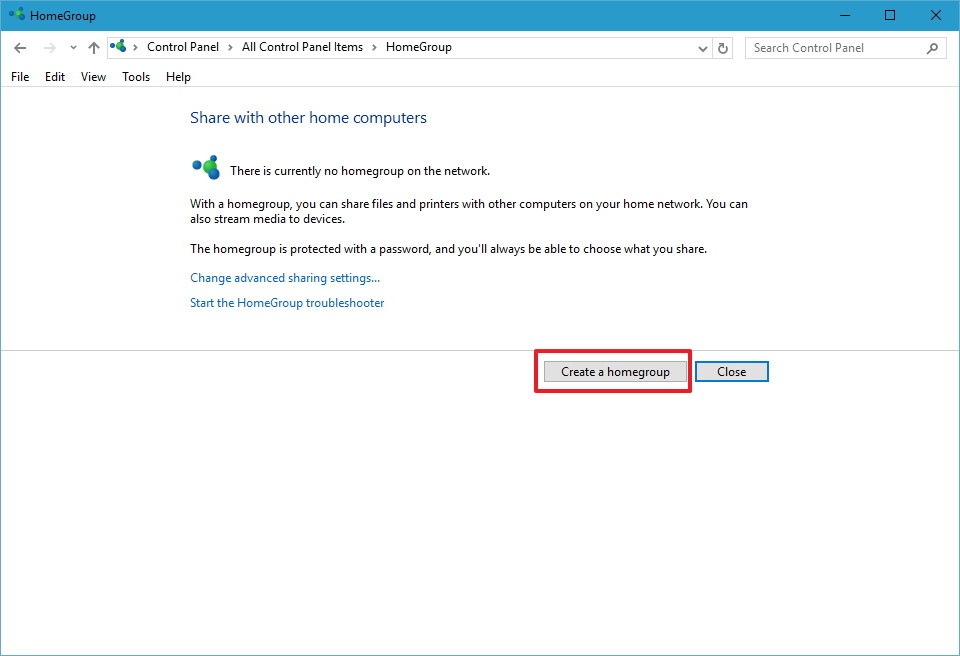
1. Open Start Menu then type the HomeGroup keyword on the Search frame and press Enter.
2. On the HomeGroup window, click Create a homegroup.
3. Click Next.
4 Select the file, folder you want to share. By default, Windows has pre-installed Pictures, Videos, Music, Printers & Devices as Shared. However, Documents folder is set to Not shared mode.
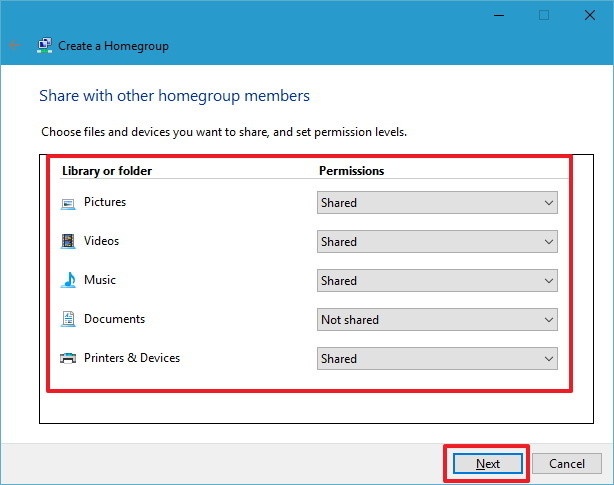
5. After selecting the content you want to share, click Next.
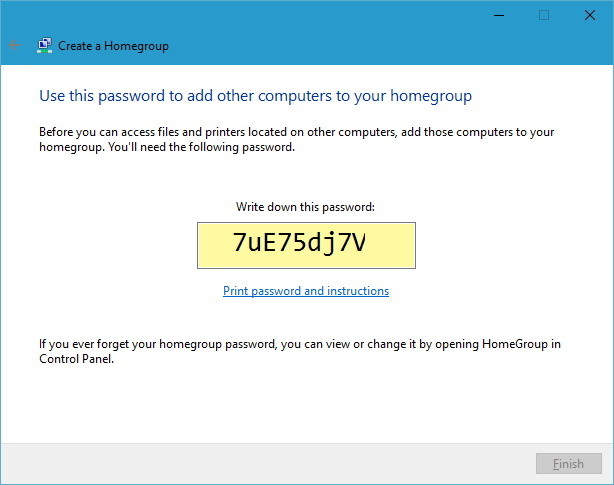
6. Follow the instructions on the screen. You will receive a message containing a Homegroup password.This password allows you to allow another computer to have file access on your computer.
You can note this password on paper or click on the Print password and instructions link.
7. Finally click Finish to complete the process.
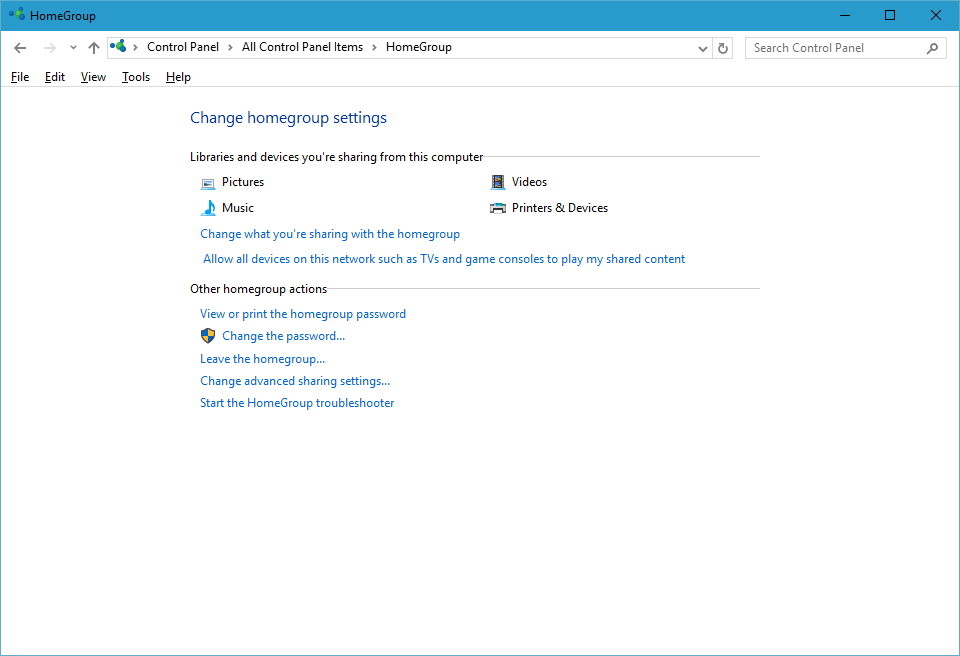
3. Change the shared content on HomeGroup
If you want to change the content you share with another computer, follow the steps below:
1. On the HomeGroup interface, click the Change what you're connecting link with the homegroup.

2. Make sure you have selected the correct Shared or Not shared option in each folder.
3. Click Next .
4. Click Finish to complete the process.

4. How to change the Stream Media option on HomeGroup
HomeGroup also allows you to control media devices like TV, Xbox One, Xbox 360 and PlayStation that can access or Stream shared content on your computer.
On the HomeGroup settings page on Control Panel, click on the Allow all devices link on this network network such as TVs and game consoles to play my shared content.
Here you choose the Media Library name, by default Windows 10 uses your email account address.
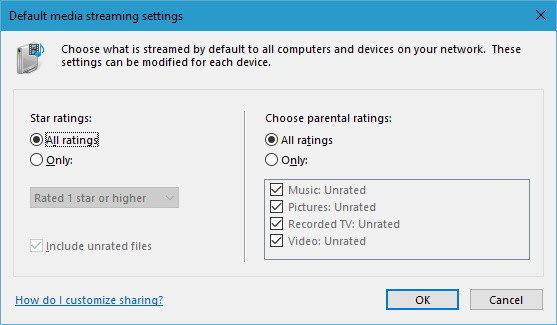
Then click Choose default default settings to change some installation options such as star rating and parental control settings that allow you to stream another media device.
You can also change the Network to enable sharing of shared content using the Show devices on drop-down menu.
In addition, you can set whether to block or allow each device by clicking the Allow All or Block All button.
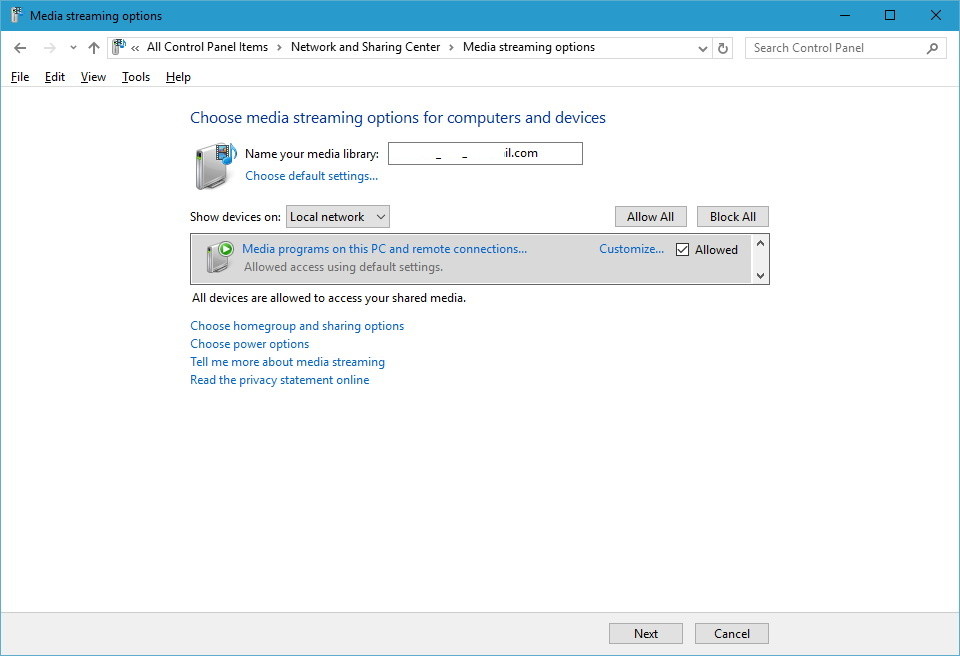
Note that the content you share must be available in the device you share, and the device must always be open, not in sleep mode. If you want to change the Power (Power) setting, you can choose Choose power options.
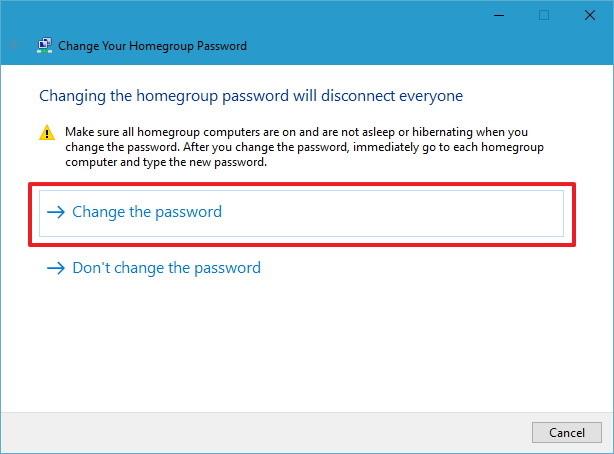
5. Instructions for changing Homegroup password
For some reason you want to change your Homegroup password, Windows gives you some options to change. Here are the steps:
1. Click the Change the password link.
2. Ensure that the computers on the Homegroup are active.
3. Click Change the password .
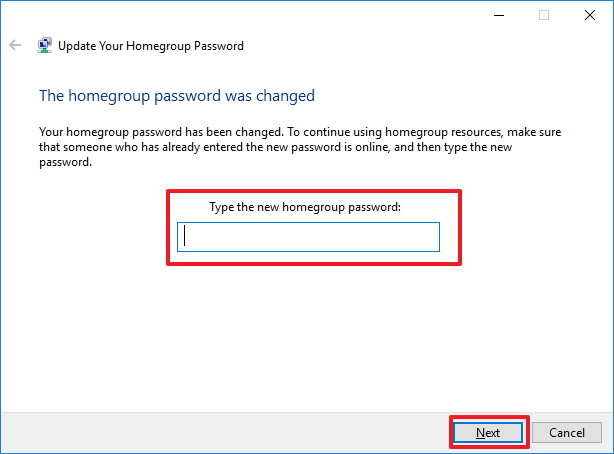
4. Note the new password then click Next.
5. Click Finish .
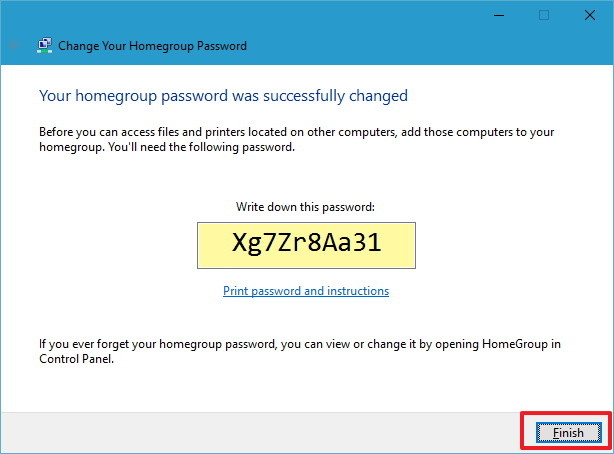
6. After receiving the password to connect the Homegroup computers on the Control Panel, click the Type new password.
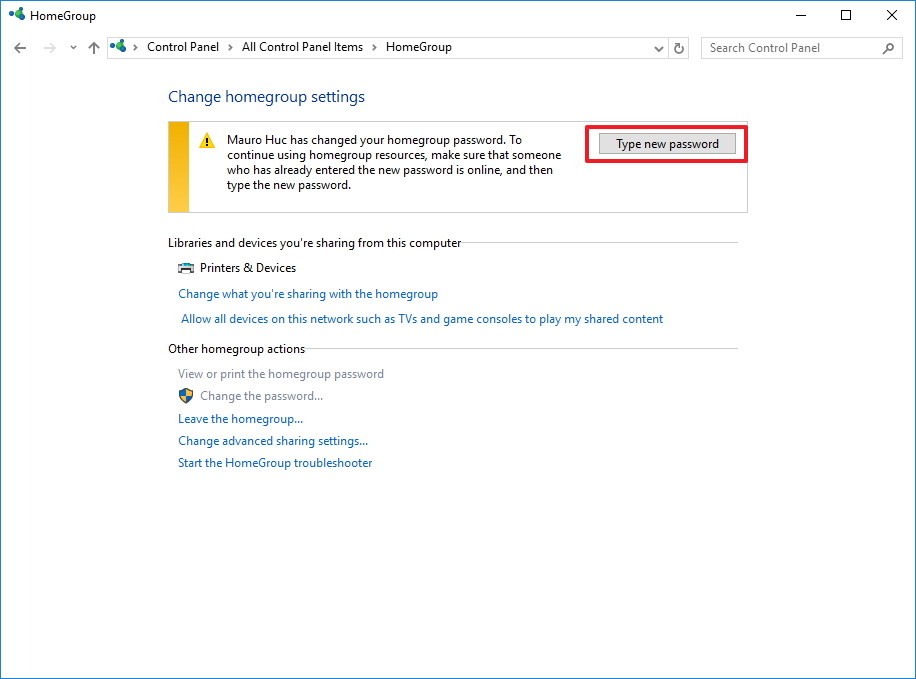
7. Enter the new password then click Next .
8. Click Finish to complete the process.
6. How to add (add) a computer on Homegroup
To join (add) a certain computer on Homegroup, follow the steps below:
1. Open Start Menu then type Homegroup keyword into Search box and press Enter.
2. Click on Join now button .

Note: If you do not see the John now button, there is probably an error, make sure you are connected to the network and restart your computer.
3. Click Next .
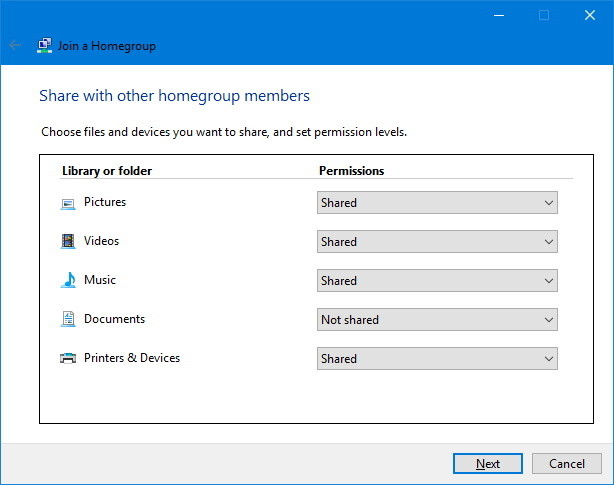
4. Select the content you want to share on the Network by selecting the options in the drop-down menu in each folder and then clicking Next.
5. Enter your Homegroup password then click Next .
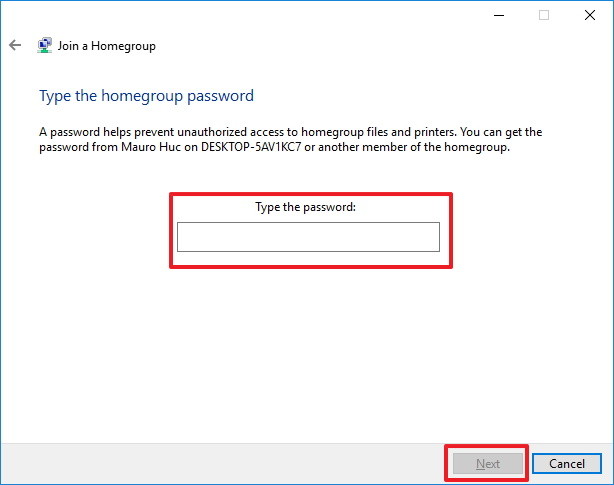
Note:
If you sign in to a Microsoft account on another computer, you will not see a password entry message.
6. Click Finish to complete the process.
7. Add a folder to the Homegroup library to share
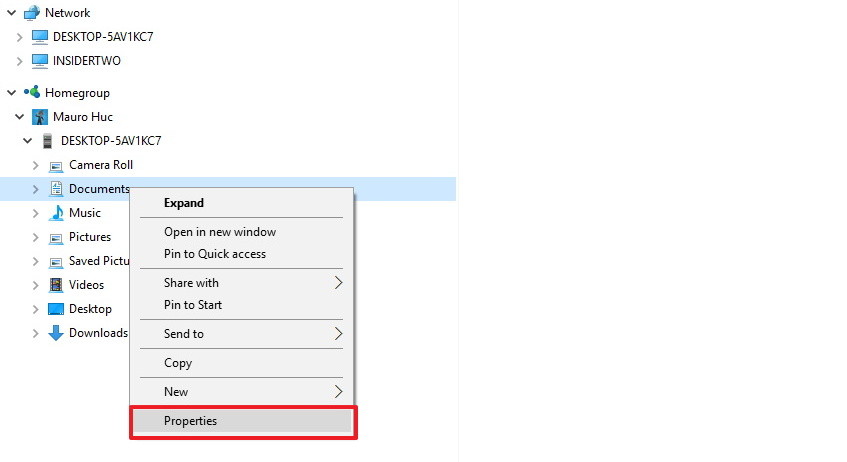
1. Press Windows + E key combination to open File Explorer.
2. In the list in the left pane, you expand the Homegroup folder.
3. Right-click Documents.
4. Click on Properties .
5. Click Add.

6. Select the folder you want to share then click Include folder .
7. Click Apply .
8. Click OK.
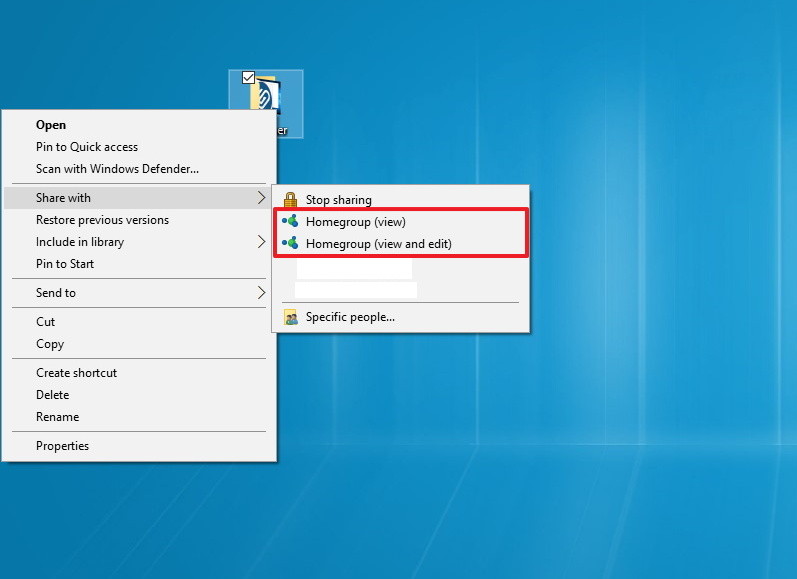
8. Add a new folder to Homegroup via Windows Network Share
1. Right-click the folder you want to share.
2. Select Share with then click on Homegroup (view) .

You can access the new shared folder by:
1. Use Windows + E key combination to open File Explorer.
2. Click Network in the left pane.
3. Double-click the computer name to share the content and find the folder location.
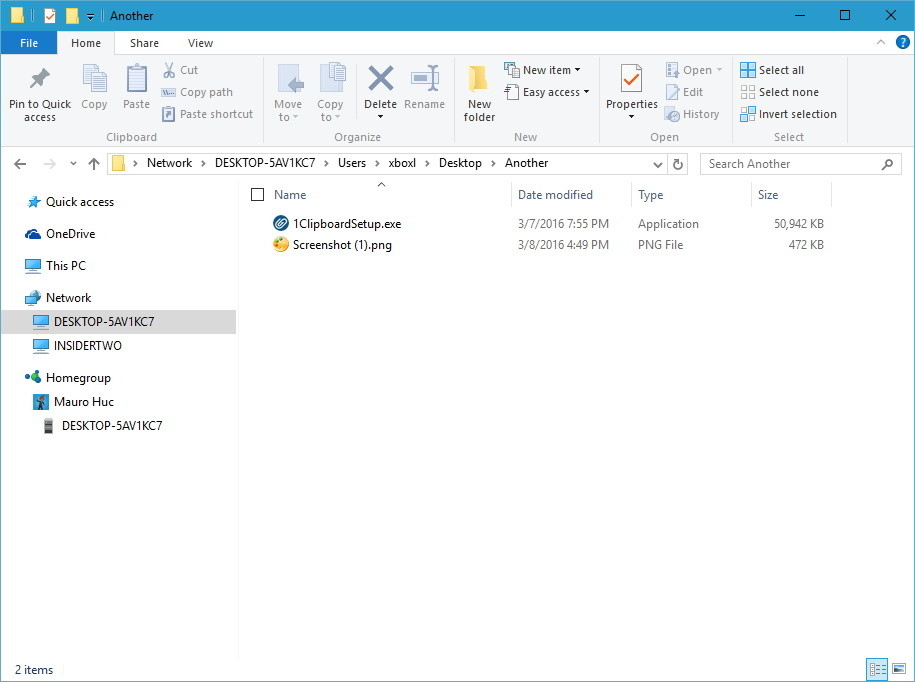
By default, all shared Homegroup folders on the Network are read-only. However, if you are using the same Microsoft account to access shared content on another computer, you will have the right to read and write.
Follow the steps below:
1. Right-click the folder you want to share.
2. Select Share with then click on Homegroup (view and edit).
9. Delete HomeGroup on Windows 10 PC
To delete the Homegroup on Winndows 10 computer, follow the steps below:
1. On the Homegroup interface, click the Leave the homegroup link .
2. Click Leave the homegroup .
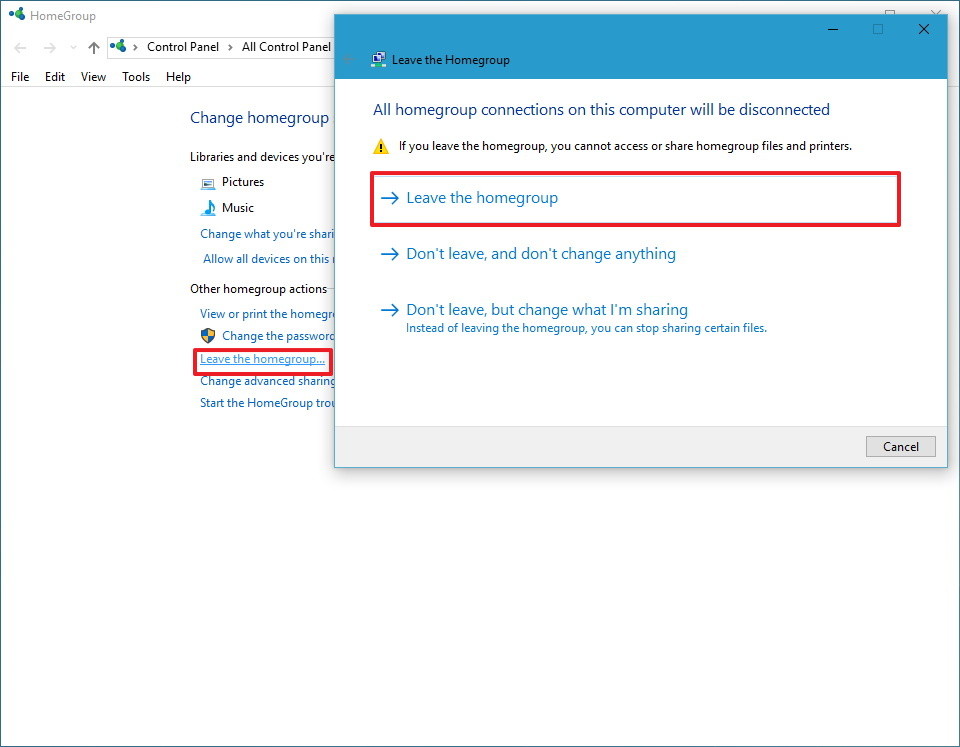
3. Click Finish to complete.
10. What if HomeGroup does not work properly?
If the HomeGroup fails, you first need to check if your computer is connected to the Network.
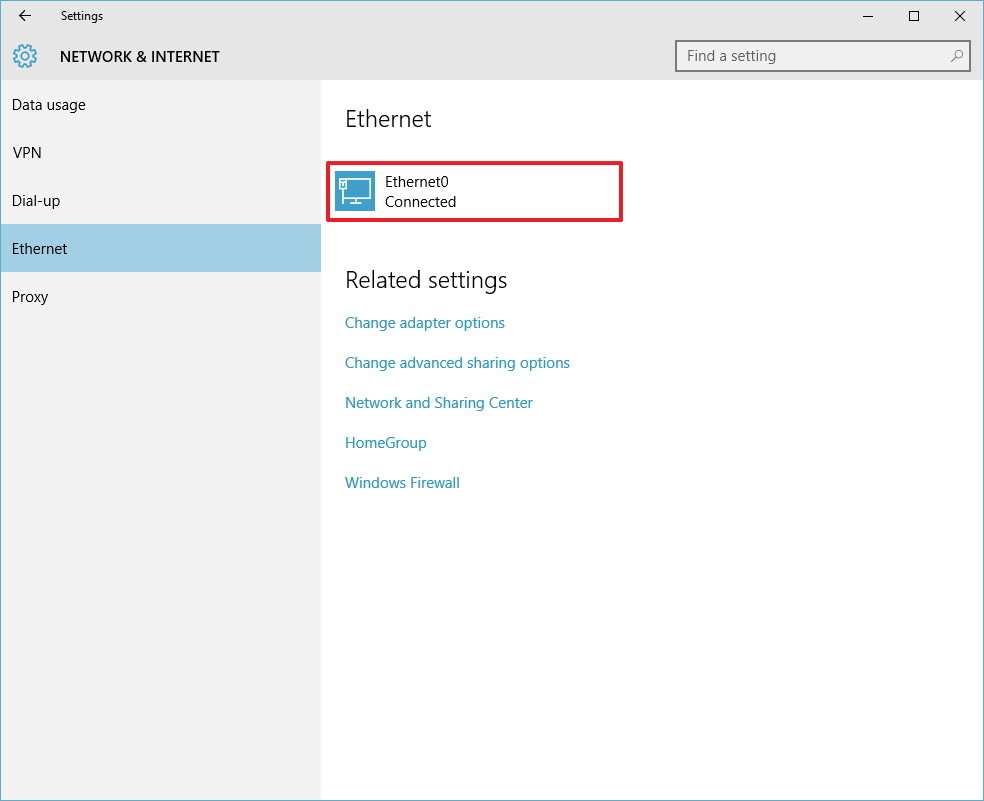
You can check by going to Settings => Network & t interne . Check Wifi or Ethernet (depending on your connection).
Often, when you restart or try to create or join your computer to HomeGroup, you can fix this problem again.
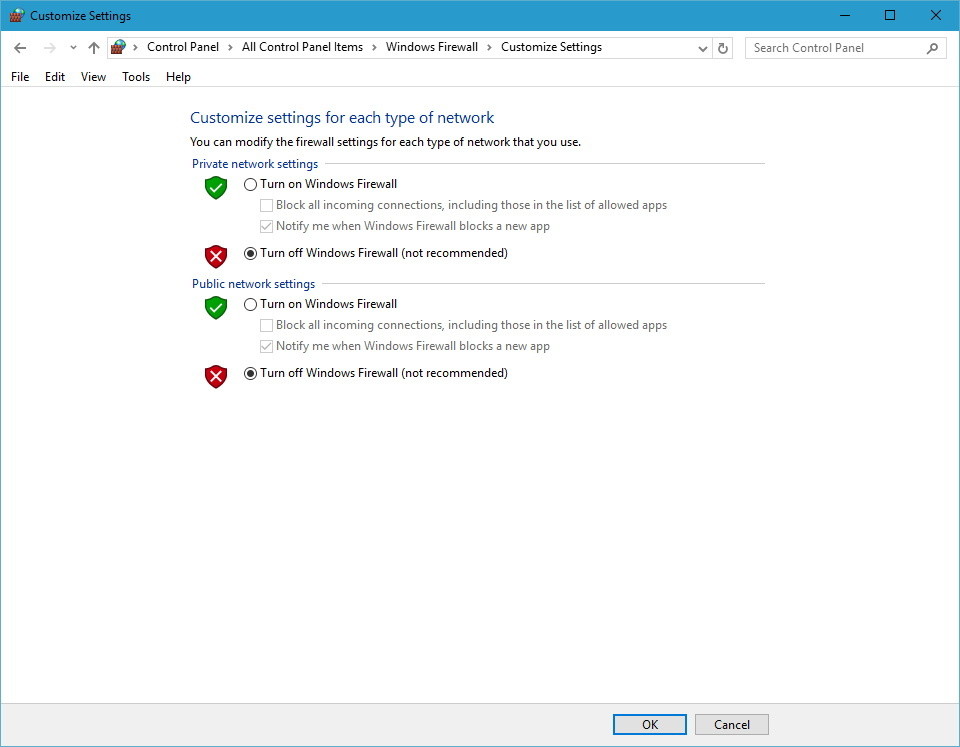
Also you can disable the Firewall on your computer. If you are turning on the Firewall, go to Control PanelAll Control Panel Items. Windows FirewallCustomize Settings then turn off the Firewall.
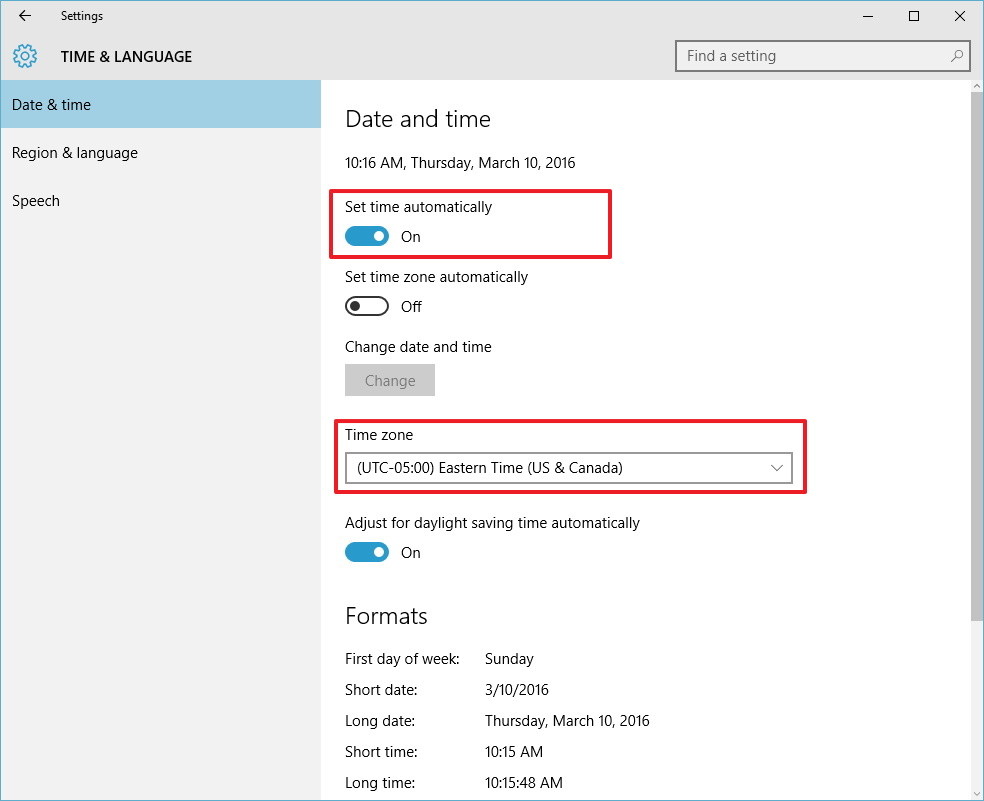
Sometimes the cause of the problem may be the HomeGroup installation. On Windows 10, go to Settings => Time & language and adjust the time if needed.
If there are 2 computers on the Network with the same name, you must change the name of a computer on Homegroup.
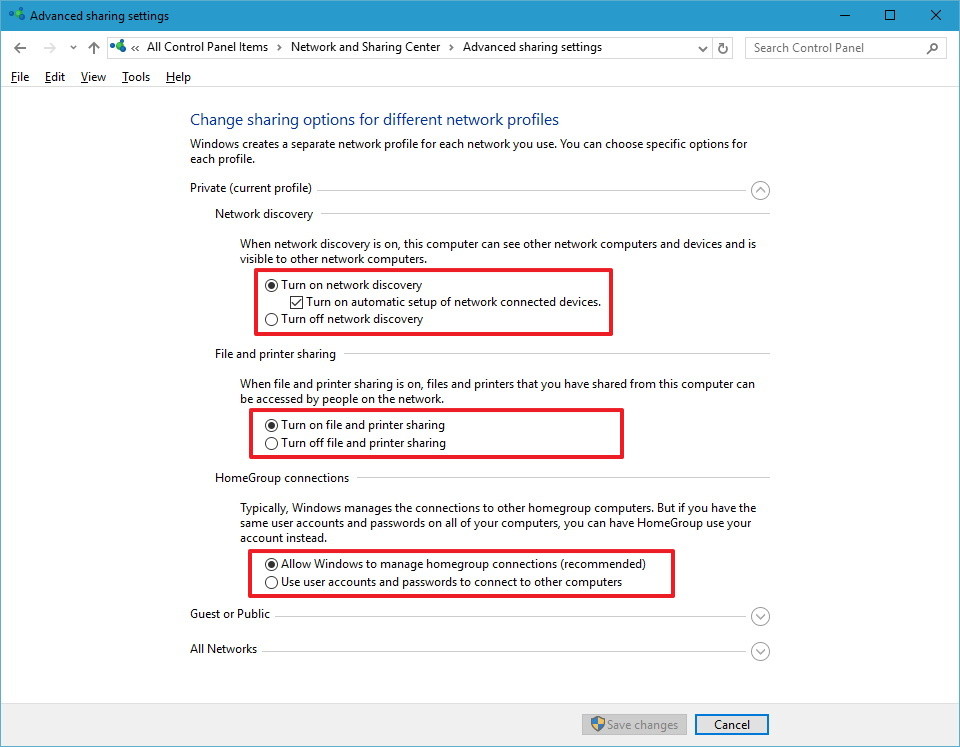
Ensure that Network discovery, File and printer sharing, and HomeGroup connections options are enabled on Private Network.
Simply go to Control PanelAll Control Panel ItemsNetwork and Sharing CenterAdvanced sharing settings and then enable those options.
If you still can't create or join a computer to HomeGroup, Microsoft also gives you a tool to fix basic errors.
On Windows 10, go to the Control PanelAll Control Panel ItemsHomeGroup then click on the Start the HomeGroup troubleshooter link and follow the steps on the screen to fix the problem.

Refer to some of the following articles:
-
Tips to customize Taskbar on Windows 10 effectively
-
How to get back 20GB of storage after the Windows 10 November update
-
Hidden features on Windows 10
Good luck!
Was this article helpful?
Your feedback helps us improve.
Related Articles
 How to replace Windows HomeGroup8 minutes read
 The basic difference between Windows 7 HomeGroup and Windows XP Networking6 minutes read
 What is HomeGroup? How to use and set up on Windows5 minutes read
 Connecting to the HomeGroup network, the home network in Windows 7.4 minutes read
 Hide and turn off the HomeGroup feature on Windows 73 minutes read
Reader Comments 0
Sign in with email or Google to join the discussion.