How to Add Permanently Delete Option to Windows 11/10 context menu
When you delete something on your Windows computer, it is moved to the Recycle Bin so you can restore it when needed. But many users do not like this feature, but they want what they delete to be permanently removed from the computer.
Of course, Microsoft also gives users the ability to permanently delete anything they want with the Shift + Delete keyboard shortcut . However, for even more convenience in this article TipsMake.com will show you how to add the Permanently Delete option to the context menu (right-click menu) on Windows 11/10.

To do this, you need to use the Registry Editor. However, before editing the Registry, you need to back up the Registry to reduce the risk if any problems occur.
Once you've backed up the Registry, follow these steps to add the Permanently Delete option to the context menu:
- You press the Win + R key combination to open Run then type regedit and then press Enter to open the Registry Editor .
- Click OK to confirm opening then go to the following location:
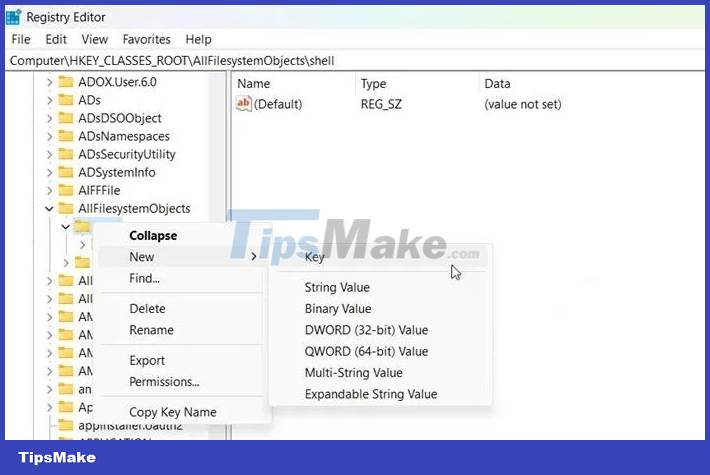
ComputerHKEY_CLASSES_ROOTAllFilesystemObjects- Expand AllFilessystemObjects , right-click the shell and select New > Key .

- Name the newly created key Windows.PermanentDelete.
- Right-click Windows.PermanentDelete and select New > String Value .
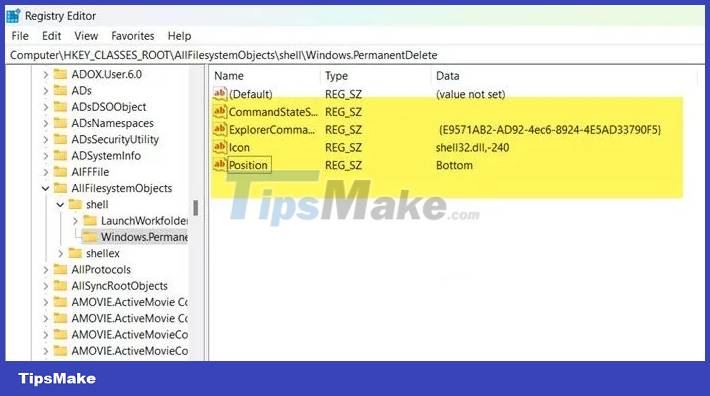
- Name the newly created value CommandStateSync.
- Now create a new String value by right clicking on Windows.PermanentDelete and selecting New > String Value .
- Name the newly created value ExplorerCommandHandler.
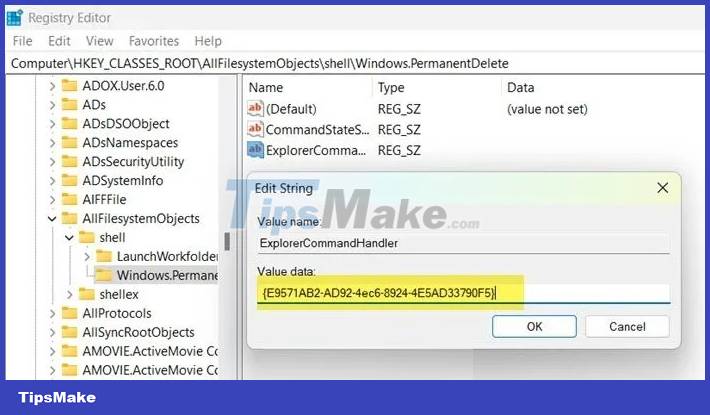
- Double-click ExplorerCommandHandler and then enter {E9571AB2-AD92-4ec6-8924-4E5AD33790F5} in the Value data box and then click OK.

- Continue creating a new String value by right-clicking on Windows.PermanentDelete and selecting New > String Value .
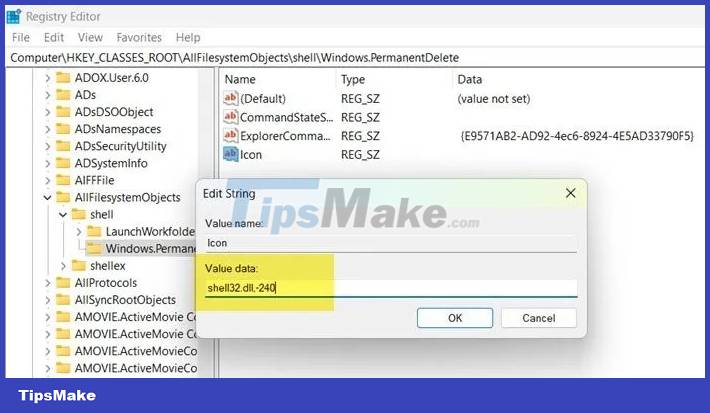
- Name the new value Icon and let its value be shell32.dll,-240 .

- The last value that we need to create is called Position. The way to create is still the same as the instructions above. The value of the Position value is Bottom.
Note : If you want the Permanently Delete option at the top of the context menu, then select Top instead of Bottom in the Position value.
Now you just need to close the Registry Editor and the Permanently Delete option has appeared in the context menu for you to permanently delete unnecessary files. However, use it carefully to avoid deleting the wrong file.
When you want to remove the Permanently Delete option, you just need to delete the entire Windows.PermanentDelete key in the Registry Editor.