How to delete Restore Previous Versions in the right-click menu
If you don't use the Previous Versions option, you can delete it. Here are the steps to remove the Restore Previous Versions option from the context menu in Windows.
Table of Contents
Steps to clear the Restore Previous Versions option
Follow the steps shown below to completely remove the Restore Previous Versions option from the File Explorer context menu.
1. Run dialog box with shortcut Win+ R.
2. Enter regedit and click OK to open Registry Editor.
3. Copy the link below.
HKEY_LOCAL_MACHINESOFTWAREMicrosoftWindowsCurrentVersionShell Extensions4. Paste it in the address bar of Registry Editor and click Enter.
5. Right-click on the Shell Extension folder . Select New> Key .
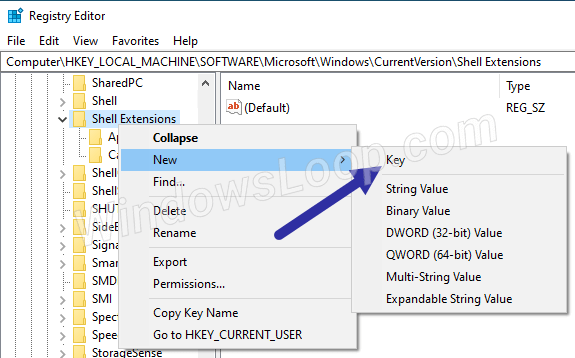 Select New> Key
6. Enter Blocked as the new folder name.
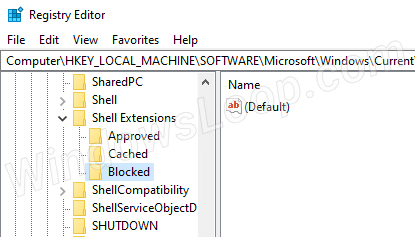 Enter Blocked as the new folder name
7. Right-click on the Blocked folder and select New> String Value .
8. Set {596AB062-B4D2-4215-9F74-E9109B0A8153} as the name for the new String Value .
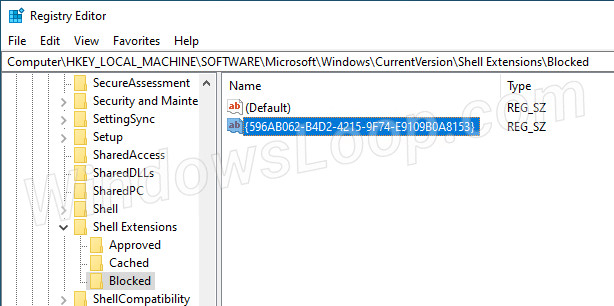 Set {596AB062-B4D2-4215-9F74-E9109B0A8153} as the name for the new String Value
9. Close Registry Editor.
Restart Explorer
1. Right-click on the Taskbar. Select Task Manager.
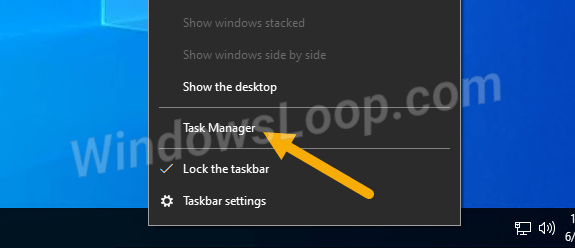 Select Task Manager
2. Go to the Process tab in Task Manager.
3. Select the Windows Explorer process and click Restart.
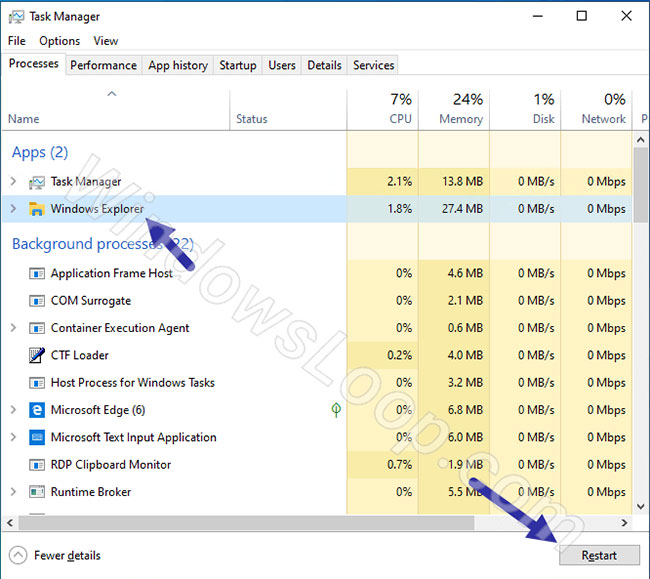 Select the Windows Explorer process and click Restart
4. Close Task Manager.
As soon as restarting explorer.exe (Windows Explorer), the changes will be applied immediately. You will no longer see the Restore Previous Versions option when you right-click a file or folder in File Explorer.
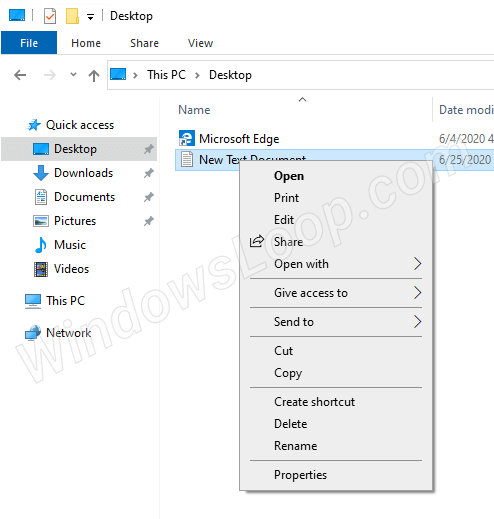 The Restore Previous Versions option no longer appears
Restore delete option
To restore the Restore Previous Versions option, all you have to do is delete the String Value.
Open Registry Editor and go to:
HKEY_LOCAL_MACHINESOFTWAREMicrosoftWindowsCurrentVersionShell ExtensionsBlockedRight-click on the value {596AB062-B4D2-4215-9F74-E9109B0A8153} and select Delete. Click Yes in the confirmation window and restart Windows Explorer. You will again see the Restore option in the right-click menu on each file and folder.
Was this article helpful?
Your feedback helps us improve.
Related Articles
 How to Add or Delete Items and Categories in the All Apps Screen of the Windows 8 Start Menu6 minutes read
 How to Restore Deleted Files in Windows XP3 minutes read
 How to delete and improve the right-click menu8 minutes read
 Customize and restore Start Menu Windows 10 by default2 minutes read
 How to use Backup and Restore on Windows 7?5 minutes read
 How to Do a System Restore5 minutes read
Reader Comments 0
Sign in with email or Google to join the discussion.