How to enable / disable the delete delete confirmation dialog box
To delete a file in Windows, all you have to do is press the key Delete. Windows displays a confirmation dialog when you try to delete a file permanently. This is how you can enable or disable it as needed.
Disable the delete confirmation dialog from Recycle Bin
The Recycle Bin has a dedicated option to enable or disable the permanently delete confirmation dialog. All you have to do is select a checkbox and you're done.
1. First, go to the desktop, right click on Recycle Bin and select Properties option .
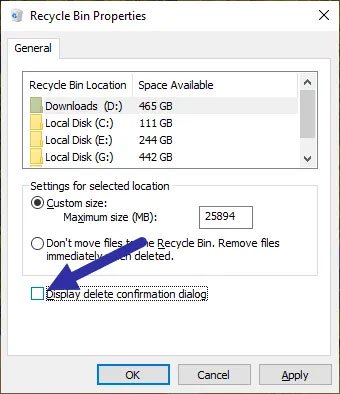
2. In the Properties window , clear the Display delete confirmation dialog box and click the Apply button > OK to save the changes.
 Deselect the Display delete confirmation dialog box
 It's done! From now on, you will not see a delete confirmation dialog.
Reactivate delete confirmation dialog:
If you want to enable the confirmation dialog, simply select the checkbox you deselected in step 2.
Turn on / off through Group Policy Editor
Occasionally, even after you uncheck the above option, Windows may still display a delete confirmation dialog box. In those cases, you must use the Group Policy Editor to turn off the dialog. The implementation is quite easy.
1. Open the Start menu , search Edit Group Policy and click the result to open Group Policy Editor .
2. After opening the Group Policy Editor , navigate to the following folder by expanding the folder tree on the left panel:
User Configuration> Administrative Templates> Windows Components> File Explorer
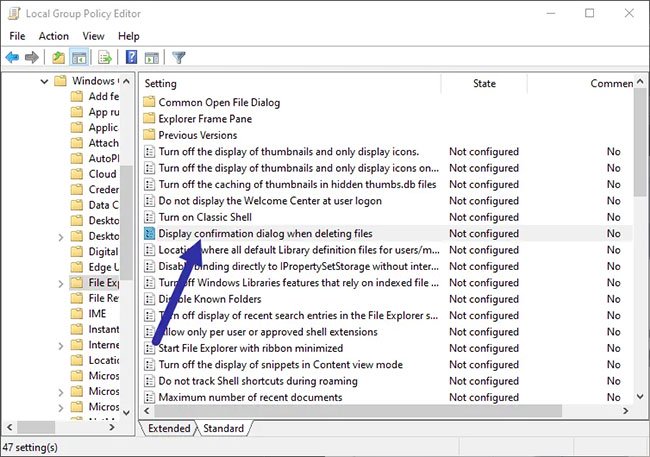
3. On the right, double-click the Policy Display confirmation dialog when deleting files .
 Double click the Policy Display confirmation dialog when deleting files
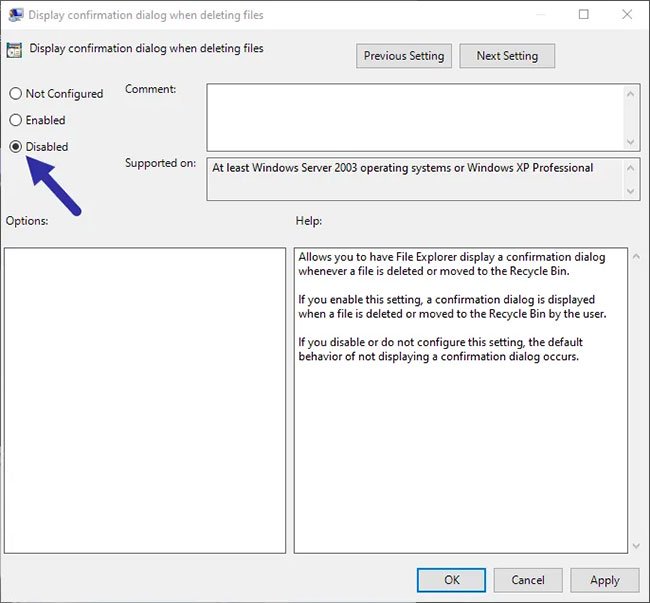
 4. In the Policy Properties window , select the Disabled option and click the Apply button > OK to save the policy changes.
 Select the Disabled option
 After changing the policy, restart Windows or execute the command gpupdate /forcewith admin rights. This action will apply the policy to the Windows system. From now on, you will no longer see the confirmation dialog.
If you want to turn the dialog back on, open the Policy Properties window and select the Not configured or Enabled option , and then restart Windows.
You should read it
- ★ 25 Free File Shredder software deletes security data for computers
- ★ Delete files that cannot be deleted on Windows using the following software
- ★ Learn about permanent ice cold
- ★ Instructions for temporarily locking, permanently Facebook iPhone / iPad
- ★ How to Add Permanently Delete Option to Windows 11/10 context menu