Cursor AI: User Guide with 10 Practical Examples
Cursor AI is an AI-powered code editor designed to make software development easier..
People often copy and paste code into ChatGPT to ask why it's not working, to edit the code, or simply to have ChatGPT explain it to them. However, switching between a code editor and ChatGPT can be quite time-consuming.
AI editors address this problem by directly integrating large language models (LLMs) into the code editor. By integrating directly with the code, LLMs gain more context about the entire project, which significantly improves their performance.
Cursor AI offers AI-powered programming capabilities, intelligent code suggestions, and integration with various development tools.
What is Cursor AI? What can it do?
Cursor AI is an AI- powered code editor designed to make software development easier. As a development version of Visual Studio Code (VS Code), it retains the user-friendly interface and extensive ecosystem of VS Code, making it easy for developers already familiar with the platform to switch.
Cursor AI integrates advanced AI capabilities through OpenAI's ChatGPT and Claude. This integration enables Cursor AI to provide intelligent code suggestions, automatic error detection, and dynamic code optimization.
Key auto-completion features
Cursor provides auto-completion and code prediction features:
- Auto-completion and code prediction : Cursor provides auto-completion functionality that predicts multi-line edits and adjusts based on recent changes.
- Code generation : Based on recent changes, Cursor predicts what you want to do next and suggests appropriate code.
- Multi-line editing : It may suggest edits that span multiple lines.
- Smart rewriting : The editor can automatically correct and improve code, even when we type carelessly.
- Pointer prediction : Predicts the next cursor position, allowing for seamless navigation within the source code.
Chat features
Cursor also integrates advanced chat features to facilitate better interaction:
- Responding to source code : Ask the Cursor for the source code, and it will search through the files to provide the appropriate answer.
- Code references : References to specific blocks of code or files, integrating them into the context of queries.
- Image support : Drag images into the chat or use buttons to add visual context.
- Web search : Get the latest information from the Internet directly into code queries.
- Instant implementation : Incorporate code suggestions from live chat into your source code with just one click.
- Document integration : Reference common libraries and add your own documentation for quick access.
How to install Cursor AI
Cursor AI provides installation files for Linux, Windows, and MacOS, which can be downloaded for free from their website.

To install on Windows and macOS, download it from their homepage and install the downloaded file like any other program.
On Linux, it's provided as an AppImage file. Before executing it, you need to grant it execute permissions using the command:
chmod a+x cursor_2.6.14_x86_64.AppImageThen, execute it using the command:
./cursor_2.6.14_x86_64.AppImageYou may need to replace version 0.40.3x86_64 in the commands above, depending on the version downloaded. The current version, as of March 2026, is 2.6, but the naming convention may vary between systems (e.g., cursor_2.4.46_arm64.deb on macOS or Linux). For further instructions on how to install AppImage files, see their website .
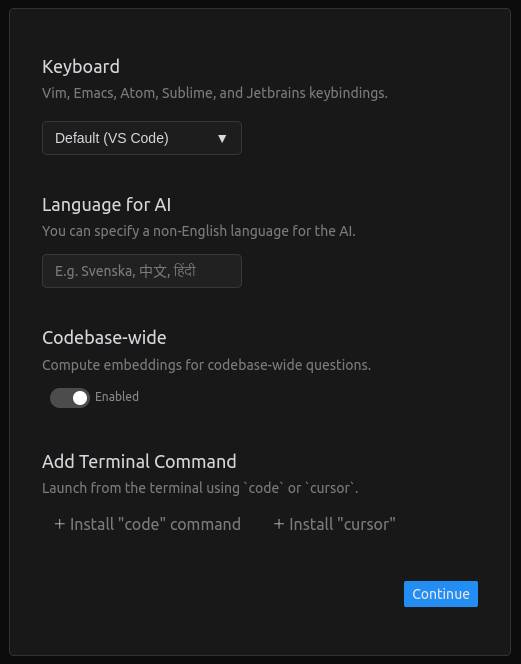
- Keyboard : This option allows you to configure keyboard shortcuts. By default, it uses VS Code shortcuts; this should only be used if you are familiar with another code editor in the list.
- Language for AI : Here you can choose to use a language other than English to interact with the AI.
- Codebase-wide : Enabling this option allows the AI to understand the context of the entire codebase.
- Add terminal command : If installed, these commands allow the Cursor AI editor to run from the terminal.
10 Use Cases for Cursor AI
This guide will provide keyboard shortcuts on macOS using the Cmd key ⌘. The shortcuts are similar if you use Cursor on Windows or Linux, except you use the Ctrl key instead.
Generate code directly
Use the shortcut Cmd + K to open the code generator directly. This will open a small prompt window where you can type a prompt to generate the code:

To generate code, type a prompt and then click the Generate button :

This will generate code, and we add it to our project by clicking the Accept button .

This case uses the cloude-3.5-sonnet model. We can choose a different model using the model selector drop-down menu:

Interact with existing code
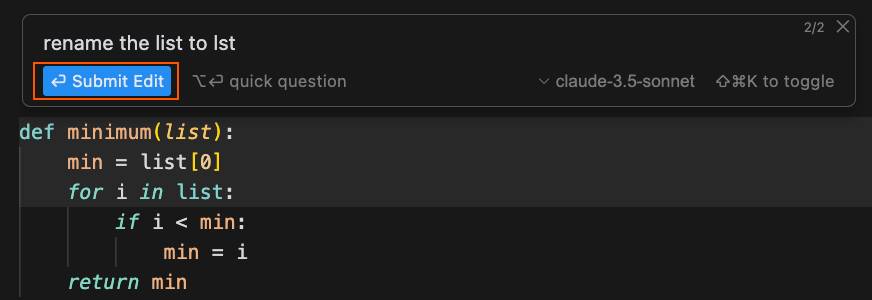
You can also use the inline chat window to interact with existing code by selecting the relevant code before using the Cmd + K shortcut . This can be used to make changes to the code, such as refactoring, or to ask questions about the code. After typing the prompt, click the Submit Edit button to receive the changes.
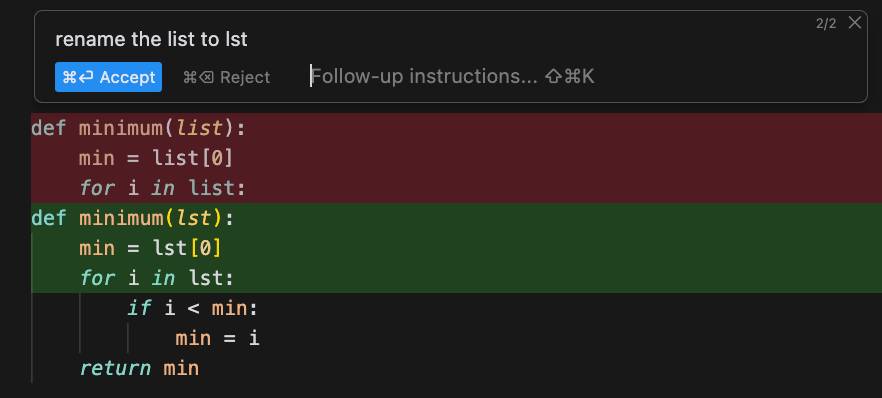
Code changes within the Cursor are displayed as diffs. Red lines represent lines that will be removed by the changes, while green lines represent new changes that will be added:
Ask questions about the existing code.
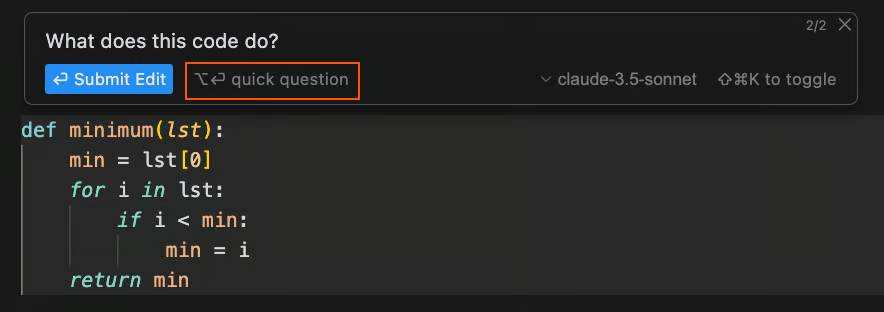
Similarly, we can ask questions about a piece of code by selecting it and using the shortcut Cmd + K. If you need to ask a question, click the quick question button to submit it.
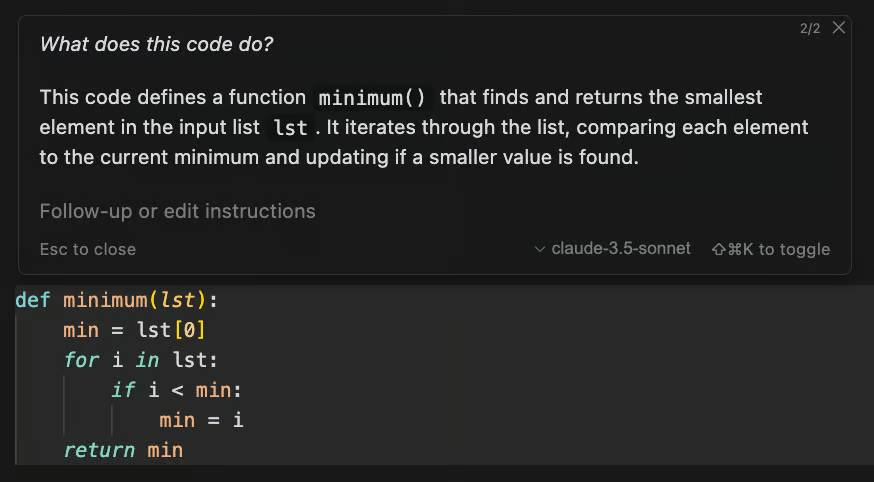
After you submit your question, the system will generate the answer and display it in the following way:
Auto-completion with the Tab key
When writing code, Cursor will suggest completed code snippets generated by AI. Similar to traditional code auto-completion, we can use the Tab key to integrate these suggestions into our code.
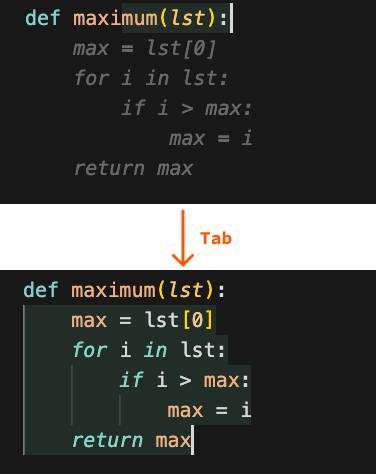
For example, let's say you start implementing a function called `maximum()`. The Cursor will recognize our intention and suggest a suitable implementation. By pressing the Tab key, we can add the suggested code:
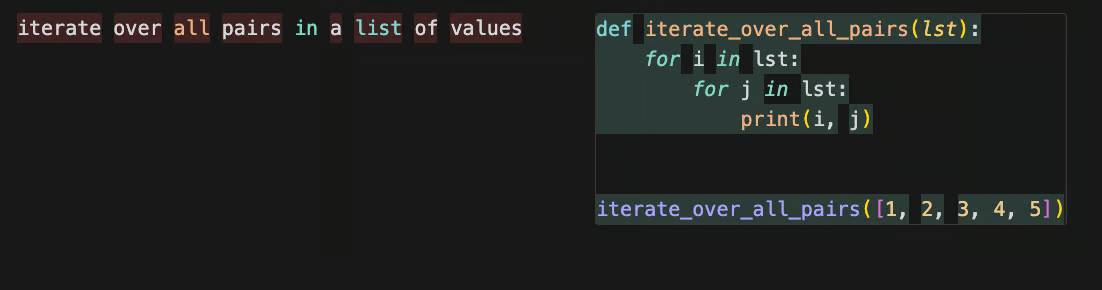
The auto-completion feature also works with code written in natural language. For example, if you want to create a double for loop to iterate through all pairs in a list, simply describe this in plain text. The Cursor will then provide a corresponding auto-completion suggestion, which can be integrated by pressing the Tab key.
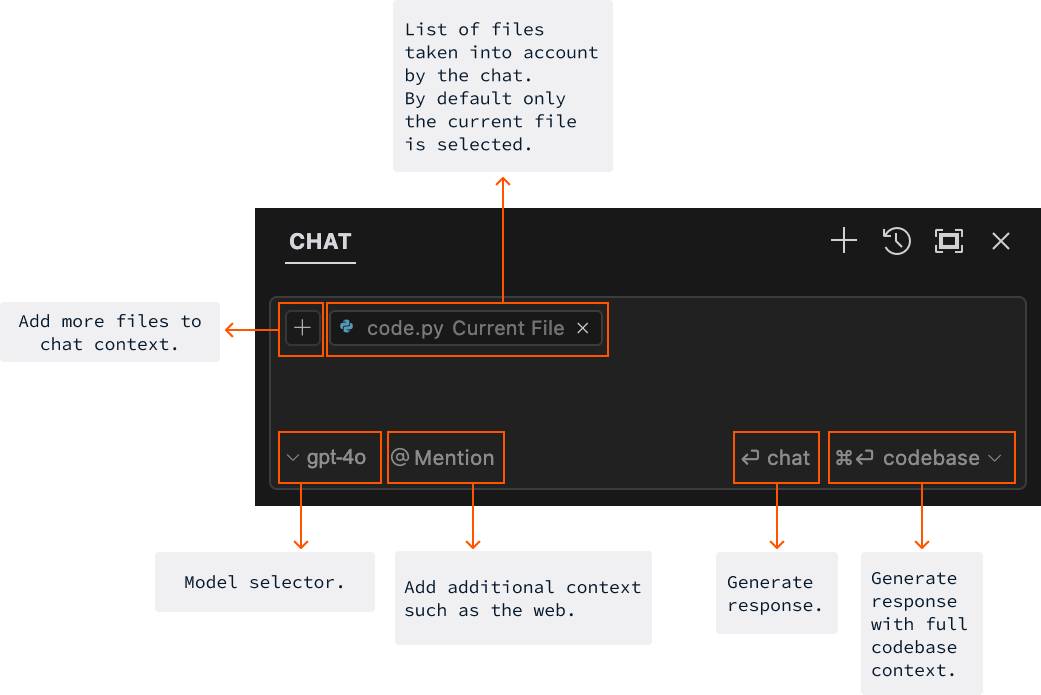
Overview of the chat interface
To open the chat window, use the shortcut Cmd + L. The chat window is more flexible than the live code generator, as it allows us to not only generate code but also ask questions. Here's an overview of the chat interface:
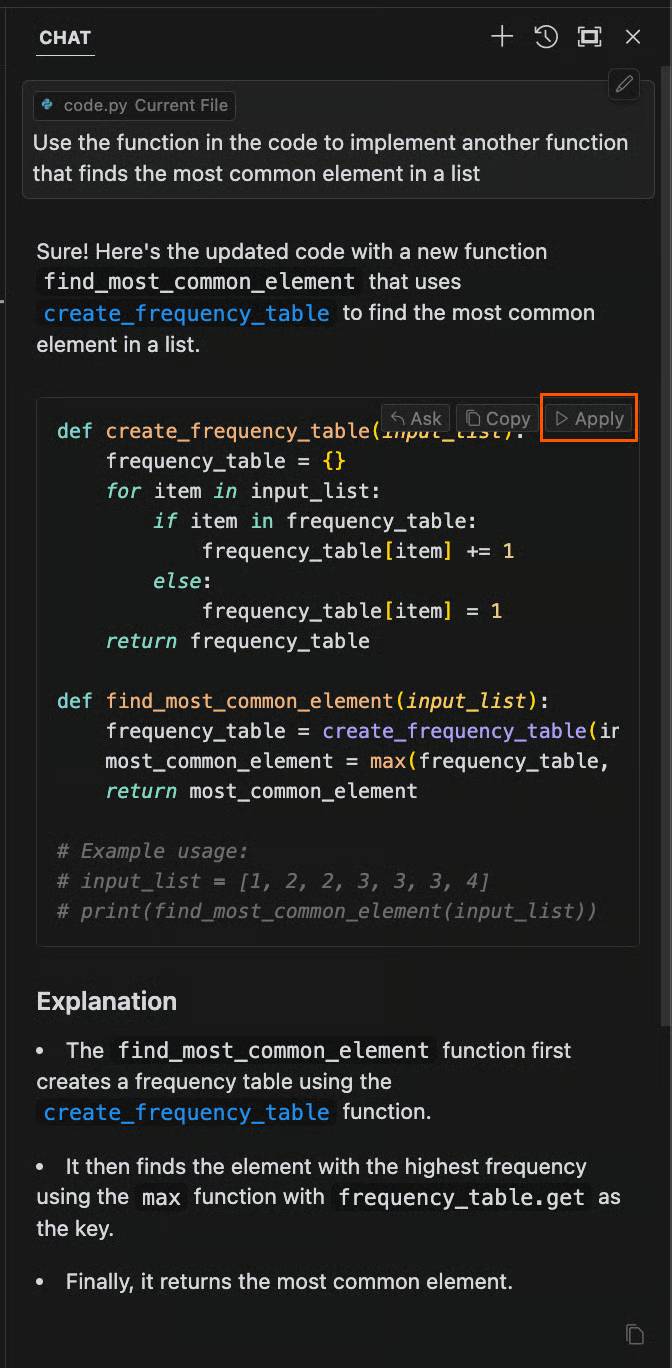
Generate code using chat.
Similar to generating code via live chat, we can also generate code using the Chat feature. Code generated during a chat can be integrated into the project by clicking the Apply button in the upper right corner of the code window.
Enhance query context with @
Perhaps the most important feature of the chat window is the @Mention option. This option allows us to provide additional data for the AI to generate a response. This ranges from simple files and folders to web searches or granting the AI access to a GitHub repository.
For example, you can use @Web to allow AI to search for answers on the web.

Remember that in some cases, sharing entire source code or private GitHub repositories with AI can cause problems. Be cautious about what you share with AI and avoid sharing sensitive or private data.
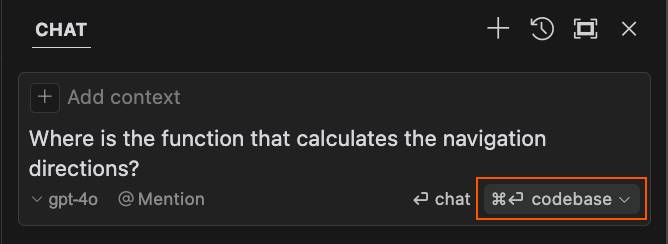
Question about the entire source code
One of the most useful features when working on large projects is the ability to quickly find a piece of code by asking questions about the entire source code. For example, let's say you want to locate a function in a project that calculates navigation directions in an application. With Cursors, you can easily locate it by describing the function's functionality:
Note that in this case we're using the codebase option. Although for some reason the Cursor doesn't display the actual code, clicking on the code box still opens the correct file and scrolls to the function you're looking for:
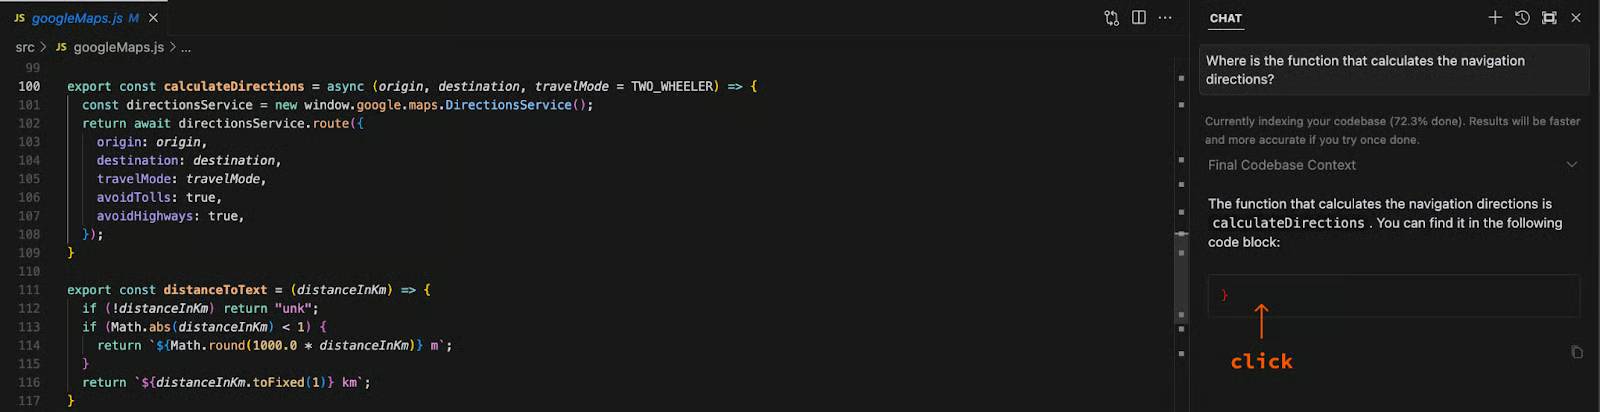
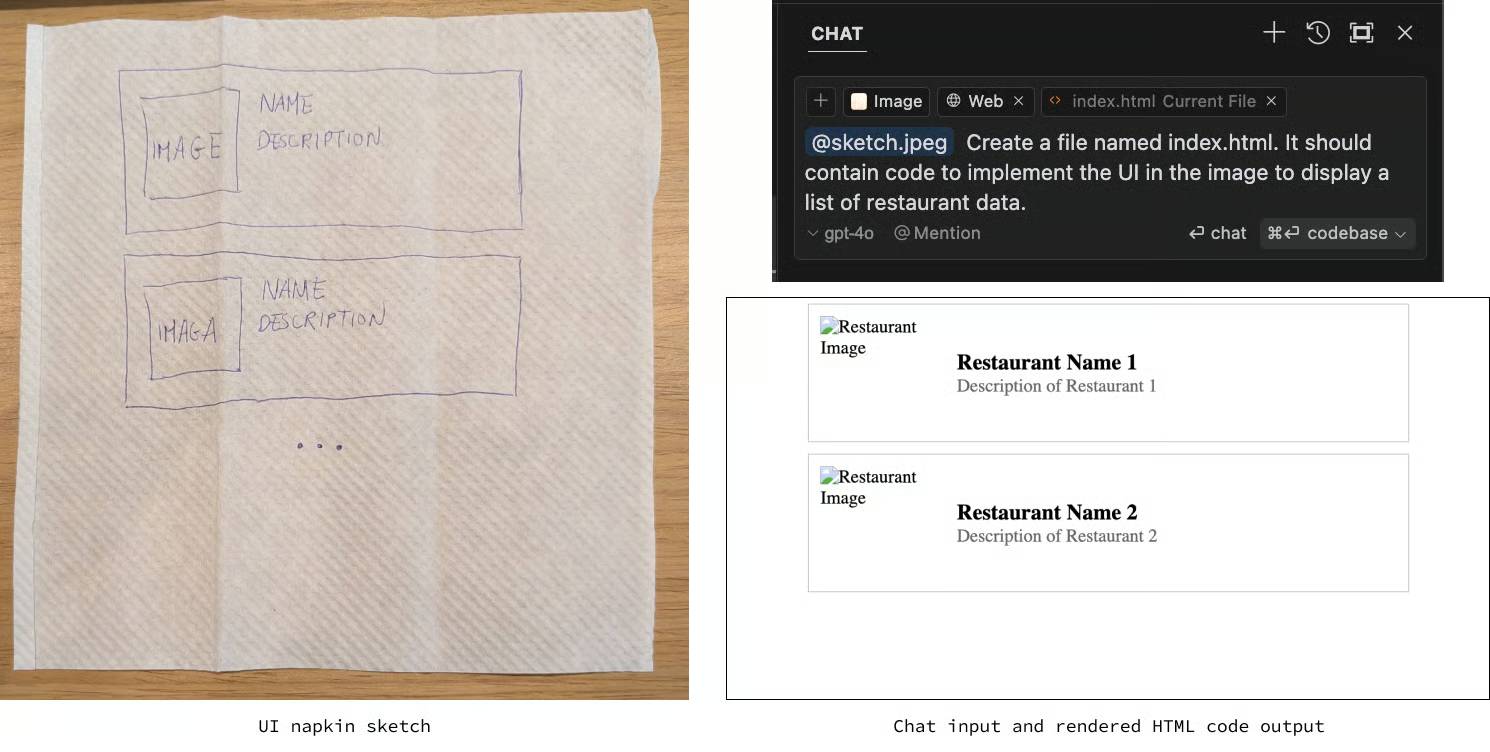
Image support
Chat Cursor also supports image import. For example, you can sketch out a user interface design for a website and ask it to generate the HTML and CSS code for that design. To add an image, you can drag and drop it into the chat window.
Add documents
One very useful feature of Cursor AI is the ability to add document references. This is especially helpful for lesser-known or private libraries where the documents may not have been used in the AI training process.
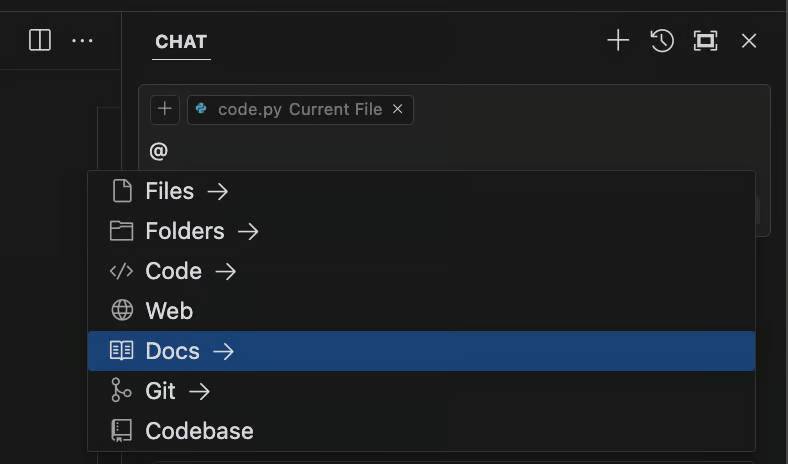
To add a document item, use the @ symbol and then select Docs from the drop-down menu:
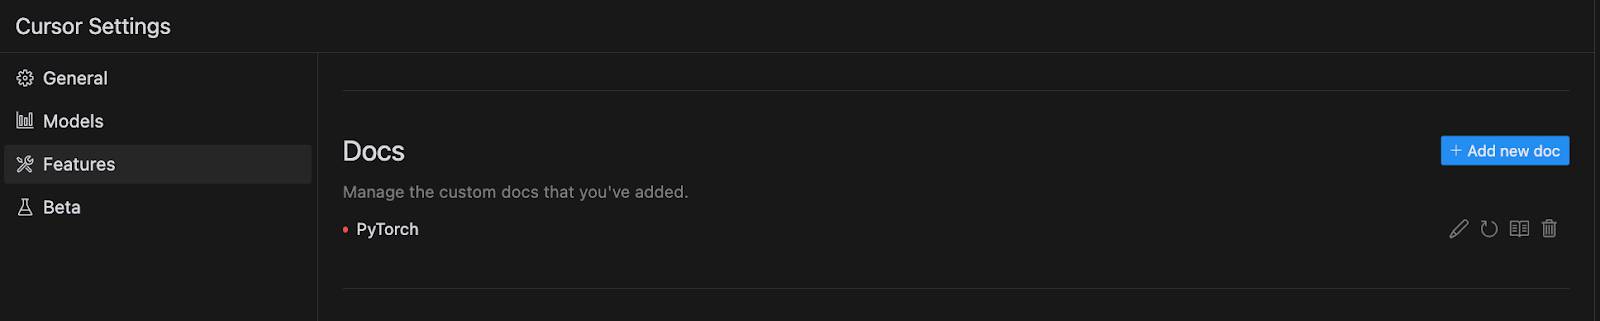
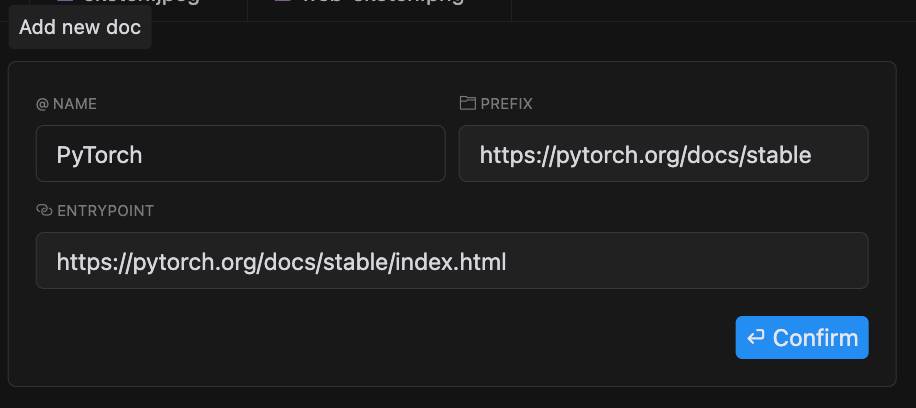
This will open a window prompting you for the document URL. Let's add a PyTorch document as an example:

After inserting the URL, you can name the document item. In this case, we use PyTorch. Then, you can use this name to reference this document in the chat prompt using @PyTorch .
You can also manage references in the Features tab from Cursor settings :