Table of Contents
Cursor is based on the VS Code codebase and supports many familiar editor extensions. You can install an extension from the Extensions panel, but you should verify the publisher, permissions, and maintenance status before allowing it to run against your code or external accounts.
Install an extension from the marketplace
- Open the Extensions panel by selecting the extensions icon or pressing Ctrl + Shift + X on Windows/Linux or Cmd + Shift + X on macOS.
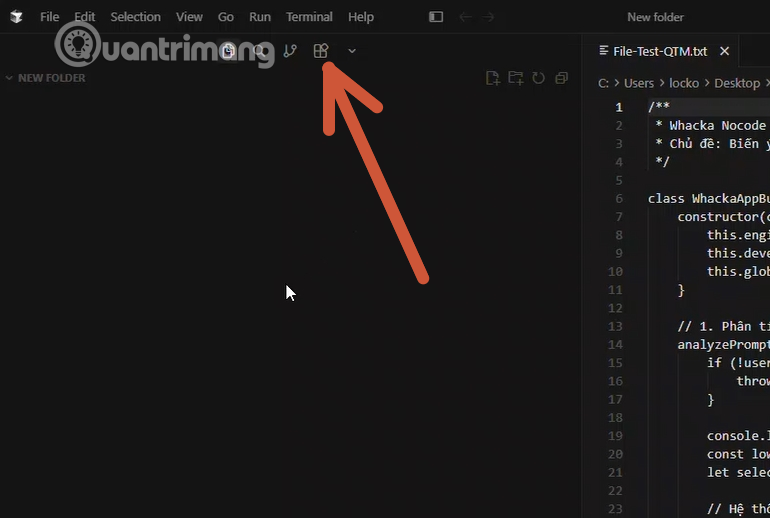
- Search for the exact extension name or the capability you need. Compare the publisher name, description, version history, installation count, and support links to avoid similarly named packages.
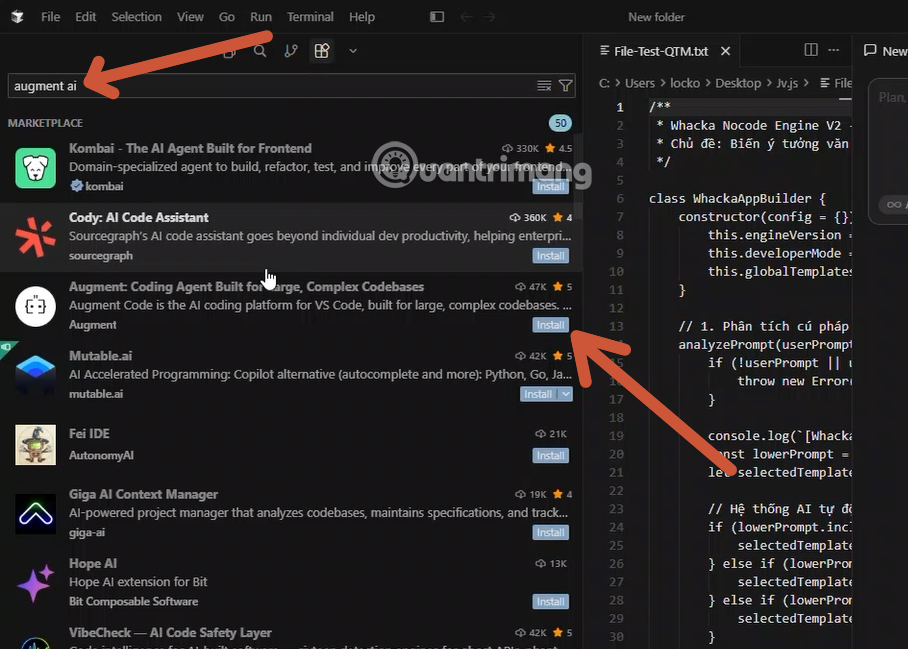
- Open the details page and select Install. Reading the page first is safer than installing directly from the result list.
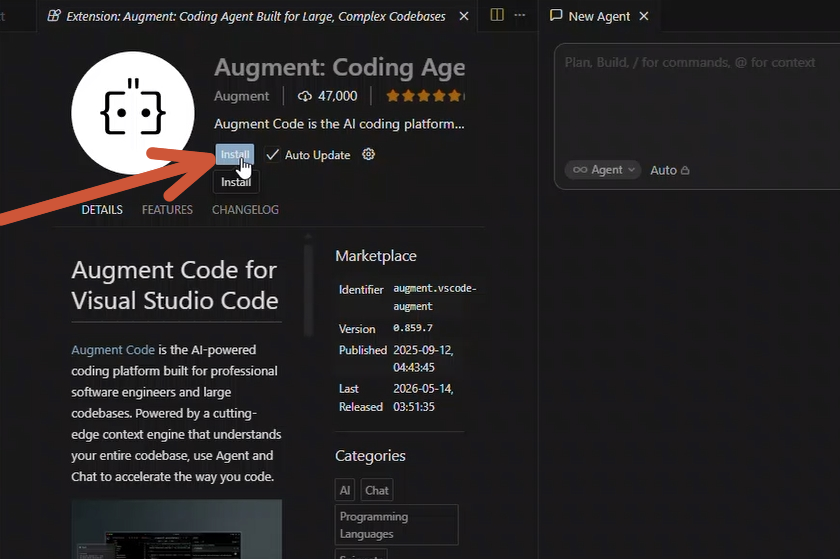
Review publisher and external-access prompts
If Cursor asks whether you trust the publisher, confirm that it is the expected developer. Choosing Trust Publisher & Install allows code from that publisher's extension to run in the editor.
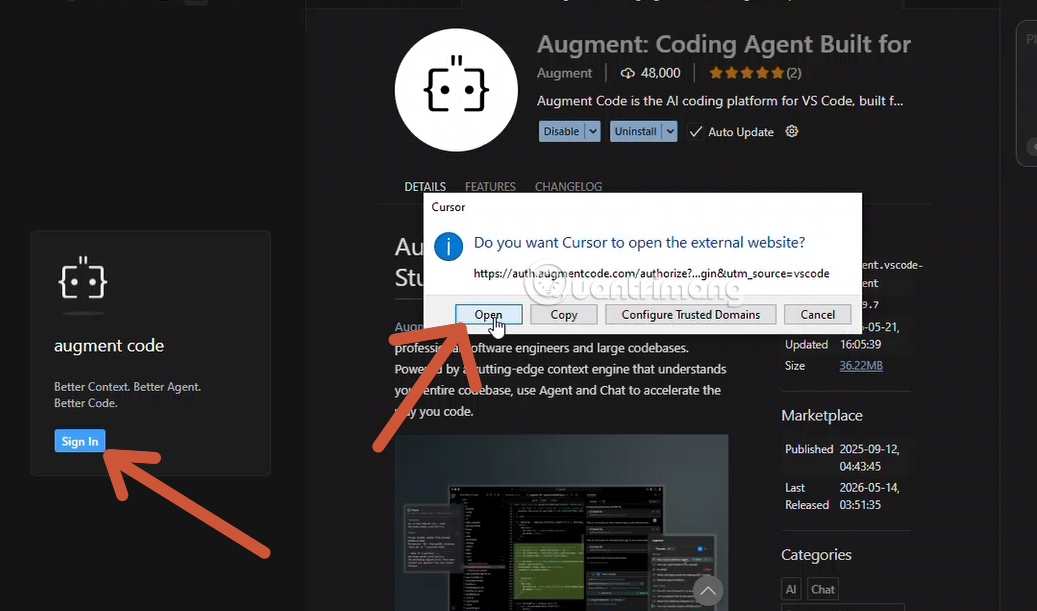
An extension that uses a cloud service may ask Cursor to open an external website. Continue only if the destination domain belongs to the service you intended to connect. Complete sign-in in the browser and review the account access being requested.

Confirm the extension is active
- Return to the extension details page and check that it shows as installed and enabled.
- Reload the editor if Cursor requests it.
- Open the Command Palette and search for the extension's commands.
- Check the extension's Output or Logs channel if activation fails.
Disable or uninstall an extension
- Open the Extensions panel and select the installed extension.
- Choose Disable to test Cursor without it, or Uninstall to remove it.
- Reload Cursor if prompted.
- If the extension connected to an external account, revoke that connection separately in the service's account settings when it is no longer needed.
Import extensions from VS Code
If you are moving from VS Code, Cursor can import extensions together with settings, themes, and keybindings. Open Cursor Settings, go to General > Account, and use the VS Code Import option. Review the imported list afterward; not every extension is necessary or fully compatible.
Cursor periodically rebases on VS Code but may use a slightly older VS Code version for stability. If an extension reports an engine-version conflict, check its requirements or install a compatible release rather than forcing it.
For the current migration process, see the Cursor VS Code migration documentation.
Extension security checklist
- Prefer a known publisher and an actively maintained extension.
- Review settings that upload code, telemetry, prompts, or repository context.
- Do not grant workspace trust to an unfamiliar repository only to activate an extension.
- Use separate profiles when testing high-permission or experimental tools.
- Remove extensions that you no longer use to reduce attack surface and editor overhead.
Related Articles
 How to Add a GitHub MCP Server to Cursor9 minutes read
 How to Use Claude in Cursor: What You Need to Know7 minutes read
 What Is Plan Mode in Cursor?8 minutes read
 Cursor AI: User Guide with 10 Practical Examples13 minutes read
 Is Cursor Worth It? AI Coding Editor Review for 202614 minutes read
 Instructions on Setting up Rules in Cursor8 minutes read
Reader Comments 0
Sign in with email or Google to join the discussion.