Instructions on how to add a GitHub MCP Server to Cursor
This guide provides detailed instructions on how to add an MCP Server to Cursor to connect AI with real-world data, enabling smarter and more efficient programming..
Model Context Protocol ( MCP ) is becoming the new gold standard in extending the capabilities of AI editors. Instead of just working within existing code files, adding an MCP server to Cursor allows AI to reach out to external tools like Google Search, internal databases, Slack, or even control hardware devices. This article will guide you step-by-step on how to integrate this powerful feature into Cursor.
1. What is an MCP Server and why is it important for Cursor?
MCP (Model Context Protocol) is an open protocol that allows large model languages (LLMs) to interact securely with external data sources and tools. In Cursor, MCP acts as a "bridge" connecting:
- Connecting to real-world data: AI can read data directly from systems like GitHub, Notion, or Jira.
- Expanding capabilities: AI can not only write code but also execute commands such as searching for documents online (via Brave Search) or sending notifications.
- Deep automation: With MCP, Cursor AI can automatically check the state of local servers or query SQL to understand the database structure before writing code.
Besides connecting MCP to Cursor, you can also consider connecting the MCP Server to Claude if you are using this AI.
2. Detailed instructions on how to add an MCP Server to Cursor (Updated 2026)
To begin, you need to have an MCP server available (usually a command npxor a URL). Follow the specific steps below:
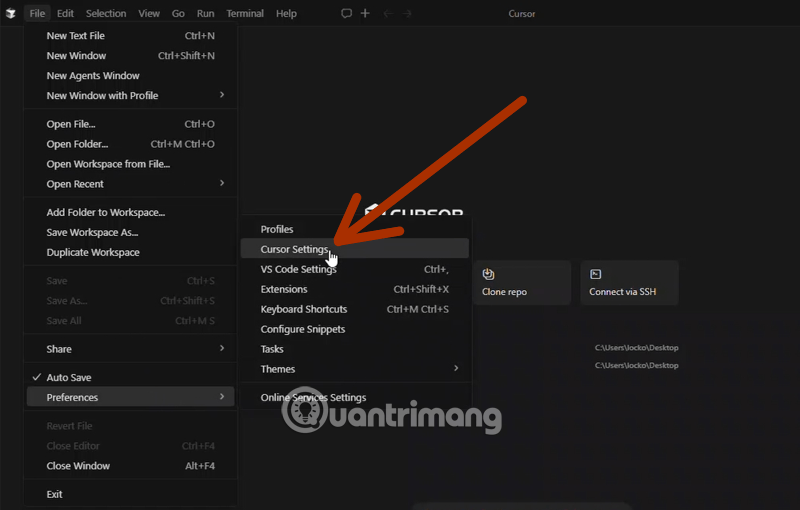
Step 1: Access the system control panel.
Open the Cursor application on your computer. On the top toolbar, click File (for Windows) or Cursor (for macOS), find Preferences , and select Cursor Settings .
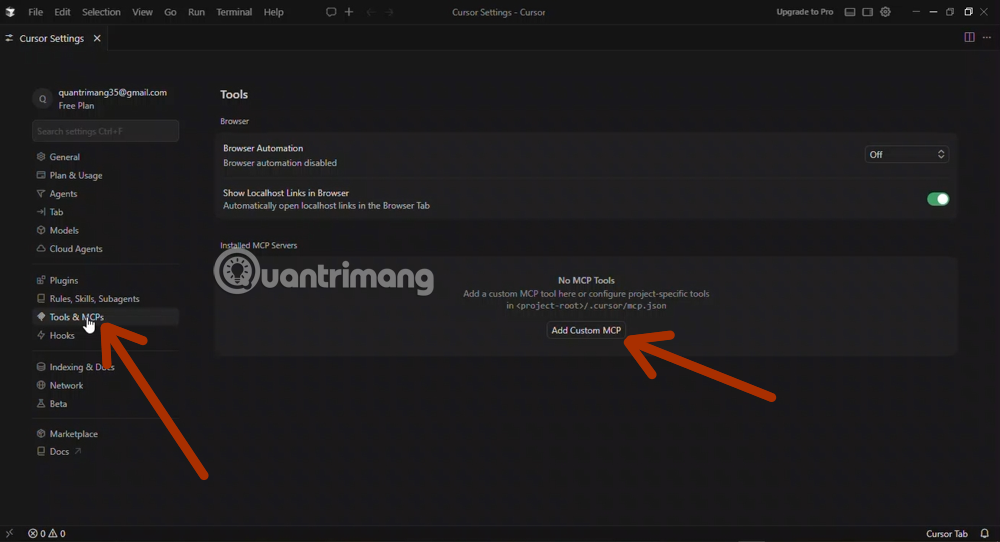
Step 2: Find the tool management tab.
In the settings window that appears, you will see a menu bar on the left. Click on the Tools & MCP tab (in the latest updates, it may be briefly displayed as MCP ).
Here, click the + Add Custom MCP (or New MCP Server ) button. A configuration window will appear for you to fill in the information.
Step 3: Server configuration details - Add a new MCP server
This is the most important step; you need to fill in the following parameters accurately:
Type (Connection type):
- stdio: Used for tools that run directly on your computer (local tools). Often uses commands like `stdio.co.uk`
npx,python`stdio.co.uk`, or the path to the executable file. - SSE/HTTP: Used for remote servers via URL.
- Name (Illustrative name): Choose a name that is easy to understand, for example:
github-searchorpostgres-helper.
Command/URL:
- If stdio is selected , enter the command to execute. For example:
npx @modelcontextprotocol/server-github. - If you choose SSE , paste the URL link of that server.
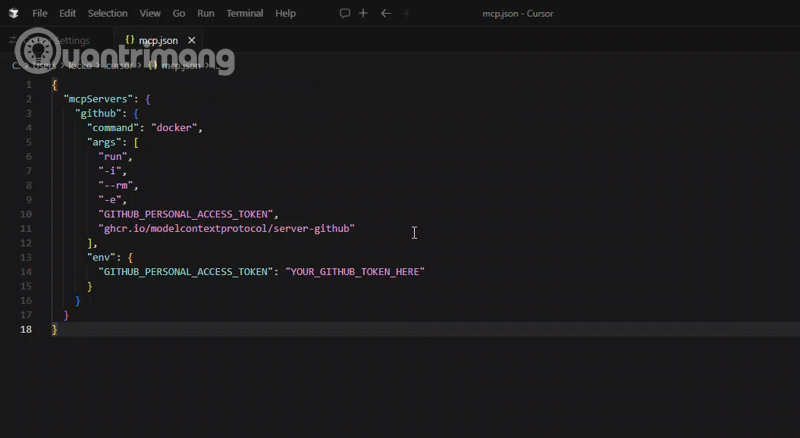
You can copy this code and paste it into your Cursor configuration file (usually a file mcpServers.jsonor in your IDE settings):
{ "mcpServers": { "github": { "command": "docker", "args": [ "run", "-i", "--rm", "-e", "GITHUB_PERSONAL_ACCESS_TOKEN", "ghcr.io/modelcontextprotocol/server-github" ], "env": { "GITHUB_PERSONAL_ACCESS_TOKEN": "YOUR_GITHUB_TOKEN_HERE" } } } }If you don't want to install Docker because it slows down your system, you can use the popular method of running it via npx (Node.js) as follows; remember to install Node.js first.
"github": { "command": "npx", "args": [ "-y", "@modelcontextprotocol/server-github" ], "env": { "GITHUB_PERSONAL_ACCESS_TOKEN": "YOUR_TOKEN_HERE" } }Paste the token you obtained from Github into the "YOUR_GITHUB_TOKEN_HERE" field and close the MCP window. Then, return to check the MCP.
Step 5: Check the connection status
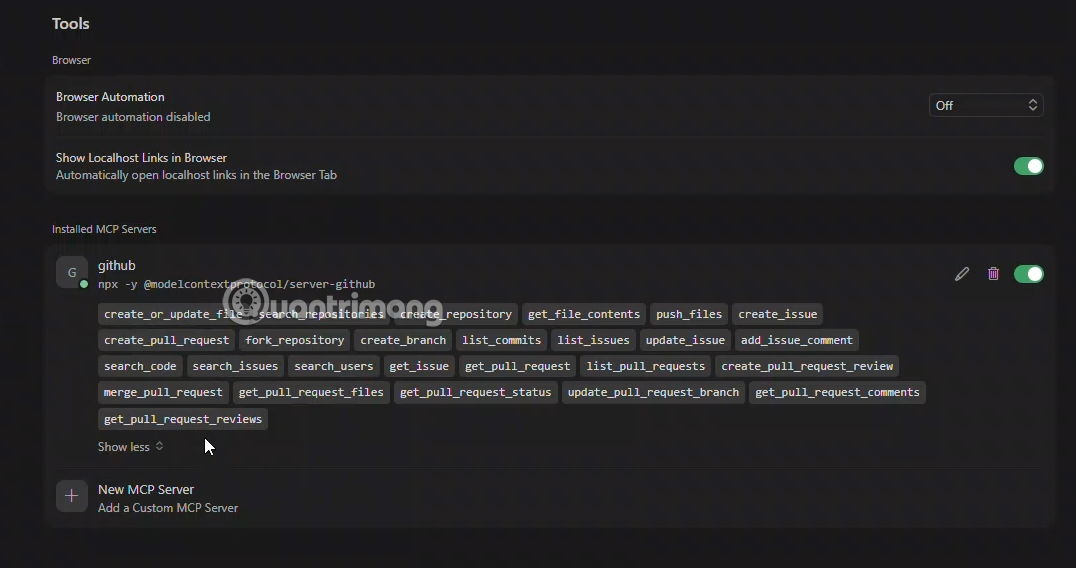
After clicking save, observe the list of added MCP servers. A green dot next to the server name indicates a successful connection and readiness. If it appears red, check your internet connection or command syntax.
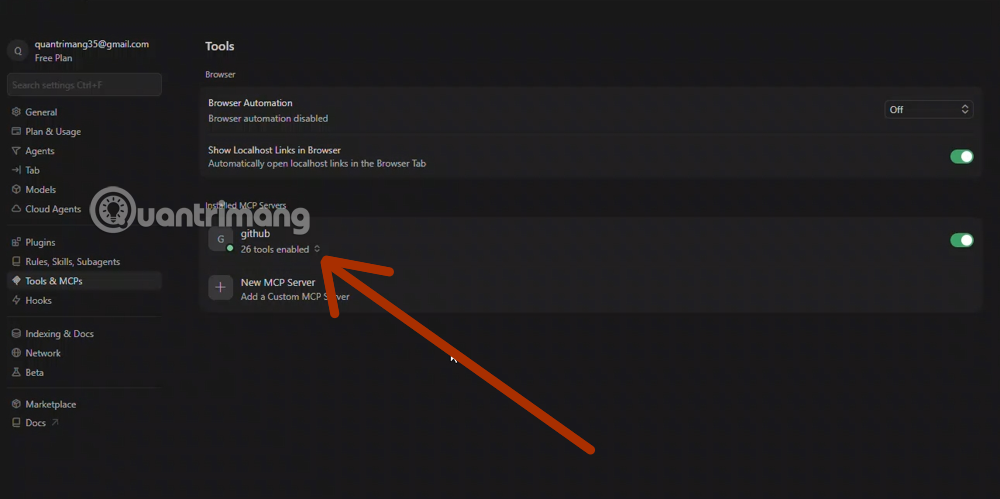
A list of "tags" will appear, and these are all the tools that GitHub's MCP Server provides to Cursor after a successful connection.
3. Managing MCP Server: Global vs. Local Folder
Cursor 2026 offers exceptional flexibility in managing the scope of MCP activities:
- Global MCP: Configured in Cursor's general settings. These tools will appear in every project you open. Suitable for general document search or lookup.
- Local MCP (.cursor/mcp.json): You can create a configuration file directly in the project directory. This allows you to share project-specific tools with colleagues via Git without requiring everyone to manually install them on their machines.
4. How to use MCP in the programming process
Once successfully added, you don't need to do anything complicated to access them. In Chat or Composer mode (Ctrl + I) , Cursor's AI will automatically scan the list of available MCP Servers.
If you ask, "Find me the latest issues of this project on GitHub ," the Cursor will automatically call the connected GitHub MCP server to retrieve the data instead of responding that it doesn't have internet access. This is the power of context-aware programming.
5. Security considerations when using MCP
Because MCP allows AI to access system resources and sensitive data, you need to adhere to the following security guidelines:
- Install only from reputable sources: Do not run commands
npxfrom unknown repositories. - Managing environment variables: Some MCP servers require API keys (such as OpenAI keys or GitHub tokens). Make sure you store them in environment variables instead of writing them directly to the configuration file.
- Restrict permissions: Grant only the minimum necessary permissions to the MCP Server (e.g., allow read access instead of deleting data).
6. Conclusion
Adding an MCP Server to your Cursor not only makes your AI "smarter" but also transforms it into a truly actionable partner. With the rapid development of the Model Context Protocol, in the near future, most software development tools will have an MCP version to integrate directly into your IDE.
Start by adding a few simple MCPs like Google Search or Filesystem to experience the difference today!