Create Site to Site VNP with the ISA 2006 Firewall Branch Office Connection Wizard - Part 2
In Part 2 of this series, I will show you how to configure a site to site virtual private network (VPN) using the Branch Office Connectivity Wizard in the ISA 2006 Firewall . necessary for the solution to work, in addition to installing CSS and creating ISA Firewall arrays for the main office and branch office.
In the first part of this series, I talked about the example network infrastructure and discussed some concepts in creating site to site VPNs.
 Create Site to Site VNP with ISA 2006 Firewall Branch Office Connection Wizard - Part 1
In the second part of this article series, I will talk about the DNS issues needed for working solutions, in addition to installing CSS and creating ISA Firewall arrays for the main office and office. branch.
Before starting the CSS installation at the main office and ISA Firewall arrays, the first step we need to do is to configure the DNS server on the corporate network to reject dynamic updates. We need to do that so that when the branch ISA Firewall connects to the office ISA Firewall itself, it will use the unregistered virtual IP address in DNS to replace the actual internal IP address of the ISA ISA Firewall. branch office. This also prevents the main office ISA Firewall from registering its virtual IP address in DNS.
Another scenario when registering a virtual interface (RAS) address raises the problem when the branch office ISA Firewall tries to connect to the main office CSS. When a site to site connection is established, the branch office ISA Firewall registers its virtual RAS interface address in CSS. CSS tries to communicate with the branch office Firewall array using this address and the connection will fail.
We can avoid these problems by disabling DDNS on the DNS server. You might ask, 'Do we need to do this permanently or just need a way to configure the demand-dial interface so that we don't need to register in the DDNS?' Answer is possible'.
We need to create Host (A) records in the Active Directory integrated DNS with the following machines:
- isa2006se.msfirewall.org (10.0.0.1)
- isa2006branch.msfirewall.org (10.0.1.1)
- main.msfirewall.org (10.0.0.1)
- branch.msfirewall.org (10.0.1.1)
There is no need to enter records for CSS machines or domain controllers because they are installed and registered in DNS using DDNS. We don't have to worry about those machines because their IP address information won't change according to the connection status of the site to site VPN connection.
Before creating the Host (A) record, you need to create a reverse lookup zone for the branch office network ID. In our current example, the branch office network ID is 10.0.1.0/24. Follow the steps below to create a reverse lookup zone:
- In the Domain controller, click Start , and then point to Administrative Tools . Click DNS .
- In the DNS management console, open the server and click the Reverse Lookup Zones button.
- Right-click the Reverse Lookup Zone button and click New Zone .
- On the Welcome to the New Zone Wizard page , click Next .
- On the Zone Type page, select the Primary Zone option and click Next .
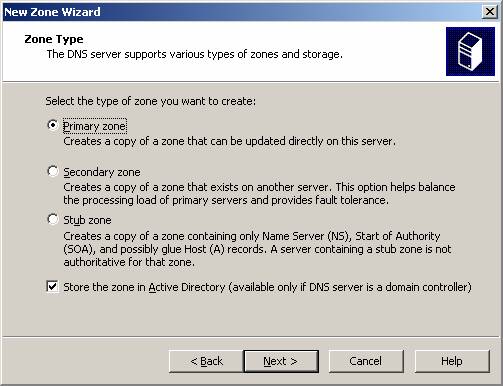
Figure 1
- In the Active Directory Zone Replication Scope page , select the option To all DNS servers in the Active Directory domain msfirewall.org . We select this option because there is only one domain (domain) in the organization. If you have multiple domains, you can create a copy of this reverse lookup zone for all DNS servers in the forest. Click Next .
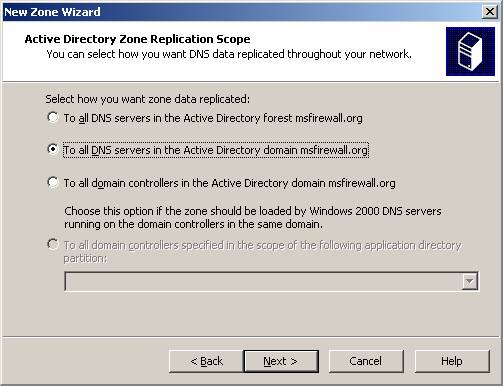
Figure 2
- On the Reverse Lookup Zone Name page , select the Network ID option and enter the network ID for the branch office in the text box. In this example, the branch office network ID is 10.0.1.0/24, so we'll enter 10.0.1 and click Next .
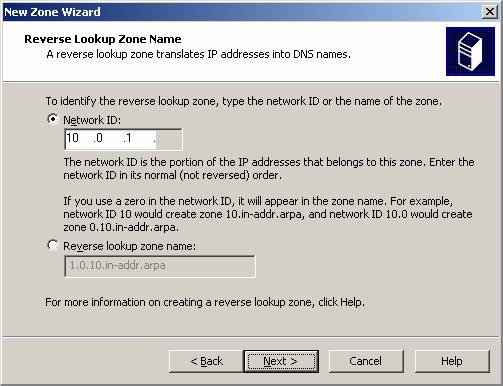
Figure 3
- On the Dynamic Update page, select the option Allow only secure dynamic updates (recommend for Active Directory) . Click Next .
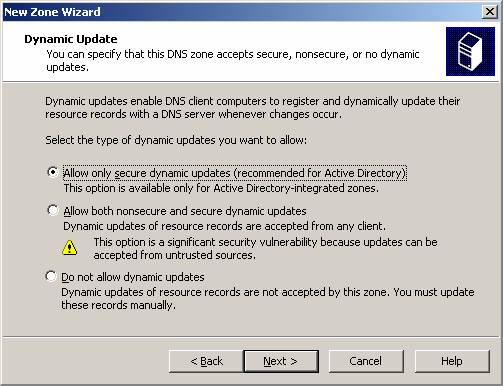
Figure 4
- Click Finish in the Completing the New Zone Wizard page .
- You will see a new area in the left pane of the DNS management interface.
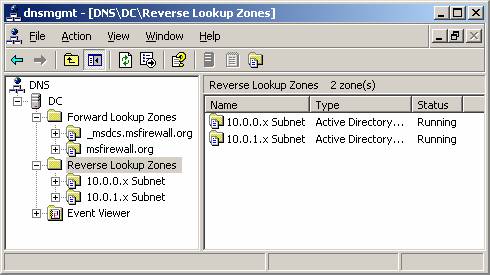
Figure 5
Now we are ready to create the Host (A) record. Use the procedure below to add Host (A) record to DNS:
- On the Domain controller, click Start , point to Administrative Tools, and click DNS.
- In the DNS management interface, open the server, and then click the Forward Lookup Zones button. Click the msfirewall.org button .
- Right-click the msfirewall.org button and click the New Host command (A).
- In the New Host dialog box, enter the name of the server in the Name (uses parent domain name if blank) section . In this example, we will enter the name of the branch office ISA Firewall, which is isa2006branch . The FQDN will appear in the Fully qualified domain name (FQDN) box. Enter the internal IP address of the branch office ISA Firewall in the IP address text box. In this example, the IP address of the branch office ISA Firewall is 10.0.1.1 , so we'll enter that address into the text box. Click Add Host .
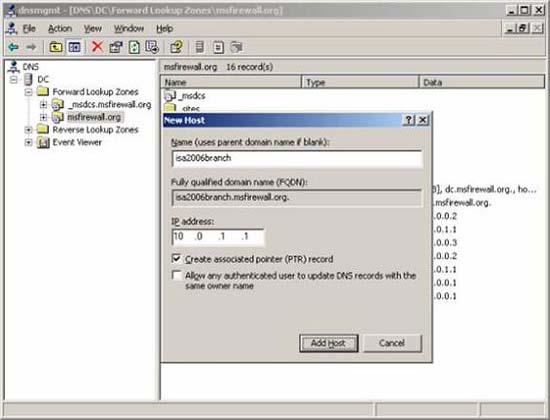
Figure 6
- To open the Add Host dialog box to allow you to enter more Host (A) entries. Enter the name and IP address information for the entries noted in the list above for the internal ISA Firewall, as well as the array.
- After entering the records, click Cancel in the New Host dialog box.
- Your list needs to look like the image below.
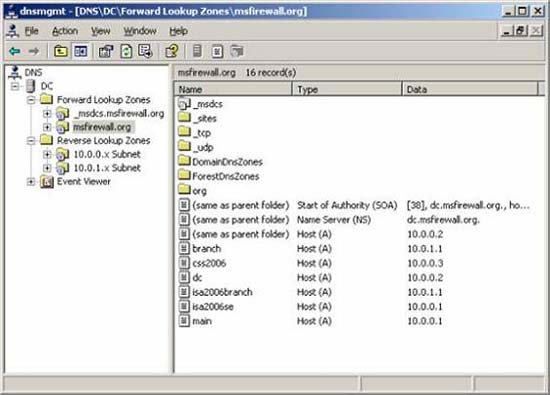
Figure 7
- Now we need to load these entries into the DNS database. This can be done by restarting the DNS server. In the DNS console , right-click the server name and point to All Tasks , click Restart .
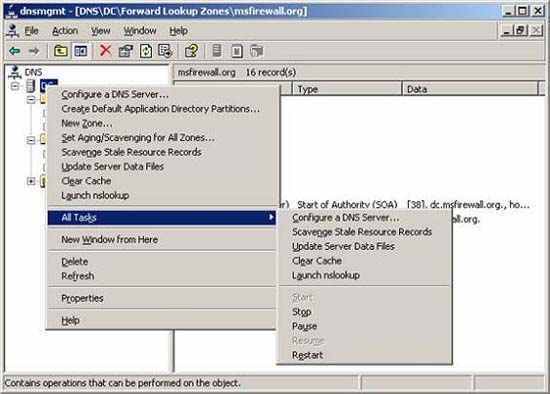
Figure 8
To end the DNS configuration, we need to disable dynamic updates (at least temporarily). In the left pane of the DNS interface, click the msfirewall.org entry in the Forward Lookup Zones button. Right-click the msfirewall.org button and click Properties .
In the Properties dialog box, click the General tab. On the General tab, select the None option from the Dynamic updates drop-down list. Click OK . There is no need to restart the DNS service for this option to take effect. Minimum DNS interface window.
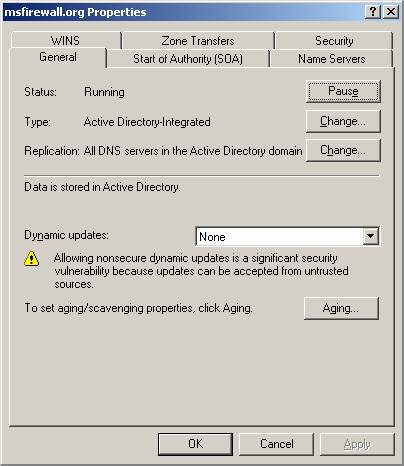
Figure 9
Install CSS on a dedicated CSS machine
Now that the important step in DNS setup has been completed, we need to move on to the next step, which is the step of installing CSS on a dedicated CSS computer. Although it is possible to install CSS on a Domain controller or even on the ISA Firewall array itself, the best and safest configuration is to place the CSS on a dedicated device.
In the ideal setting, CSS is placed on a dedicated security network, no other computers and no traffic are allowed to access the CSS computer from any other network segment, using ISA Firewall we can protect CSS before all other machines. However, to simplify things in this series, we don't set things up that way.
Follow these steps to install CSS on a dedicated CSS computer:
- Put the ISA 2006 CD into the computer. If the system does not automatically start the CD, double-click the ISAAutorun.exe file to launch the autorun menu.
- In the autorun menu, click on the Install ISA Server 2006 link.
- Click Next in the Welcome to the Installation Wizard page for Microsoft ISA Server 2006
- Select the option I accept the terms in the license agreement on the License Agreement page and click Next .
- Enter your customer information on the Customer Information page and click Next .
- On the Setup Scenarios page, select the Install Configuration Storage Server option and click Next .
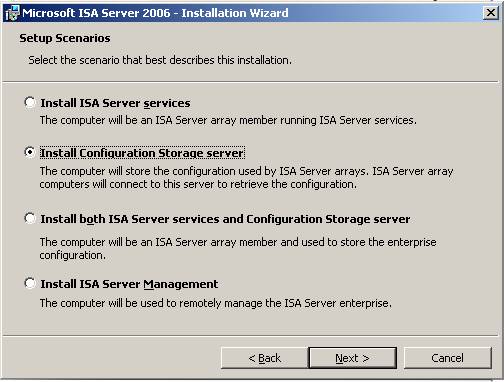
Figure 10
- Click Next in the Component Selection page .
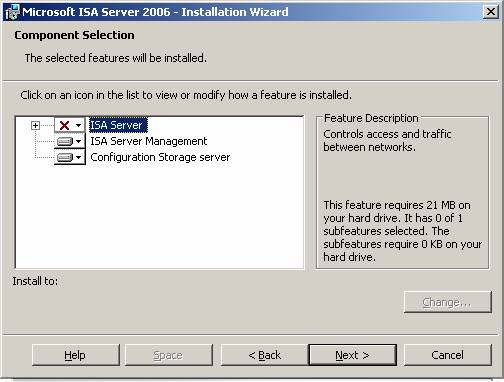
Figure 11
- On the Enterprise Installation Options page, select the option Create a new ISA Server enterprise . This option allows you to create a new enterprise. In contrast, the Create a replica of the enterprise configuration option allows you to copy an existing ISA Firewall enterprise, which can be used as a backup CSS when the main CSS crashes. In this example, we need to create a new enterprise that will have all our arrays. Click Next .
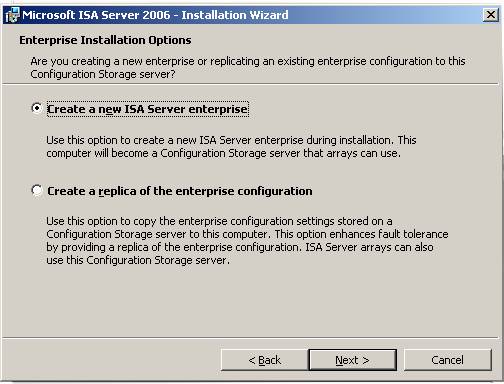
Figure 12
- In the New Enterprise Warning page, you will see value information in using an enterprise to manage all arrays. Click Next .
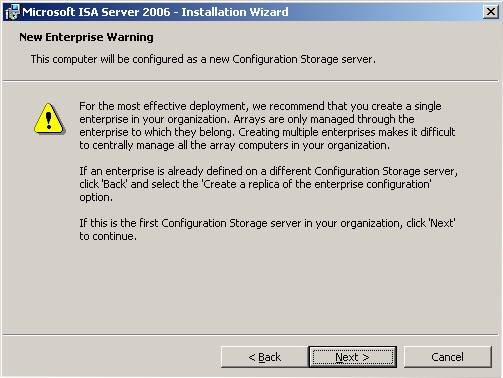
Figure 13
- In the Create New Enterprise page, enter a name for the new ISA Firewall enterprise in the Enterprise name name box. In this example, we will use the name Enterprise . You can enter a description for this ISA Firewall enterprise in the Description box. Click Next .
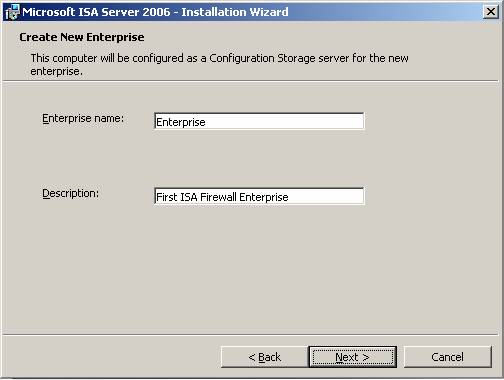
Figure 14
- In the Enterprise Deployment Environment dialog box, you need to choose between two deployment options on the same domain or in the same workgroup. Best for security issues ISA Firewall as well as easy configuration you should choose to be part of the same domain. So we'll do it with the best option.
Since we will deploy a secure configuration, ISA Firewall and CSS members are part of the same domain, so choose the option I am deploying in a single domain or in trust domains . Click Next .
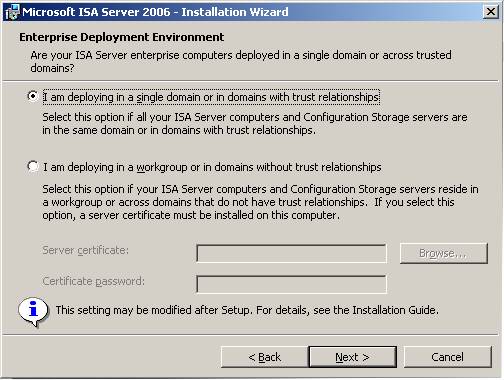
Figure 15
- On the Ready to Install the Program page , click Next.
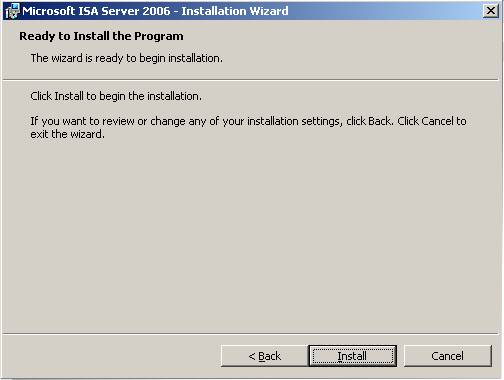
Figure 16
- The progress bar will show the status of the installation and what actions the installer is performing at a certain time.
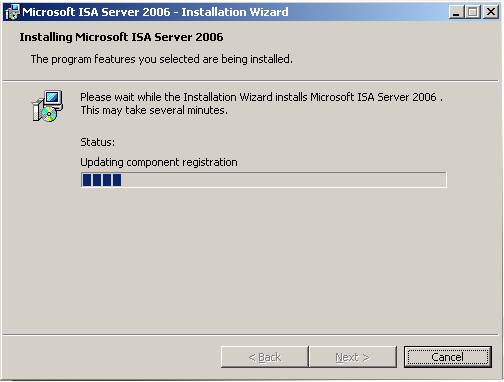
Figure 17
- On the Installation Wizard page, click the Invoke ISA Server Management entry when the wizard closes and click Finish .
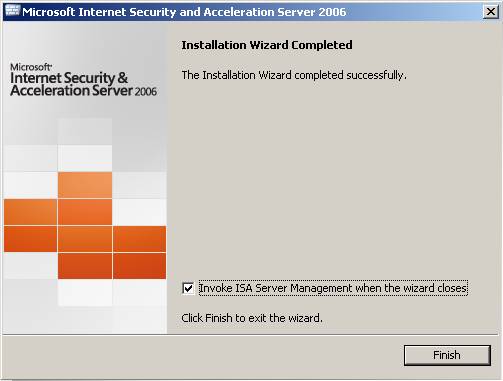
Figure 18
Create arrays and configure Enterprise Management Station
Now we are ready to create arrays for the main and branch offices. The primary array is a set of ISA Firewalls that act as logical firewalls, all of which have the same policy and configuration. An ISA Firewall array can consist of 1 to 32 servers. At least one interface on each ISA Firewall array member must be on the same network ID as all other members of the ISA Firewall array in the same ISA Firewall array, this interface is used for internal array communication. In fact, this means that you cannot extend arrays for entire WAN links or site to site VPNs, since all interfaces in the remote office will be on a different network ID than the network ID at main office.
In the example used in this series, we will have two arrays: the main office array named Main and the array for the branch office named Branch . We can completely create multiple main office arrays and multiple branch office arrays and each array can contain up to 32 members. In practice, however, branch offices typically contain typical array members, while large offices and large branch offices can accommodate 2 to 32 member servers.
One of the biggest advantages in using multiple array members is that CARP and NLB network load balancing mechanisms allow you to achieve flux efficiency equal to the total number of array members over the time that link speed has. available for each array member.
For example, with dynamic data inspection, a typically configured ISA Firewall can pass through traffic at approximately 1.5Gbps. If you have a main office array containing 5 array members, the array throughput will be 7.5Gbps. Calculate the cost of a hardware firewall with 7.5Gbps throughput and compare it to the cost of a 5-member array.
You will be impressed by the cost savings as well as the ability to replace components at affordable prices.
Let's go back to the ISA Firewall console. After clicking Finish on the last page of the installation wizard, the ISA Firewall interface will open as a secure website. Follow these steps to add CSS to Enterprise Remote Management stations in enterprise policy:
- Read the page Protect the ISA Server Computer and then close it.
- In the ISA Firewall console, open the Enterprise button, and then open the Enterprise Policies node. Click the Default Policy button .
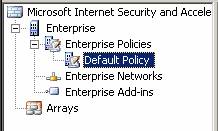
Figure 19
- Click the Toolbox tab in the Task Pane. Click the Network Objects title. Click the Computer Sets folder, and then double-click the Enterprise Remote Management entry.
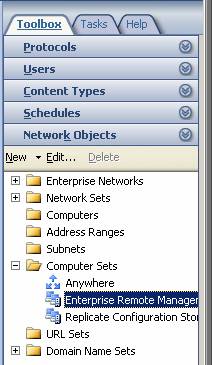
Figure 20
- In the Enterprise Remote Management Computers Properties dialog box , click the Add button and click the Computer entry.
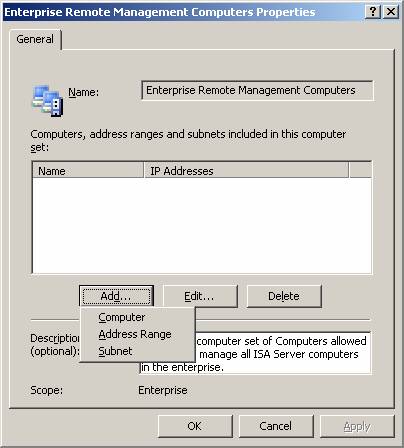
Figure 21
- In the New Computer Rule Element dialog box, enter a name for the CSS machine, which also acts as a remote management station. We will name this computer CSS and enter its name in the Name box. In the Computer IP Address box, enter the IP address of the CSS machine. In our example, the IP address is 10.0.0.3 . Enter the description for that machine in the Description (optional) box. Click OK in the New Computer Rule Element box.
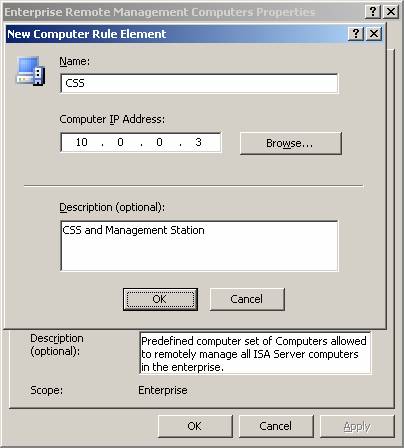
Figure 22
- Click OK in the Enterprise Remote Management Computers Properties box .
- Click Apply to save the changes and upgrade the firewall policy. Click OK in the Apply New Configuration box.
Now we need to create arrays. There will be two arrays in this scenario: a main office array and a branch office array. Both arrays will be managed in the same ISA Firewall enterprise and can use centralized enterprise policies. Follow the steps below to create the Main array:
- In the left pane of the ISA Firewall console, right-click the Arrays node. Click the New Array command .
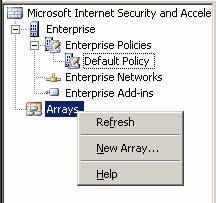
Figure 23
- In the Welcome to the New Array Wizard box , enter a name for the array in the Array name box. In this example, we will name the array Main . Click Next .
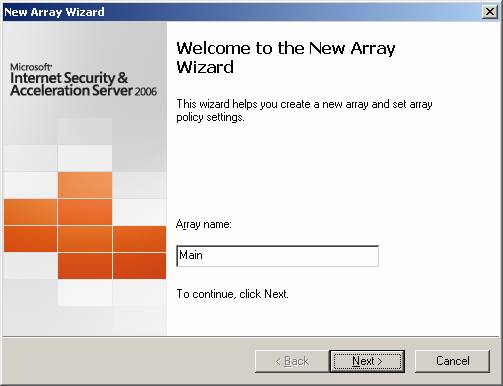
Figure 24
- In the Array DNS Name box, enter a FQDN to distinguish the array name. This is very useful when you use NLB or client side CARP to load balance. In this example, we will use the name main.msfirewall.org to resolve the IP address of the internal interface of the main office ISA Firewall office. If NLB is enabled, this name will resolve to an internal VIP, and if using client side CARP, we will have Host (A) records for this name and use DNS round robin for distribution. Initial connection to receive information. Click Next .
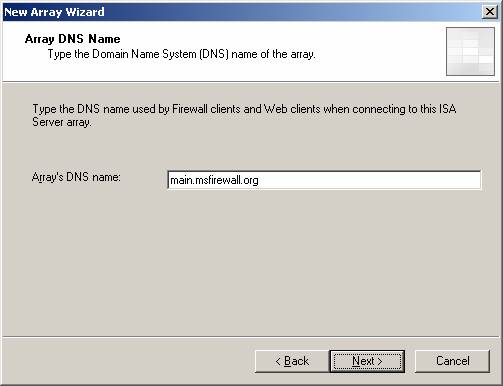
Figure 25
- On the Assign Enterprise Policy page, select the default option, Default Policy . We will then examine how to use enterprise policies that apply to all arrays managed by the same ISA Firewall enterprise. Click Next .
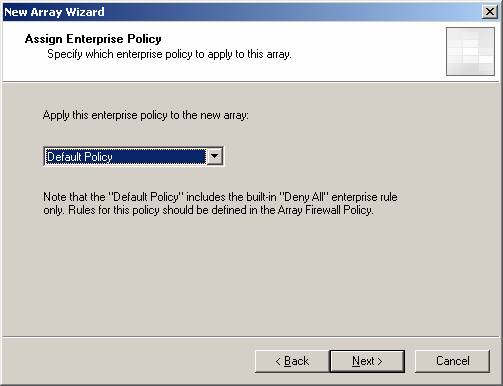
Figure 26
- On the Array Policy Rule Types page , you can centrally control some types of rules that are configured by array administrators. Leave the default 'Deny' Access Rules, 'Allow' Access Rules and Publishing rules (Deny and Allow) enabled and click Next .
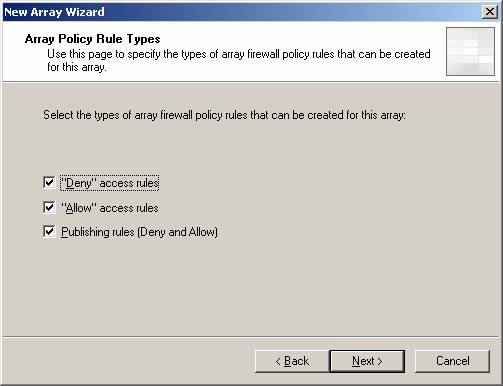
Figure 27
- Click Finish on the Completing the New Array Wizard page.
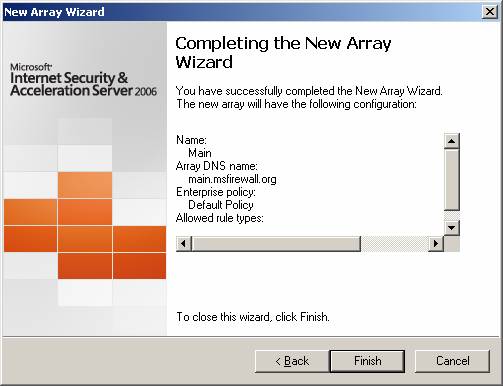
Figure 28
- The process bar Creating a new array appears when the array is created.
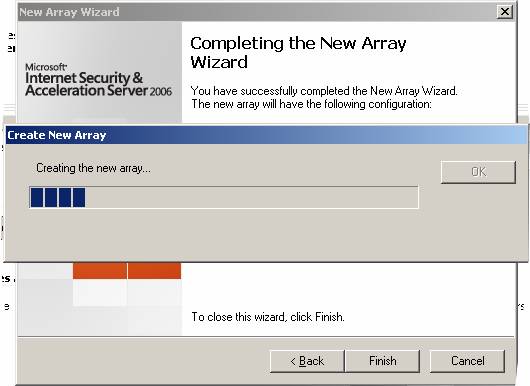
Figure 29
- Click OK after The new array was successfully created .
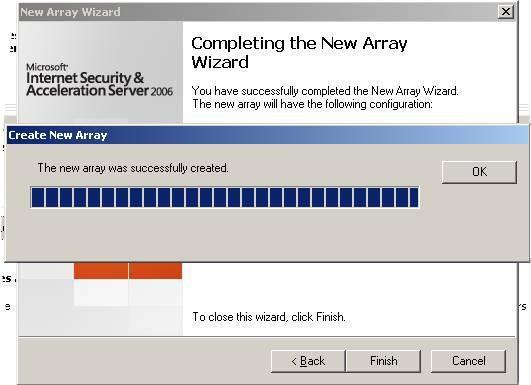
Figure 30
- Click Apply to save the changes and upgrade the firewall policy. Click OK in the Apply New Configuration box.
Let's create the branch office array:
- Right-click on the Arrays button and click New Array .
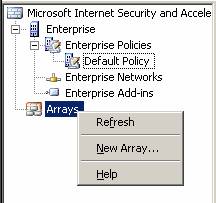
Figure 31
- Enter Branch in the Array name box. Click Next .
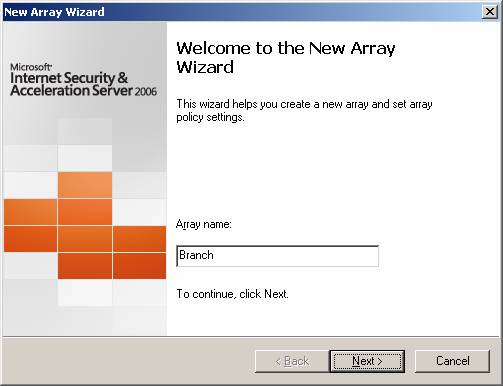
Figure 32
- Enter branch.msfirewall.org in the Array's DNS name box. This name will resolve to an IP address within the branch office ISA Firewall. Click Next .
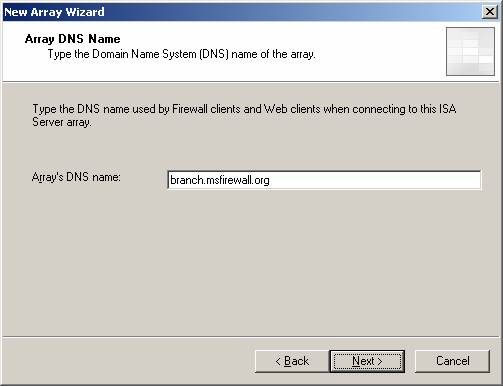
Figure 33
- Accept the Default Policy entry on the Assign Enterprise Policy page and click Next .
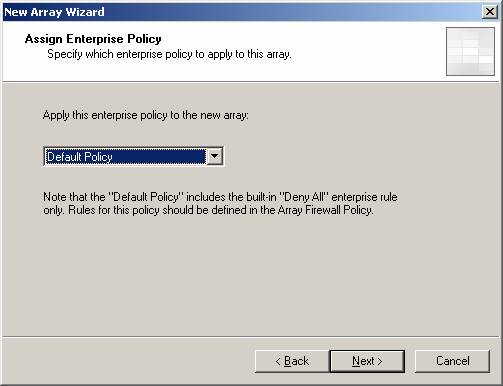
Figure 3 * 4
- Accept the default settings on the Array Policy Rule Types page and click Next .
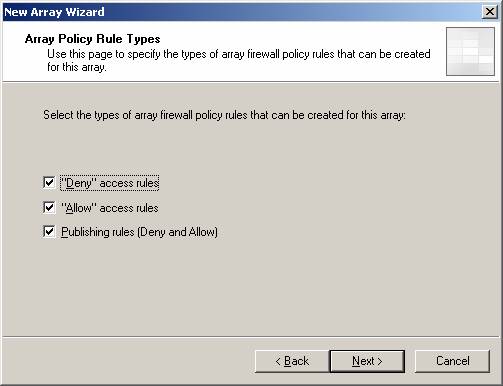
Figure 35
- Click Finish on the Completing the New Array Wizard page.
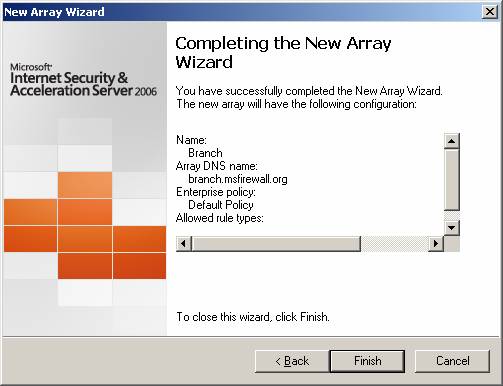
Figure 36
- The status bar indicates the progress of the new array creation process.
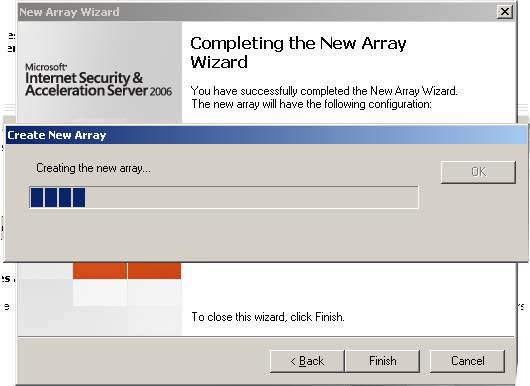 Figure Figure 37
- Click OK when you see The new array was successfully created .
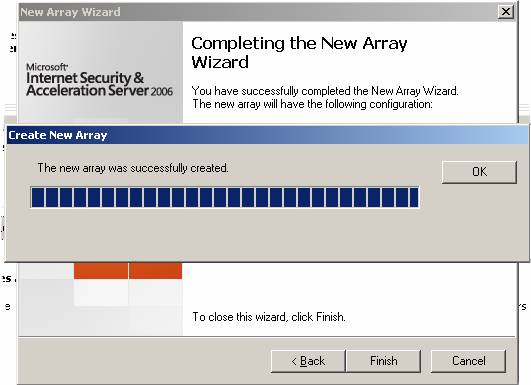
Figure 38
- Click Apply to save the changes and update the firewall policy. Click OK in the Apply New Configuration box.
One last thing needs to be done before the end. Click on the link above in the middle pane that relates to the customer experience improvement program. You will be taken to the Customer Feedback box. You should join this program because it will help the ISA Firewall product group understand how you use the ISA Firewall and how to respond to problems that you may encounter with the ISA Firewall. What information will be sent to Microsoft and the end result will make a ISA Firewall product more stable and secure for you and anyone who uses the ISA Firewall.
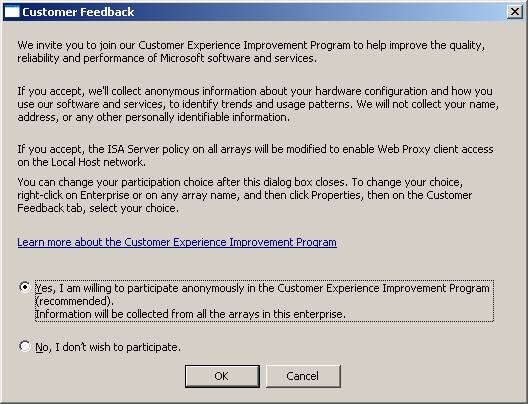
Figure 39
Conclude
In this section, we have configured the DNS server with Host (A) record to support the solution. After configuring DNS, we installed CSS on a dedicated CSS machine and configured the main office and branch offices. In the next part of this series, we will show you how to create an answer file and then use it for creating a site to site VPN connection, then join the branch office ISA Firewall to the domain and CSS main office.