Create a Site-to-site VPN on ISA 2006 (Part 2)
Create a Site-to-site VPN on ISA 2006 (Part 1)
DNS issues (domain name systems) require solutions such as installing CSS, creating ISA Firewall arrays for the head office and branch offices.
In part one of the series on how to use the Branch Office Connectivity Wizard to create a site to site virtual private network between the main office and the branch office, we looked at the example network infrastructure and discussion. Some key concepts in creating site to site virtual private networks.
In this second part we will explore the issues with DNS (Domain Name System), the domain name system, a very important component in creating solutions, installing CSS and creating ISA ISA arrays. Main room and branch office.
Configure the DNS Server to remove dynamic updates and enter Host (A) records for the ISA Firewall computer and array names.
Before we start the CSS installation process at the main office and the ISA Firewall arrays, the first step is to configure the DNS Server on the unified network, to reject dynamic updates. We need to do this so that when the branch office ISA Firewall connects to the main office ISA Firewall, the virtual IP address will not have to register in DNS instead of the real IP address. This also prevents the headquarters office ISA Firewall from registering its virtual IP address in the domain name system (DNS).
This is a very common problem in connection to site to site VPN operations. For example, suppose you use Web proxy and Firewall clients on the network at the head office. Those clients are configured to use the ISA Firewall name, to connect to the ISA Firewall's firewall and Web proxy services. Everything works fine until site-to-site connections are available. After this connection is established, the virtual IP address of the main office registration information itself is in the DDNS. When the Web proxy and Firewall clients try to connect to the office ISA Firewall, they are trying to connect to the virtual IP address of the main office ISA Firewall (RAS interface address) and connections from the Web proxy, Broken firewall client.
Another case makes the virtual interface (RAS) IP address issues appear when the branch office ISA Firewall tries to connect to the main office CSS. When the site to site connection is complete, the branch ISA Firewall registers its virtual interface (RAS) address in CSS. CSS tries to contact the branch office Firewall, use this address and a broken connection.
We can prevent this problem by disconnecting DDNS on the DNS server. You might ask: 'Do we need to keep this mode for a long time, or is there another way to configure the demand-dial interface not registered in DDNS?'. Answer is possible'!
We need to create Host (A) records in Active Directory that integrate DNS with the following names:
- isa2006se.msfirewall.org (10.0.0.1)
- isa2006branch.msfirewall.org (10.0.1.1)
- main.msfirewall.org (10.0.0.1)
- branch.msfirewall.org (10.0.1.1)
We do not need to enter records for the CSS or Domain Controller, because these machines are installed and registered in DNS using DDNS. We also do not need to worry about them, because IP address information will not be changed according to the status of the site to site VPN connection.
Before creating Host (A) records, you need to create the reverse search domain for the branch network ID, In our current example, this branch network ID is 10.0.1.0/24. Follow these steps to create a reverse search area:
- On the Domain Controller, go to Start > Administrative Tools> DNS.
- In the DNS management console, expand the server name and click the Reverse Lookup Zones button.
- Right-click the Reverse Lookup Zone button, and then click New Zone .
- On the Welcome to the New Zone Wizard page , click Next.
- On the Zone Type page, select the Primary Zone option and click Next.
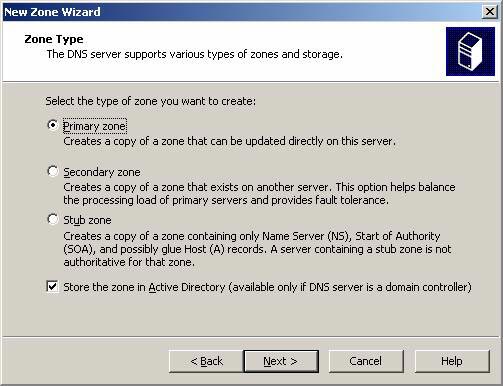
Figure 1
-
On the Active Directory Zone Replication Scope page, select To all DNS servers in the Active Directory domain msfirewall.org . The reason for choosing this option is because we only have a single domain in the organization. If you have multiple domains, you can create this reverse lookup zone for all DNS servers in the forest. Click Next.
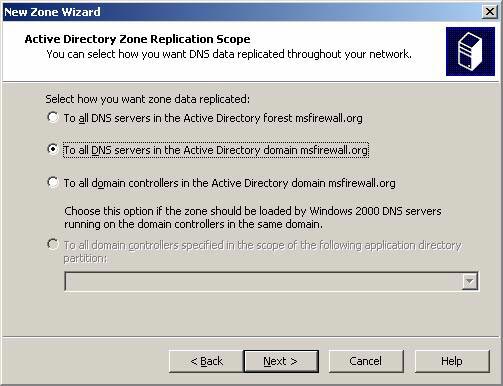
Figure 2
-
On the Reverse Lookup Zone Name page , select Network ID and enter the network ID for the branch office in the tex box. In this example, ID is 10.0.1.0/24, so we'll enter 10.0.1 and click Next.
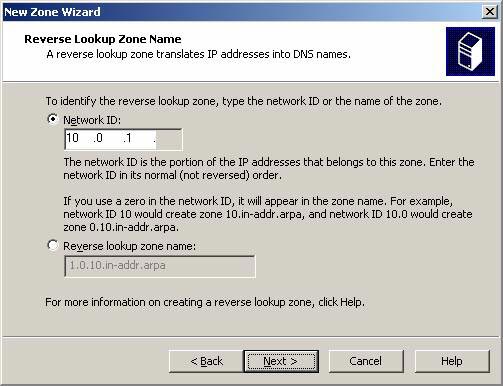
Figure 3
-
On the Dynamic Update page , select Allow only secure dynamic updates (recommend for Active Directory) (allow safe dynamic updates only; recommended for Active Directory). We should not use the option to enable dynamic updates in this domain, so that branch servers can register in DDNS. Just avoid registering the demand-dial interface in DNS and then check to see if this function works properly. Click Next .
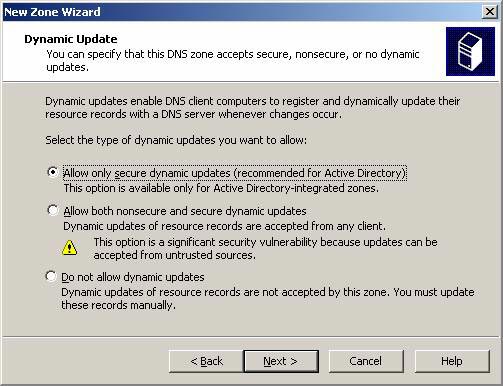
Figure 4
-
Click Finish on the Completing the New Zone Wizard page.
-
You will see the new domain in the left pane of the DNS management console .
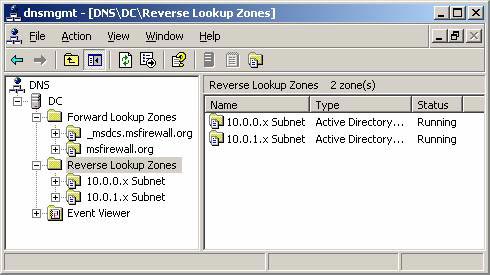
Figure 5
You have now created Host (A) records. Use the following procedure to add Host (A) records to DNS:
- On the Domain Controller, click Start , point to Administrative Tools, and press DNS.
- In the console DNS management, expand the server name, open the Forward Lookup button . Click on the Zones msfirewall.org button.
- Right-click the msfirewall.org button and click the New Host (A) command .
- In the New Host dialog box , enter the server's name name in the Name (uses parent domain name if blank) text box (use the parent domain name if empty). In this example we will enter the branch office ISA Firewall name, isa2006branch . The FQDN will then appear in the Fully qualified domain name (FQDN) text box (the domain name meets the criteria). Enter the internal IP address of the branch office ISA Firewall in the IP address box. In this example, the address will be entered as 10.0.1.1 . Click Add Host.
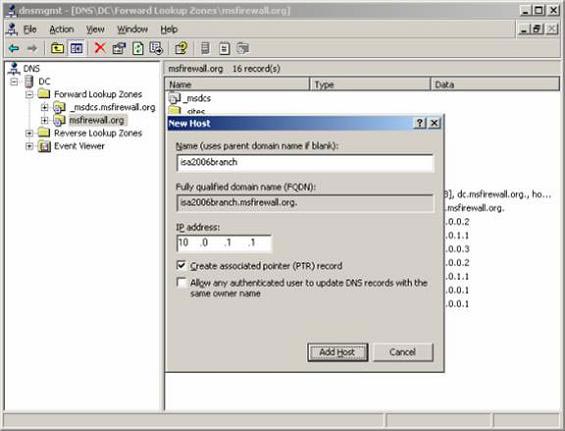
Figure 6
-
The New Host dialog box remains open to allow you to enter additional information for Host (A). Enter the name and IP address information for the entries noted in the list above.
-
After entering all records, click Cancel in the New Host dialog box .
-
Your list will look like the illustration below.
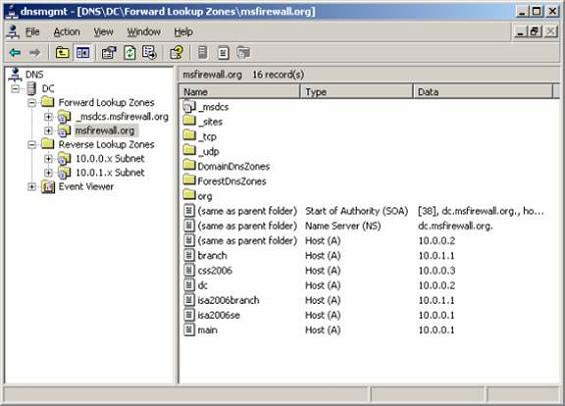
Figure 7
-
Now we need to put some information into the DNS database. This can be done by restarting the DNS server. In the DNS console , right-click the server name, point to All Tasks , and click Restart.
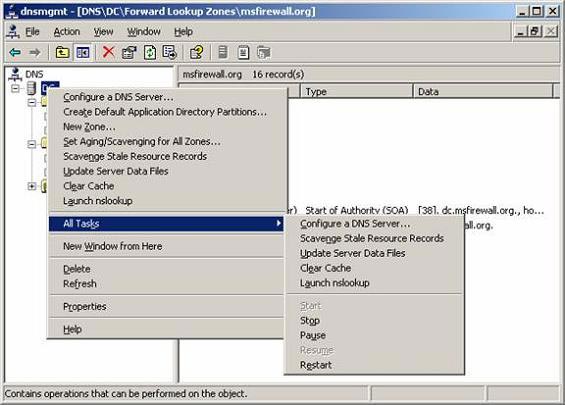
Figure 8
To end DNS configuration, we need to remove dynamic updates (at least temporarily). In the left pane of DNS console, click on the msfirewall.org entry in the Forward Lookup Zones button. Right-click the msfirewall.org button and select Properties .
In the Properties dialog box, click the General tab. On the General tab, select the None option from the Dynamic updates drop down list. Click OK . No need to restart DNS service. Minimize DNS console.
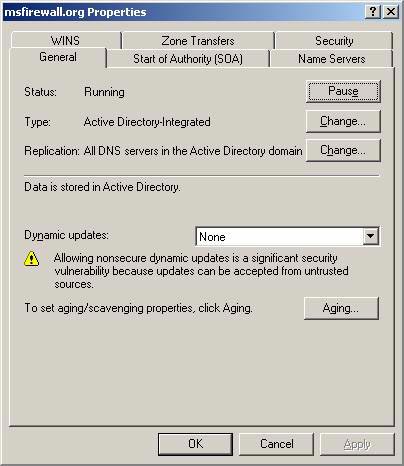
Figure 9
Install CSS on a dedicated CSS computer
This is an extremely important step in the process of completing DNS settings: installing CSS on a dedicated CSS machine. You can install CSS on the DC (Domain Controller), or even on the ISA Firewall array itself, but the best and safest configuration is to place CSS on a dedicated device, prevent array members and members Domain Controller.
With the ideal installation program, CSS is located on a dedicated network security segment. There are no other machines located there and no traffic is allowed to move to the CSS machine coming from another section. ISA Firewall is also used to protect CSS before all other machines. However, to be simple and easy to understand, we will set up a number of things. You can use the basic principles discussed in many DMZ articles on its own Website, especially how to protect FE Exchange Servers.
Follow these steps to install CSS on a dedicated CSS computer:
- Insert the ISA 2006 CD into the read drive or burner. If the program menu runs automatically does not appear, double-click the file ISAAutorun.exe.
- On the autorun menu, click on the Install ISA Server 2006 link .
- Click Next on the Welcome to the Installation Wizard page for Microsoft ISA Server 2006.
- Select the option I accept the terms in the license agreement and click Next .
- Enter the custom information on the Customer Information page and click Next .
- On the Setup Scenarios page, select the Install Configuration Storage Server option and click Next .
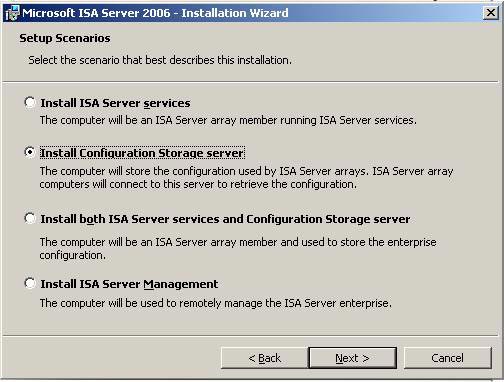
Figure 10
-
Click Next on the Component Selection page .
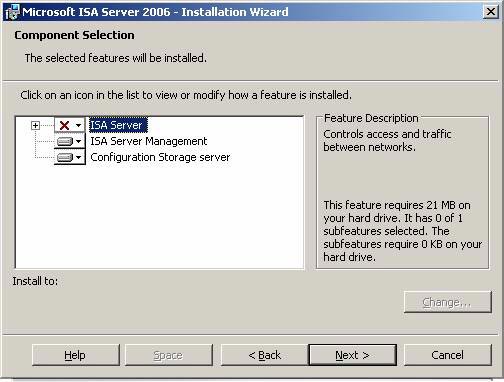
Figure 11
-
On the Enterprise Installation Options page, select Create a new ISA Server enterprise . This option allows you to create new businesses. In contrast, the Create a replica of the enterprise configuration option allows you to create a copy of an existing ISA Firewall, which can be used as a CSS backup in case the primary CSS fails. In this example, we need to create a new business, containing all the arrays, Click Next .
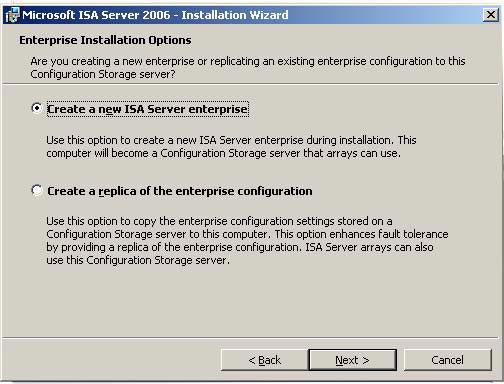
Figure 12
-
On the New Enterprise Warning page, you can see information about the value of using a single enterprise to manage all arrays. Click Next .
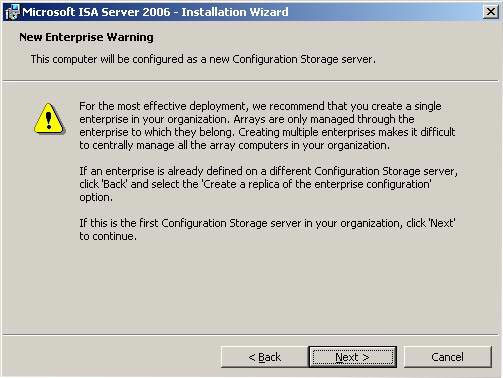
Figure 13
-
On the Create New Enterprise page, enter a name for the new ISA Firewall business in the Enterprise name box. In this example we will use the name Enterprise . You can include a brief description of the information for this enterprise ISA Firewall in the Description box . Click Next.
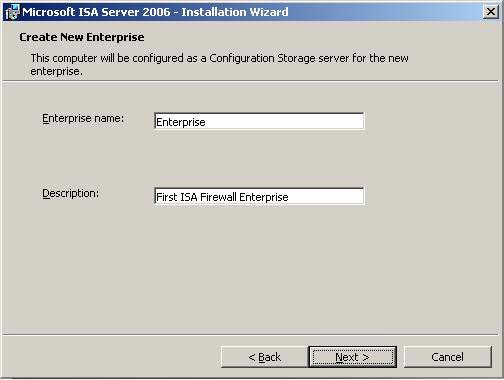
Figure 14
-
In the Enterprise Deployment Environment dialog box, you will have to tell the installation wizard that the Installation Wizard knows if the ISA Firewall and CSS are in the same domain, or whether they are in a workgroup. The best ISA Firewalls in the security and configuration areas often have the same domain. In practice, you often face numerous threats from hackers who take control of network security, without understanding the ISA Firewall and will force you to deploy a less flexible, less secure workgroup configuration. In that case you often have to deploy PKI with the appropriate certificate for each machine.
When we deploy a secure configuration, ISA Firewall members and CSS become part of the same domain. Select the option I am deploying in a single domain or in the trust domains domains click Next .
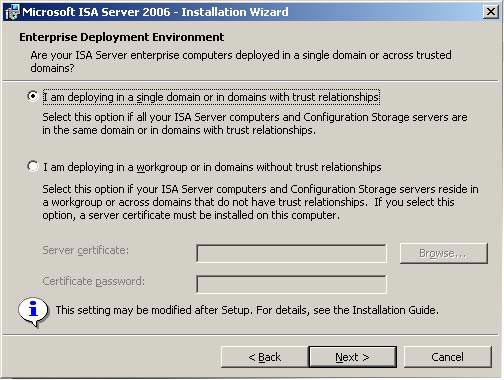
Figure 15
-
On the Ready to Install the Program page , click Next .
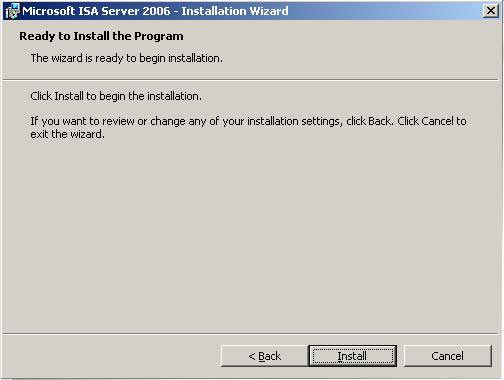
Figure 16
-
The progress bar will provide you with the status of the installation and which operations are being performed by the installer at a time.
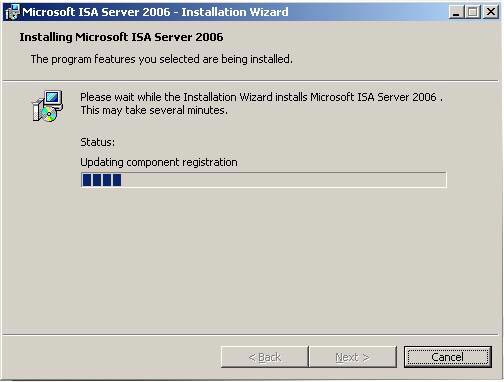
Figure 17
-
On the Completed Installation Wizard page, put a checkmark in the Invoke ISA Server Management box when the wizard closes . Click Finish.
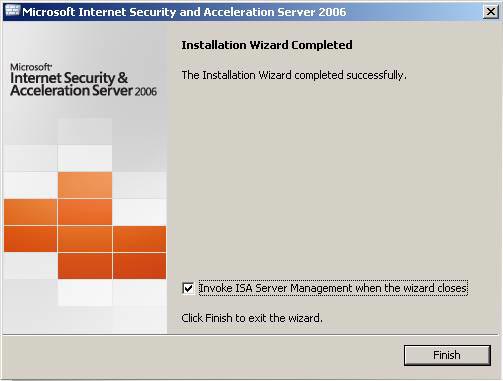
Figure 18
Create arrays and configuration of Enterprise Management Station
Now we have created arrays for the main office and branch office. An array is a collection of ISA Firewalls that act as a single local firewall with the same policy and configuration. An ISA Firewall array can have from 1 to 32 servers. At least one interface on each ISA Firewall array member must be on the same network ID, when all other ISA Firewall array members are in the same ISA Firewall array and this interface is used for array internal communications. This means that you cannot extend these networks to WAN links or site to site VPNs, since all interfaces in the remote office will be on a different network ID than the headquarters.
In the example used in this series, we have two arrays: one for the main office named Main and one for the branch named Branch . We can create multiple main office arrays and multiple branch arrays, each of which can consist of 32 members. In fact, branch office arrays mainly consist of single array members, while the head office and large branches will have array members from 2 to 32 servers.
One of the best enhancements to using multi-array members is the CARP and NLB load balancing mechanisms. They allow you to effectively increase throughput with the total number of members in each array according to the link speed time.
For example, in a status packet inspection program, a standard configuration ISA Firewall can have typical traffic at approximately 1.5Gbps. If the head office array has 5 members, the array throughput is 7.5Gbps. You try to check the price of the 'hardware' firewall with 7.5Gbps throughput and compare it with the cost of the 5-member array on the computer hard drive storage.
The saving price difference will make you impressed, along with the ability to have parts, replacement parts only at the price of promotional goods.
Returning to the ISA Firewall console, after clicking the Finish button on the last page of the installation program, the ISA Firewall console will also open, along with Web page security. Follow these steps to add CSS to the Enterprise Remote Management station:
-
Read the Web page Protect the ISA Server Computer and close it after reading it.
-
In the ISA Firewall console, expand the Enterprise node, and then expand the Enterprise Policies node. Click on Default Policy.
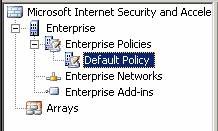
Figure 19
-
Click on the Toolbox tab in the Task Pane. Click on the Network Objects header . Click the Computer Sets folder and double-click the Enterprise Remote Management entry.
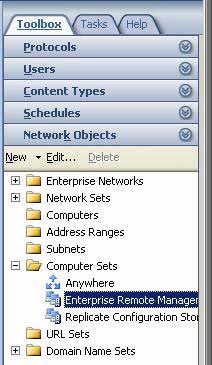
Figure 20
-
In the Enterprise Remote Management Computers Properties dialog box, click the Add button and click on the Computer entry point .
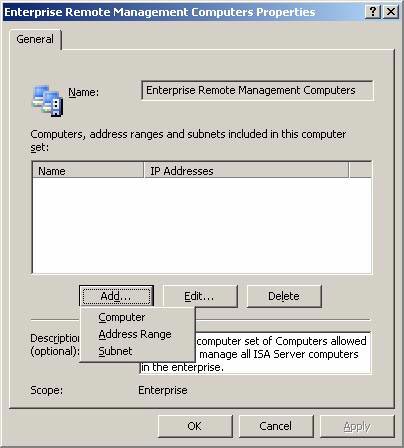
Figure 21
-
In the New Computer Rule Element dialog box, enter a name for the CSS machine, which also acts as a remote enterprise management station. We will name this computer CSS and enter the name in the Name box. In the Computer IP Address box, enter the IP address for the CSS machine. In our example, this address is 10.0.0.3 . Write the description information summarized in the Description (optional) box, but not required. Click OK in the New Computer Rule Element dialog box .
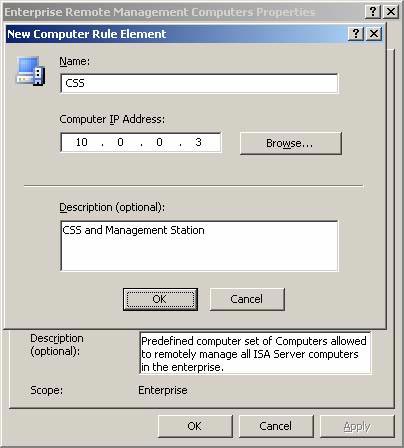
Figure 22
-
Click OK in the Enterprise Remote Management Computers Properties dialog box.
-
Click Apply to record the changes and update the firewall policy. Click OK in the Apply New Configuration dialog box.
Now we need to create the array. There are two types of arrays: one for the main office and one for the branch office. Both arrays are managed in the same ISA Firewall enterprise and can be managed with centralized enterprise policies. Follow these steps to create the Main array:
-
In the left pane of the ISA Firewall console, right-click the Arrays button. Click the New Array command.
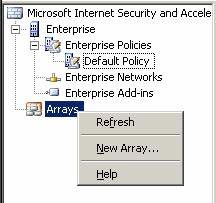
Figure 23
-
In the Welcome to the New Array Wizard dialog box, enter a name for the array in the Array name box. For our example, the array name is Main . Click Next.
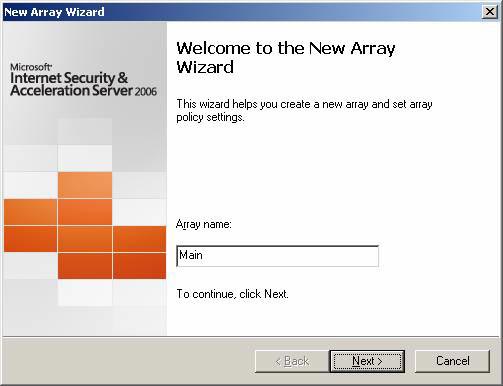
Figure 24
-
In the Array DNS Name box, enter the FQDN to identify the array name. This will be useful for you when using NLB or CARP client site to load balance. In this example, we'll name the main.msfirewall.org name to handle the IP address for the internal interface of the main office ISA Firewall. If using NLB, this name will handle an internal VIP. With the CARP client side, we will have multiple Multi Host (A) records and use DNS Round Robin to distribute for initial connections that receive array table information. Click Next to continue.
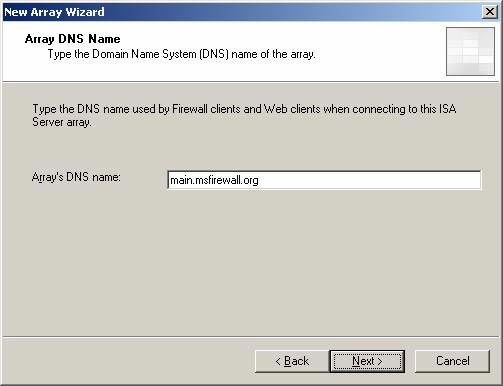
Figure 25
-
On the Assign Enterprise Policy page, select the default Default Policy option . We will then examine the enterprise policies that apply to the entire array managed by the same ISA Firewall enterprise. Click Next .
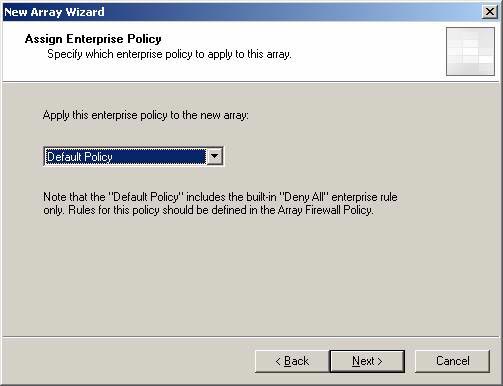
Figure 26
-
On the Array Policy Rule Types page , you can use some centralized control over the rules configured by the administrator. 'Enable' Deny 'Access Rules default settings ,' Allow 'Access Rules and Publishing rules (Deny and Allow) . Click Next .
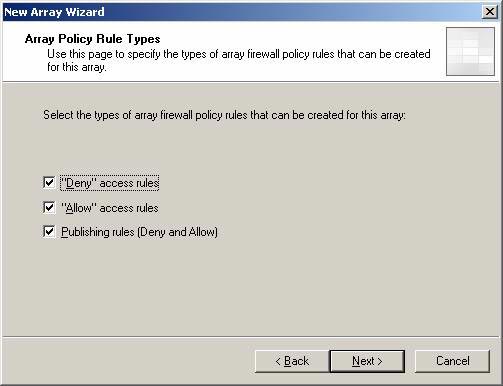
Figure 27
-
Click the Finish button on the Completing the New Array Wizard page .
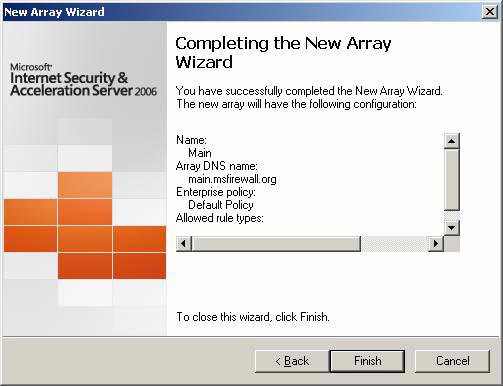
Figure 28
-
The Create a new array progress bar appears when the array is created.
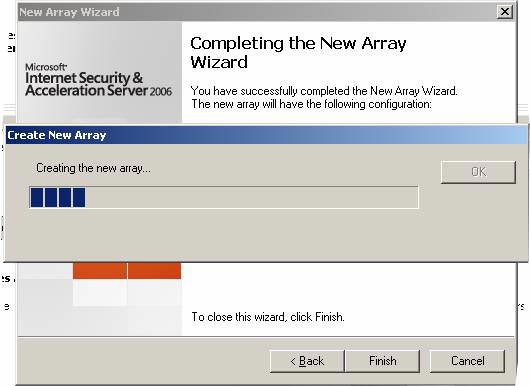
Figure 29
-
Click OK after The new array was successfully created appears.

Figure 30
-
Click Apply to record the changes and update the firewall policy. Click OK in the Apply New Configuration dialog box.
Now create the branch office array:
-
Right-click the Arrays button and select New Array .
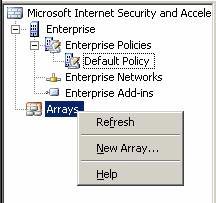
Figure 31
-
Enter Branch in the Array name box. Click Next .
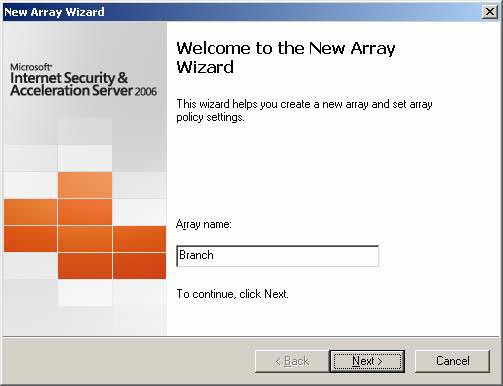
Figure 32
-
Enter branch.msfirewall.org in the Array's DNS name box . This option will handle the internal IP address on the branch ISA Firewall. Click Next .
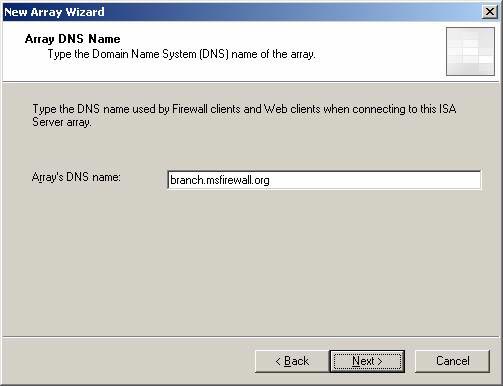
Figure 33
-
Agree on the Default Policy on the Assign Enterprise Policy page and click Next .
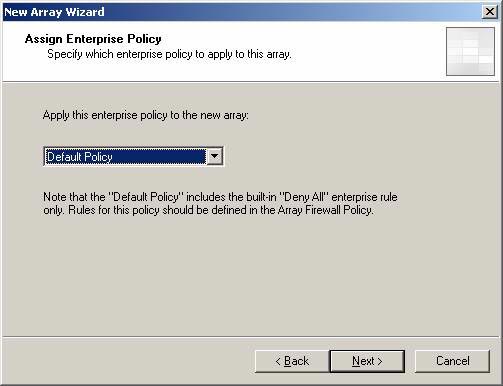
Figure 3 * 4
-
Accept the default settings on the Array Policy Rule Types page and click Next .
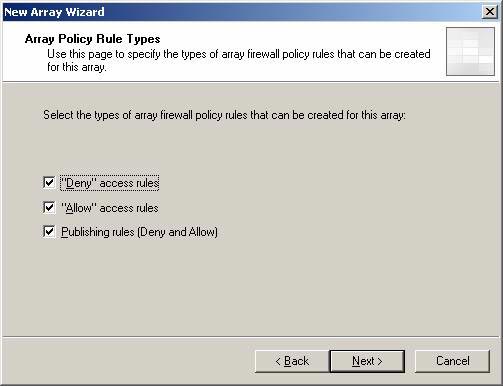
Figure 35
-
Click Finish on the Completing the New Array Wizard page .
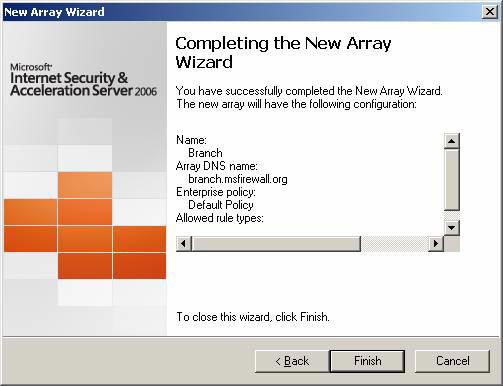
Figure 36
-
The status bar displays the process of creating new arrays.
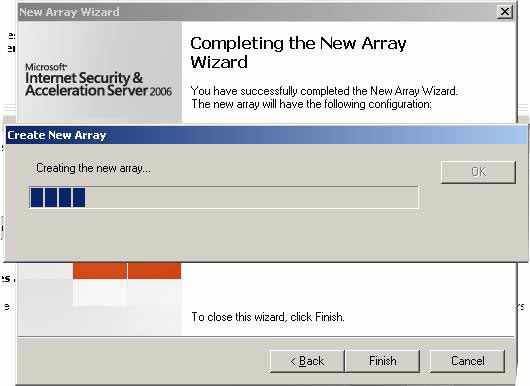
Figure 37
-
Click OK when you see the text The new array was successfully created .

Figure 38
-
Click Apply to record the changes and update the firewall policy. Click OK in the Apply New Configuration dialog box.
There is one last thing to do before the end. Click on the link in the top middle frame, regarding the user experience enhancement program. This link will open Customer Feedback (customer feedback). You should join this program, because it will help the ISA Firewall production team understand how you use the ISA Firewall and how to respond faster to the problems you encounter when using the ISA Firewall. You do not encounter any security problems when you send Microsoft information related to using the ISA Firewall. The product will become more secure and flexible with user comments.
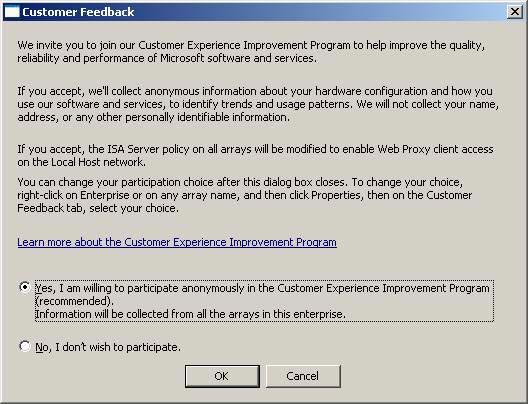
Figure 39
Conclude
In this article on how to create a site to site VPN using this Branch Office Connect Wizard, we have configured the server to manage the DNS server domain system with Host (A) records supported. After that, we continue to install CSS on a dedicated machine and configure arrays for headquarters and branches on CSS. In the next article we will continue to use the Branch Office Connectivity Wizard to create the answer file, then use this answer file to create the site to site VPN connection and link the branch office ISA Firewall to the domain and CSS in the column. Head office.
Create a Site-to-site VPN on ISA 2006 (Part 3)