Create a Site-to-site VPN on ISA 2006 (Part 5)
In this article, we will conclude the basic configuration of the Site-to-Site VPN virtual private network by creating an answer file at the main office that will be used by the Branch Office Connectivity Wizard on the branch office ISA Firewall. This article marks the end of running the Branch Office Connectivity Wizard on the branch office ISA Firewall to create a Site-to-Site VPN and connect the branch office ISA Firewall to
Create a Site-to-site VPN on ISA 2006 (Part 1)
Create a Site-to-site VPN on ISA 2006 (Part 2)
Create a Site-to-site VPN on ISA 2006 (Part 3)
Create a Site-to-site VPN on ISA 2006 (Part 4)
Creating the answer file at the main office will be used by the Branch Office Connect Wizard on the branch office ISA Firewall.
Branch Office Domain Controller
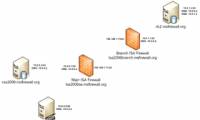
In the first four parts of the series using the Branch Office Connectivity Wizard to connect the ISA firewall at the branch office with the ISA firewall at the headquarters, we looked at an example network infrastructure; go through the key concepts in the site-to-site VPN virtual private network; Configuring support network services and installing CSS, the ISA Firewall at the main office, the branch office ISA Firewall. Part 3 ends when the branch ISA Firewall is ready to accept the answer file that will be used by the Branch Office Connectivity Wizard. Part 4 discusses the issue of creating a Site-to-Site VPN network to connect the main office and branch office.
In this article, we will conclude the basic configuration of the Site-to-Site VPN virtual private network by creating an answer file at the main office that will be used by the Branch Office Connectivity Wizard on the branch office ISA Firewall. This article marks the end of running the Branch Office Connectivity Wizard on the branch office ISA Firewall to create a Site-to-Site VPN and connect the branch office ISA Firewall to the domain.
Create answer file for Site-to-Site VPN connection at main office ISA Firewall
Now we are ready to create an answer file for the Branch Office Connectivity Wizard on the branch office ISA Firewall used to create the Site-to-Site VPN connection and connect the branch office ISA Firewall to the domain. This answer file uses information in the Site-to-Site VPN connection created on the main office ISA Firewall. So the first step we need to do is to create a Site-to-Site VPN connection at the main office ISA Firewall, to connect it to the branch office ISA Firewall.
We will place the answer file in the root file of the C: drive on the branch ISA Firewall. If you don't want to, you can place the file in a dynamic storage device such as a USB card. The Branch Office Connectivity Wizard will automatically find the answer file on the root directory of drive C or on dynamic storage.
When running the Answer File Wizard, you should note that the Site-to-Site connection created by the answer file comes from the branch ISA Firewall. Therefore, when creating the Wizard pointing to the local class, the fact is that it points to the branch; and when the Wizard points to the remote class, the fact is that it is referencing the headquarters.
Perform the following steps on the CSS machine to create the answer file:
-
Create the Create Answer File for Remote VPN Site link (create answer file for remote VPN layer) in the Task Pane. Click Next on the Welcome to the Create Answer File Wizard page .
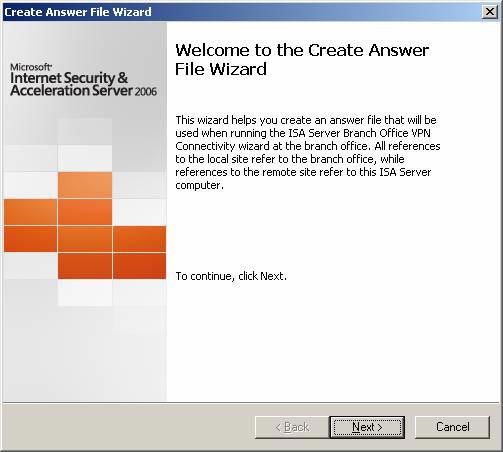
Figure 1
-
On the Answer File Details page, enter the full path to the answer file in the Type the full path to the answer file. You must name the answer file IsaUsrConfig.inf if you want the Branch Office Connectivity Wizard to automatically find the file. In this example we will place the answer file into the root directory of drive C on the CSS machine. Click Next .

Figure 2
-
There is no need to do anything on the Connection Type page, because the VPN protocol used for the Site-to-Site VPN connection is read from the existing configuration. Click Next .
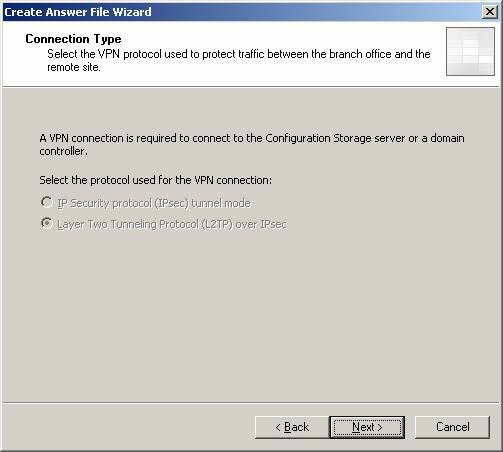
Figure 3
-
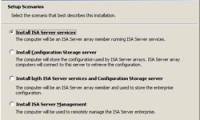
On the Array Server Deployment page, select This option is the first server deployed in the array . If there is another server in the array , select Another server is already deployed in the array and provide the server's internal IP address to be able to make intra-array communication among the members. Click Next .
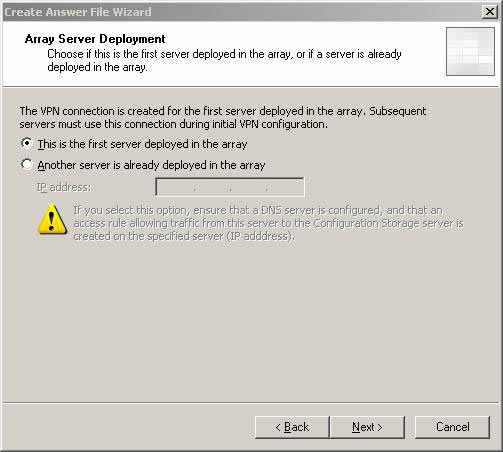
Figure 4
-
On the Local Site to Site Authentication page , the Main network name is automatically added. This is the user account name on the branch ISA Firewall, which will be used by the main ISA Firewall to authenticate the branch office ISA Firewall. The wizard automatically takes care of this account for you on the branch office ISA Firewall and configures the account with dial-in permissions. Click Next .
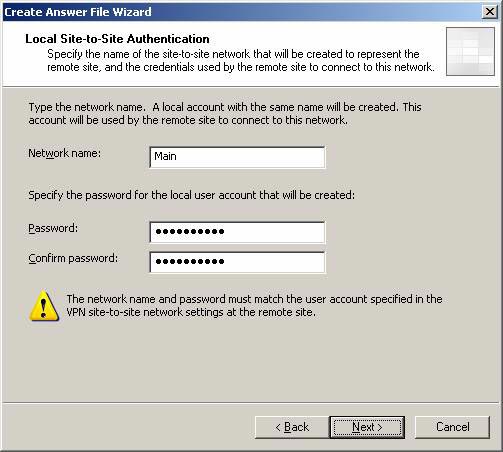
Figure 5
-
On the Remote Site VPN IP Addresses page , the addresses defined in the default Internal Network at the main office are automatically entered. You need to enter the IP address of the main office ISA Firewall in the Remote VPN server (IP address or name) field . Remember, when using the Answer File Wizard, the remote layer is the main office. Click Next .
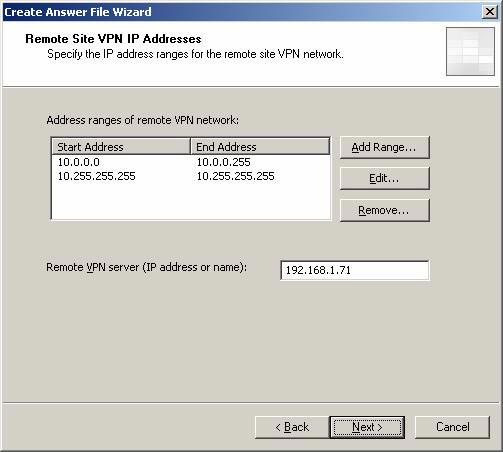
Figure 6
-
On the Local Network VPN Settings page , select the Static IP address pool option . We need to use this option because we do not have a DHCP server located at the branch office. If you later install a DHCP server at the branch, you can change the IP address configuration for the VPN to use DHCP. Click the Static IP address pool button. In the IP Address Range Properties dialog box, enter the limit of the branch office ISA Firewall IP address that can be assigned to remote VPN clients and ports and VPNs. In this example we will enter address 10.0.1.252 for Start address and 10.0.1.254 for End address . Click OK , and then click Next on the Local Network VPN Settings page .
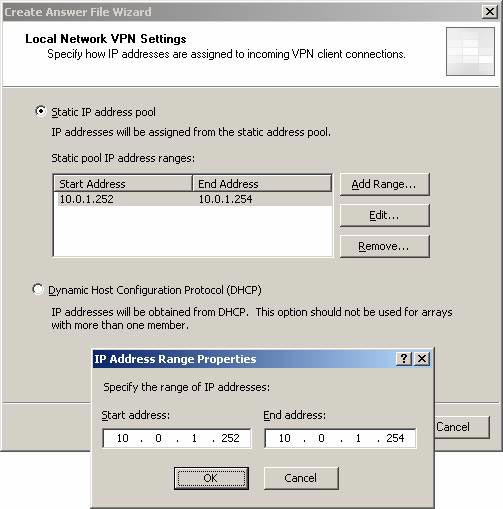
Figure 7
-
On the Remote Authentication page, enter the branch office authentication information that will be used to authenticate the main office ISA Firewall. We have created an account on the main office ISA Firewall with the name Branch , we will enter that account name on this page. This is a local account, so we'll use the computer name of the main office ISA Firewall in the Domain box. Enter information and click Next .
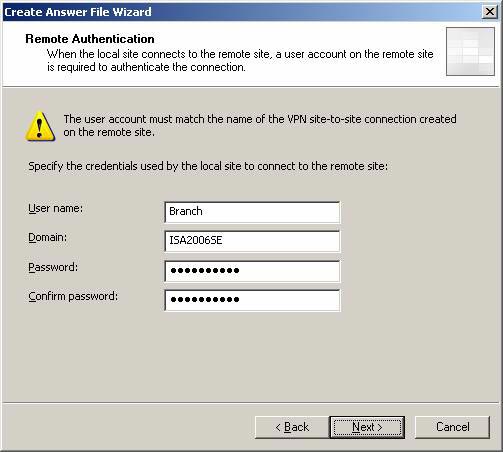
Figure 8
-
On the IPSec Authentication page, there are two methods to authenticate the IPSec connection for you to choose: certificate authentication or pre-shared authentication. In the current example, we'll start with pre-shared keys. Later, when everything works exactly as expected, we will switch to certificate certification. Select Use pre-shared key option and enter the pre-shared key as 123 . Click Next .
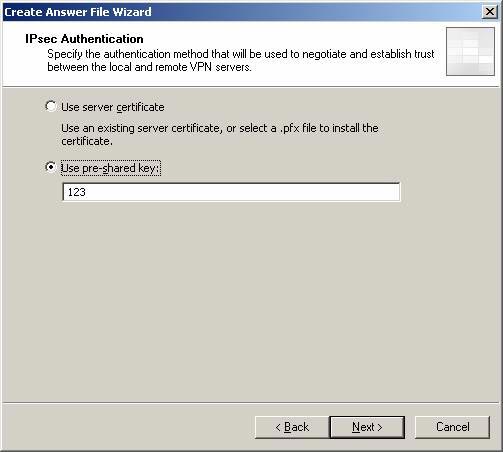
Figure 9
-
On the Join Remote Domain page, select the Join a domain option . This option allows the Branch Office Connectivity Wizard to link the branch ISA Firewall to the domain. This is a safer and more flexible option. In the Domain name (FQDN) box , enter the FQDN of the main office domain. In our example, the main office domain is msfirewall.org , so we will enter this information into the text box. Click Next .
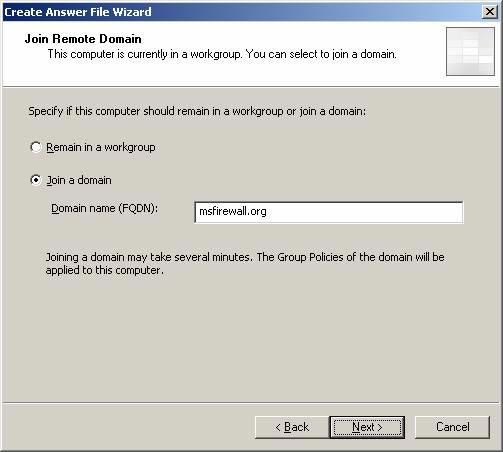
Figure 10
-
The Join Domain dialog box appears. Enter the username and password of the user who has the right to link the machine to the domain (such as domain admin) and press OK .
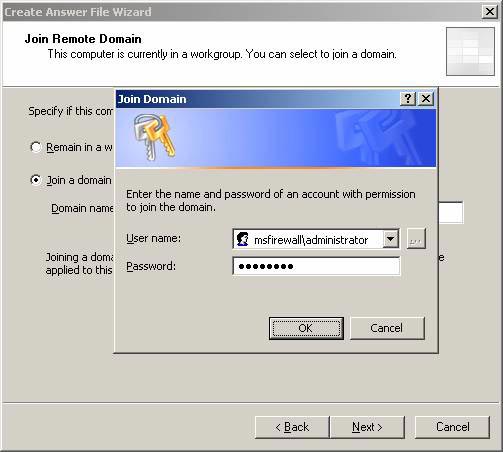
Figure 11
-
On the Locate Configuration Storage Server page , enter the CSS machine name in the Configuration Storage Server box (type the FQDN) . This must be FQDN and not an IP address or hostname (NetBIOS). Select Connect using this account in the Connection Credentials box. This option is not mandatory, but in fact, the installation of the branch office ISA Firewall sometimes stops after restarting if you log in as a domain user. Therefore, it is more effective to use the administrator role and the Branch Office Connectivity Wizard will use these credentials for the rest of the configuration. Click Next .
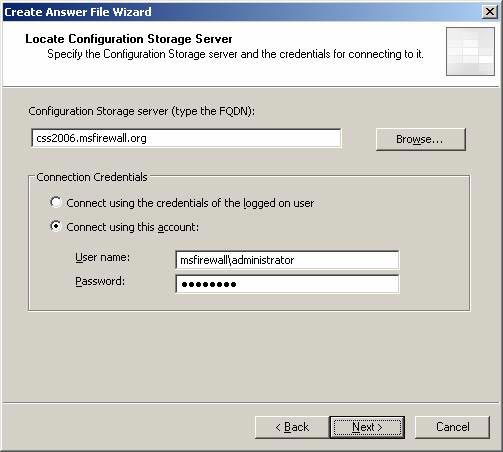
Figure 12
-
On the Secure Published Configuration Storage Server page , you can tell the Wizard about a rotating configuration server to use in case the Site-to-Site VPN is corrupted or never set up. When you publish CSS, the information circulates within a TLS-encoded channel, so it is safe to transfer over the Internet. When releasing the rotating main office CSS on the main office ISA Firewall, the branch office ISA Firewall connects to alternate CSS through the Server Publishing Rule. To use this component, you need to install the CA certificate, which the CA provides machine certificates for alternating CSS in the Trusted Root Certification Authorities repository of the branch ISA Firewall. In the later part of this series, we will show you how to create an alternate CSS and how to publish it, configure the branch ISA Firewall to use it. For now we only have a single CSS, so for the time being we accept the default parameters on this page and click Next .
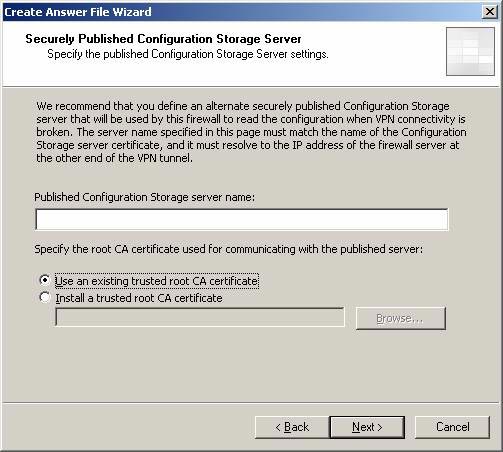
Figure 13
-
On the Array Membership page, select the Join an existing array option . We have created an array for the branch, so we can use this option and select the created array. Click Next .
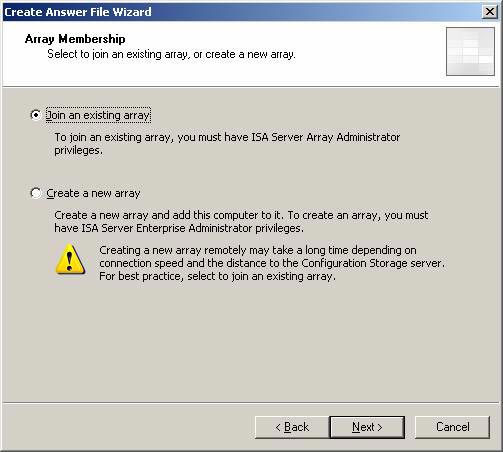
Figure 14
-
On the Join Existing Array page, enter the name of the array you want the branch office ISA Firewall to combine. You may want to use the Browse button, but it doesn't work. In our example, the created array name is Branch . Enter this name and click Next .

Figure 15
-
On the Configuration Storage Server Authentication Options page , select the Windows authentication option. We use this option because the branch ISA Firewall will be linked to the domain. Not only that, domain membership also provides us with a higher level of security and flexibility in deployment. It simplifies many initial configurations because it does not require us to process certificates at that time. We will see how to work with the following certificate. But you don't need to worry much about it. Click Next .
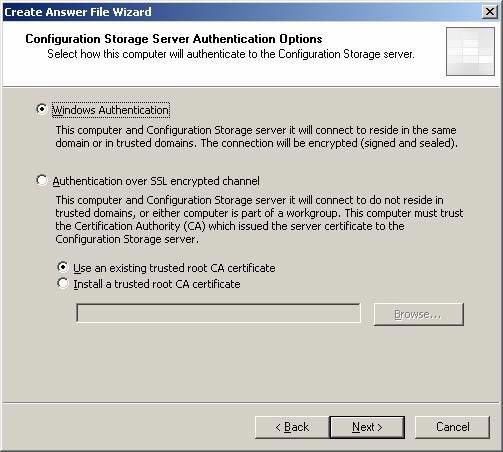
Figure 16
-
Click the Finish button on the Completing the Create Answer File Wizard page .
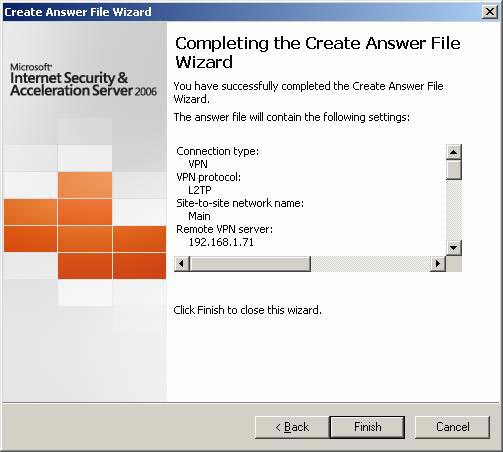
Figure 17
-
Open the answer file ( c: IsaUsrConfig.inf ). Note that all content is in clear text, including: admin password, host name, account name. If you get into the wrong hands, this file will become very dangerous. Therefore, you need appropriate protection and control. Remember, this file can be placed on the USB card, root directory on drive C of the branch office ISA Firewall, or in a folder on the branch office ISA Firewall at c: IsaAnswerFiles . There is a procedure that allows branch users to run the Branch Office Connectivity Wizard to delete this file via a desktop shortcut. Its name is the Branch Office or a similar name, which doesn't make users curious. Although it is not a very secure security method, at least it is better to leave the file on the branch office ISA Firewall's hard drive if not needed.
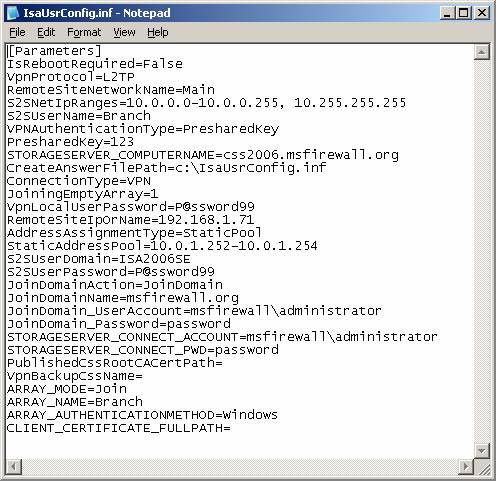
Figure 18
-
Copy the answer file to the root directory of drive C on the branch office ISA Firewall machine.
Run the Branch Office Connectivity Wizard on the Branch Office ISA Firewall
At this point, you need to attach the branch office ISA Firewall to the branch office. If a professional user is responsible for installing the ISA Firewall, you need to provide him with instructions on how to use and run the components. The user should have the following information:
-
Give them instructions on how to plug in the power, plug in the internal and external interfaces; How to verify the internal and external interfaces are plugged into the appropriate port.
-
User name (username) and password (password) for the local administrator account. The user will need to login as a local admin to run the Wizard.
-
The procedures required to run the Branch Office Connectivity Wizard. The answer file will be automatically given and has all the necessary information. Users only need to click on the Wizard according to the instructions.
-
Place link on the desktop. This link will perform a DoD of the installation file. You can use cipher.exe. The link name must be very normal for the user to ignore or pay attention to.
-
Place the link on the desktop, which removes the local admin account you created for the user. The link name must be very normal for the user to ignore or pay attention to.
-
Ask the user to call you after completing the procedure, so that you can verify that the installation file and user account have been deleted.
Follow these steps to run the Branch Office Connectivity Wizard on the branch office ISA Firewall:
-
Log in to the machine, using the local admin account created on the branch office ISA Firewall. Open Windows Explorer window and go to C: Program FilesMicrosoft ISA Server folder. Double-click on the AppCfgWzd.exe program.
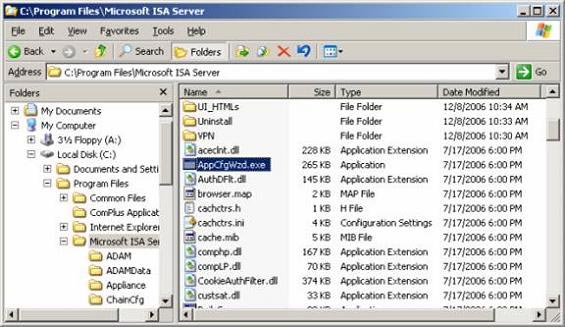
Figure 19
-
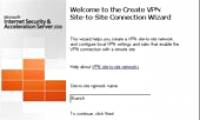
Read the information on the Welcome to the ISA Server Branch Office VPN Connectivity Wizard page , then click Next .
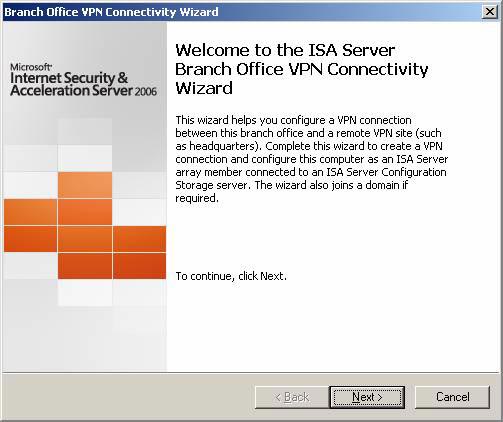
Figure 20
-
On the Configuring Settings Source page, you will see the Wizard automatically finds the configuration file and automatically selects the From a file option . Verify that the file name is correct and click Next.
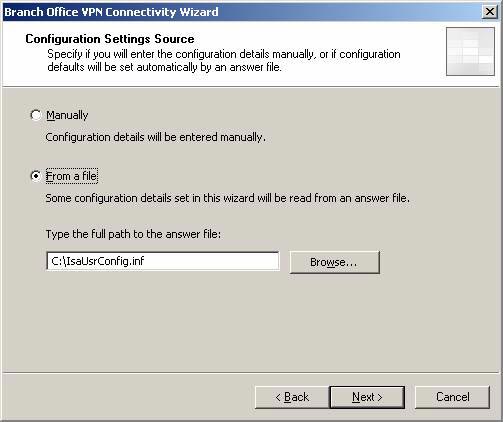
Figure 21
-
On the Connection Type page, you will see the Wizard automatically determines that the VPN protocol to be used is L2TP / IPSec. Click Next .
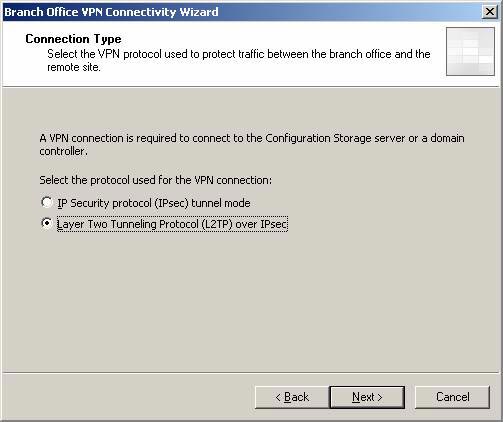
Figure 22
-
On the Array Server Deployment page, this option is the first server deployed in the array automatically determined from the answer file. Click Next .
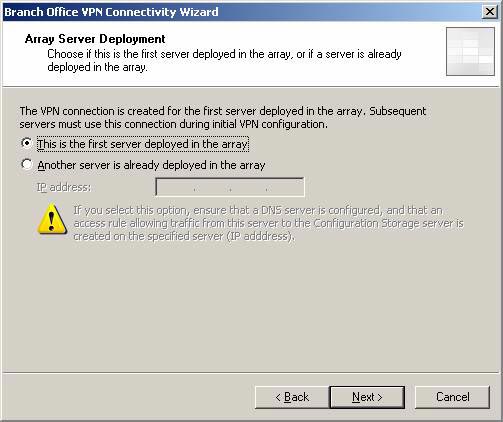
Figure 23
-
On the Local Site to Site Authentication page , the user account that the main office will use to connect to the branch office ISA Firewall is automatically configured, based on the settings in the answer file. Click Next .
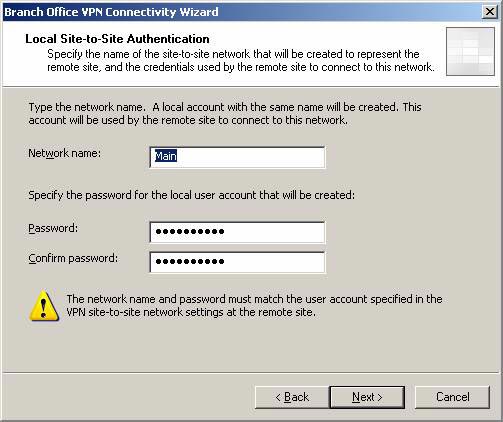
Figure 24
-
On the Remote Site VPN IP Addresses page , IP addresses that represent the main office network are automatically included; The IP addresses of the main ISA Firewall are automatically configured in the Remote VPN server (IP address or name) box . Click Next .

Figure 25
-
On the Local Network VPN Settings page , the static address area for assigning remote access IP addresses to VPN clients and VPN gateways is automatically configured. Click Next .
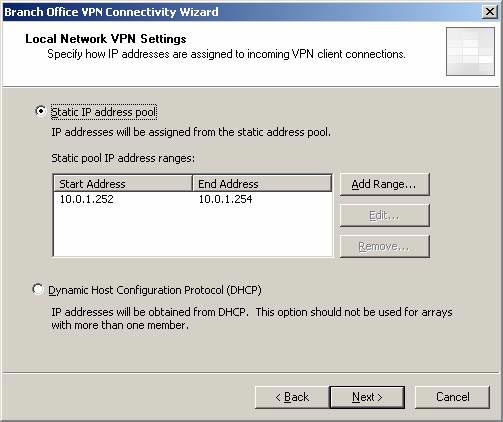
Figure 26
-
On the Remote Authentication page, the authentication information of the branch office ISA Firewall used to connect to the main office ISA Firewall is automatically entered. Click Next .
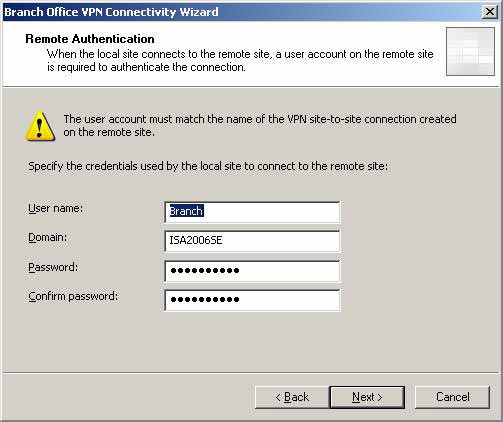
Figure 27
-
On IPSec Authentication page, the pre-shared key configuration in the configuration file is automatically determined and entered in the Use pre-shared key box . Click Next .
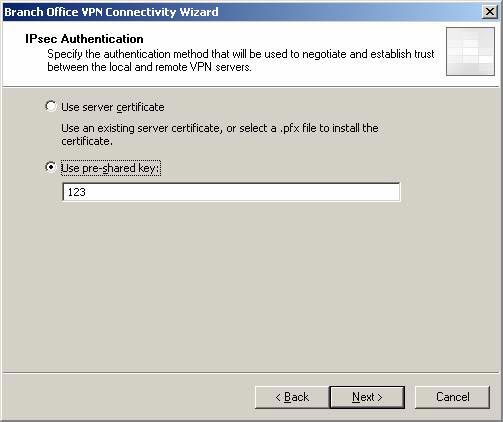
Figure 28
-
Review the settings on the Ready to Configure the VPN Connection page and click Next .
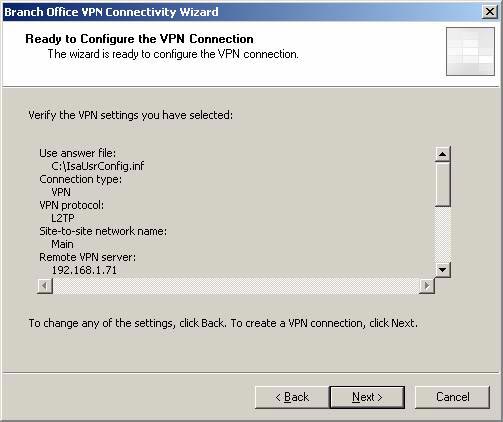
Figure 29
-
On the Join Remote Domain page, the Join a domain option is automatically selected and the domain you configured in the configuration file is automatically entered in the box. Click Next .
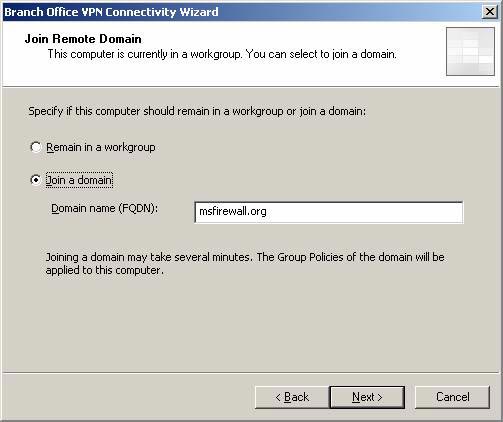
Figure 30
-
A dialog box appears, informing you that the computer needs to be restarted after linking to the domain. Click OK .
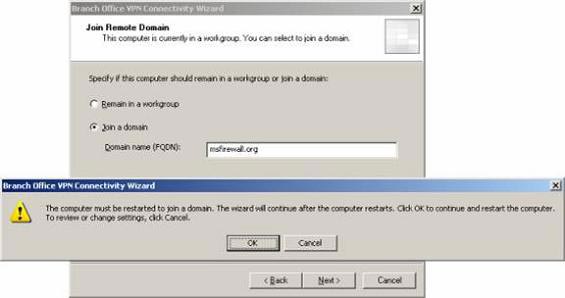
Figure 31
-
The Join Domain dialog box appears, requesting user credentials with rights to link computers to the domain. Verification information is entered automatically based on the information in the answer file. Click OK .
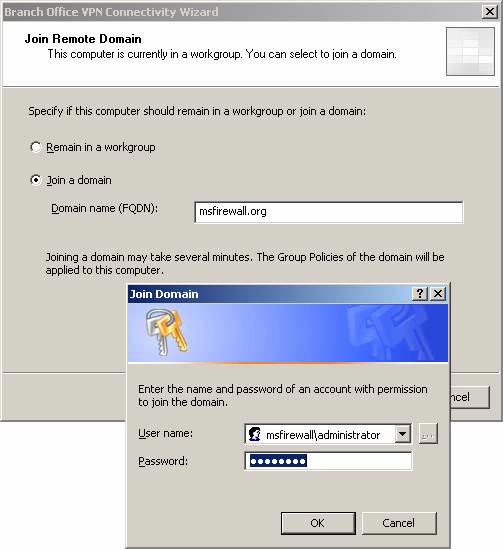
Figure 32
-
The computer will restart automatically in about a minute after clicking OK Join Domain dialog box.
-
The user logs back in as the local admin. A minute or two later, the desktop will appear. The wizard will reboot so that the Branch Office ISA Firewall can link to the branch office array. There may be delays related to establishing a VPN connection, so users will have to wait about 10 minutes.
-
Page Resuming the Branch Office ISA Server VPN Connectivity Wizard appears when the machine is ready to change from using its own CSS to using CSS at the main office. Click Next .
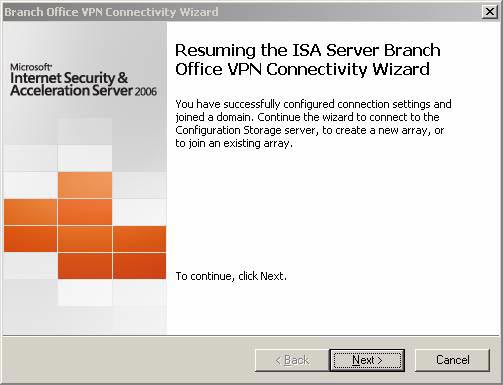
Figure 33
-
On the Locate Configuration Storage Server page , the name of the main office CSS is automatically entered into the Configuration Storage server box . User account and authentication information are automatically entered in the Connection Credentials section. Click Next .
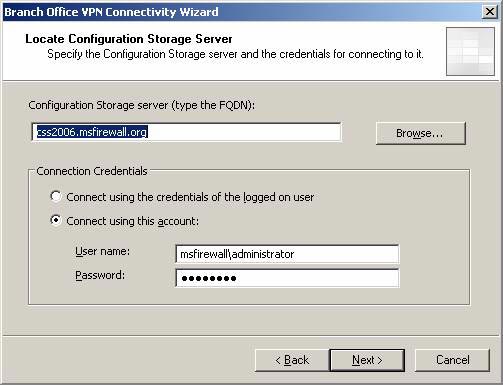
Figure 3 * 4
-
On the Securely Published Configuration Storage Server page, an alternate CSS import option appears, which can be used when a Site-to-Site VPN connection is dropped. In this example we have not used alternate CSS, so we will use the default settings. Click Next.
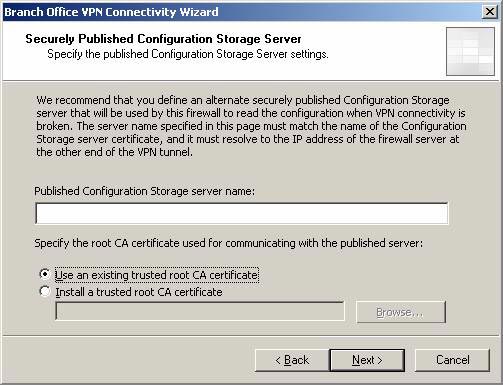
Figure 35
-
On the Array Membership page, the Join option to make an array is automatically selected. Click Next .
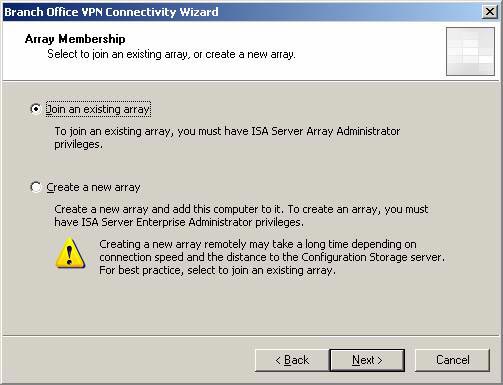
Figure 36
-
On the Join Existing Array page, the Branch array is entered automatically. Click Next .
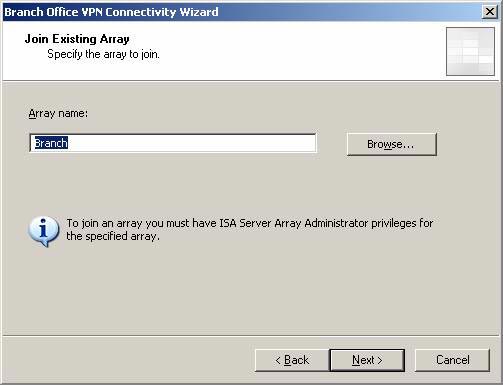
Figure 37
-
On the Configuration Storage Server Authentication Options page , the Windows Authentication option is automatically selected. We should use Windows Athentication because this machine is a domain member, the most realistic security ISA Firewall. Click Next .
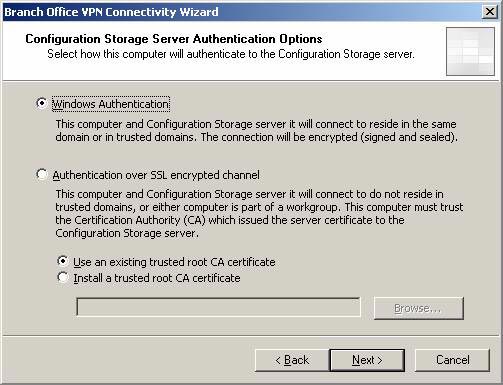
Figure 38
-
Review the settings on the Ready to Configure the ISA Server page and click Next .
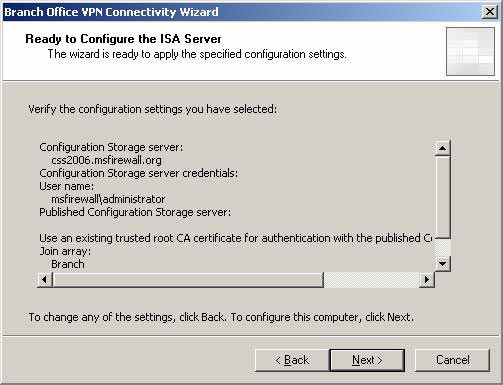
Figure 39
-
A progress bar appears on the Configuring the ISA Server page . It may take a long time, depending on the link speed and some other factors. It usually takes about 30 minutes or more. You will not be able to use Event Viewer log information until the VPN connection has not been established. If any error occurs even though you wait a long time, you should review it in Event Viewer to troubleshoot the problem.
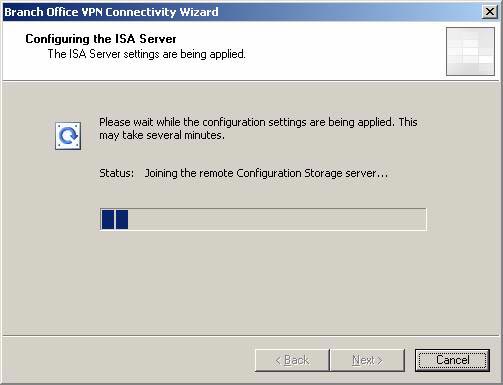
Figure 40
-
The Completing the Appliance Setup Wizard page appears when the branch office ISA Firewall successfully transforms from the local CSS to the main office CSS. Now you might ask, 'What is the Appliance Setup Wizard', why is it while we work with the Branch Office Connect Wizard from the beginning to the present. Unfortunately, there is no answer for you. Maybe at some point the Branch Office Connectivity Wizard is named the Appliance Setup Wizard. Then they changed the name again, but forgot to update this page. Don't mind, this is the end of the Wizard. Click Finish .
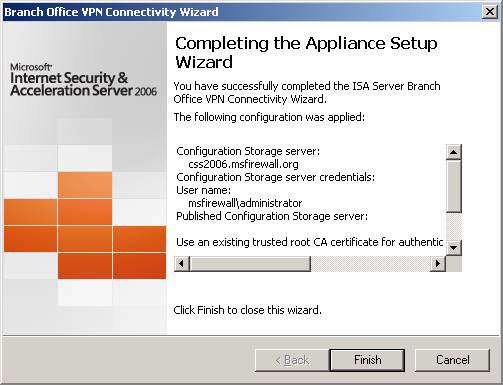
Figure 41
-
A dialog box will appear informing you that you need to restart the branch office ISA Firewall. Click OK .
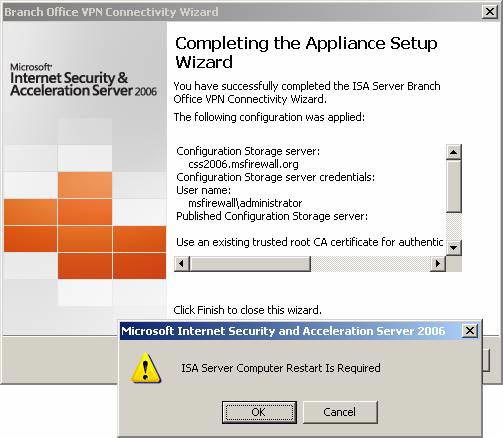
Figure 42
-
Users need to login with the local admin account. You should instruct the user to click on the link to the generated command file to delete the answer file and the user account created for them. Then show him how to log off. Now, the branch office ISA Firewall is configured and ready to run. Configuration and management operations can be performed on the main office CSS machine or any other machine if you configure it as a management station.
Summary
In this part 5, we have completed the basic installation process connecting to the Site-to-Site VPN, using the answer file along with the Branch Office Connectivity Wizard. In the next part of this series, we will work with the Firewall Rule set, which will enable you to block communications between the branch office and the headquarters. We will create the rule set, which allows installing the branch office Domain Controller and make configuration changes to DNS to support branch name solutions. We will also configure the branch office ISA Firewall and DNS to support branch office firewall clients. This helps to regulate and control branch office users' access to data in the main office. In particular, we will know how the ISA Firewall significantly enhances the security of the centralized Site-to-Site VPN.
Create a Site-to-site VPN on ISA 2006 (Part 6)
Was this article helpful?
Your feedback helps us improve.
Related Articles
 Create a Site-to-site VPN on ISA 2006 (Part 4)14 minutes read
 Create a Site-to-site VPN on ISA 2006 (Part 6)19 minutes read
 Create a Site-to-site VPN on ISA 2006 (Part 3)17 minutes read
 Create Site to Site VNP with the ISA 2006 Firewall Branch Office Connection Wizard - Part 221 minutes read
 Instructions for creating web pages in Wordpress from A to Z (Part 2)9 minutes read
 Create a Site-to-site VPN on ISA 2006 (Part 2)22 minutes read
Reader Comments 0
Sign in with email or Google to join the discussion.