Overview of the Forefront TMG 2010 management interface
In this article we will give you an overview of the Forefront TMG 2010 management interface.
Introduce
The appearance of Microsoft Forefront Threat Management Gateway (TMG) 2010 has brought many interesting things and there are compelling reasons for upgrading from previous Microsoft ISA Server versions. One of them is the new security features included in the product, such as URL filtering, web antivirus, anti-malware, SSL forwarding, completely new intrusion detection and detection system, security capabilities. email protection. Besides, there are countless other things that have been changed to make it easier for the daily management task for TMG. In this article, we will show you some of the new favorite features and some interesting improvements in the TMG management interface.
New components are also improved
Rule Base Search - The new search feature included in the TMG management interface will make managing a large number of rules simpler. If you want to display any rule that is using the DNS protocol, simply enter the term 'DNS' into the search box and click the magnifying glass icon to execute the search.
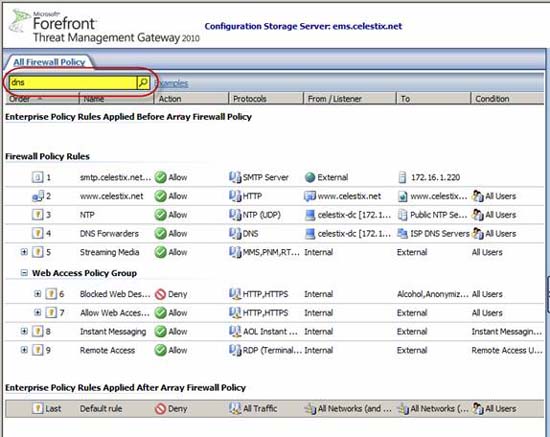
Figure 1
The main window displays rules with the DNS protocol.
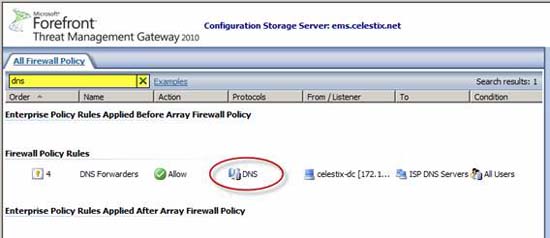
Figure 2
There are several ways to build queries. You can choose the name, name: value pairs and property: value pairs. For more information, you can click the Examples link next to the search box.
Web Access Policy - The new Web Access Policy button in the interface tree displays a consolidated view of web access rules configured in TMG.
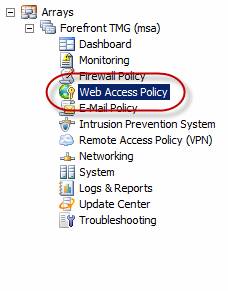
Figure 3
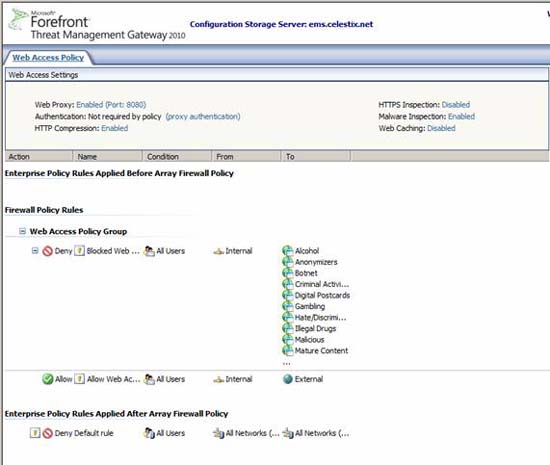
Figure 4
As a rule-based search function, administrators will significantly simplify administrative tasks when executing a large number of complex rules. A clear and concise view of web access rules will reduce configuration errors. Quick and easy access to common settings to allow web access is also included in this view. These settings include web proxy configuration, authentication, compression, HTTPS inspection, malware inspections and web caching.
Routing Configuration - Select the Networking button in the interface tree, then you will see a new tab called Routing .
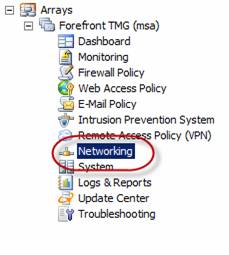
Figure 5

Figure 6
Here you can create network topology routes . There is no need to connect to each TMG firewall separately and enter the route command from the command line. To add a static route, click the Create Network Topology Route link in the task pane.
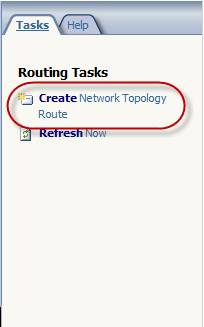
Figure 7
Enter the destination or destination host, the appropriate subnet mask, the gateway address at the next hop. You can also specify a metric if you want.
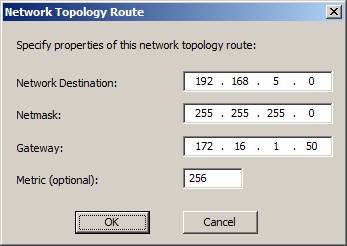
Figure 8
This feature also allows you to view the routing configuration of each TMG firewall.
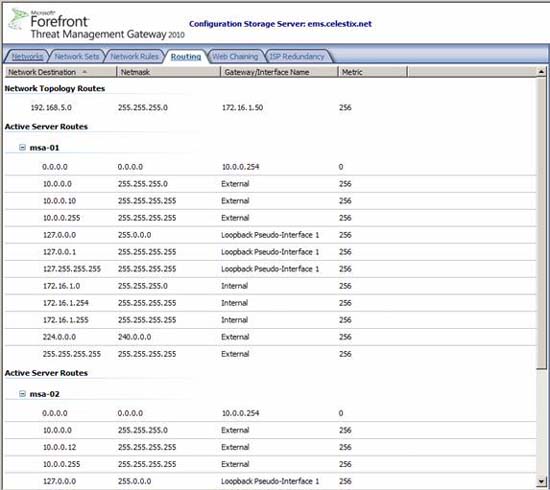
Figure 9
Network Interface Configuration - In addition to being able to configure static routes in the management interface, you can configure network interface properties. Click the Networking button in the console tree and select the Network Adapters tab.
Note: This tab is only available when running the management interface on an array member. It is not displayed in the management interface on the Enterprise Management Server.
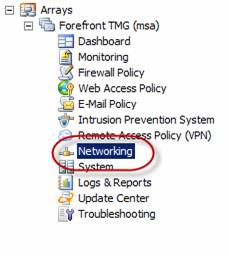
Figure 10
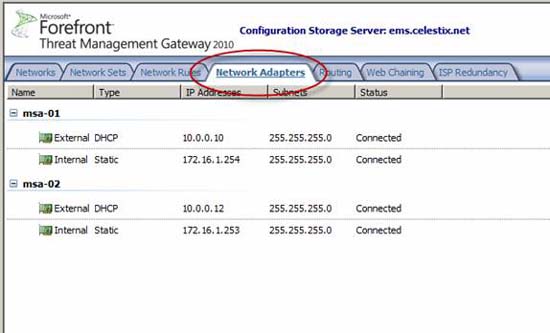
Figure 11
Right-click on a network interface and select Properties . Here you can change IP addresses, subnet masks, default gateways, and configure DNS servers. In addition, you can enable or disable interfaces.
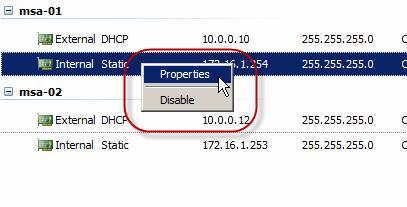
Figure 12

Figure 13
Getting Started Wizard - After TMG is installed, the first time you open the management interface, the program will launch the Getting Started Wizard .
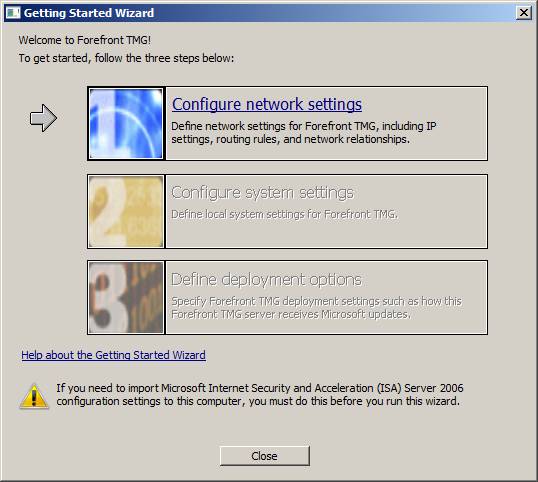
Figure 14
Here you will be prompted to configure network and system settings, define deployment options. If you need to make significant configuration changes to the system or redefine deployment options, you can run the wizard again by clicking the top button in the console tree and then selecting the Tasks tab in the task pane and Click the Launch Getting Started Wizard link.
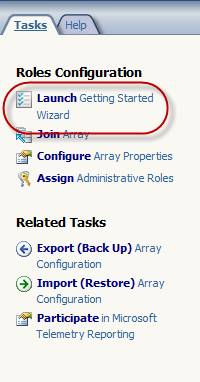
Figure 15
Note that you cannot run the Getting Started Wizard when the TMG firewall is a member of the array. Attempting to launch the wizard will generate the following error:
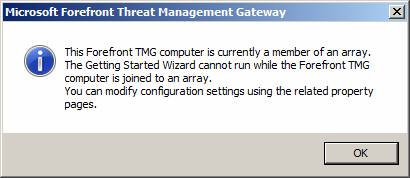
Figure 16
Network Load Balancing (NLB) Configuration - TMG currently has the ability to change the NLB operator in the GUI.
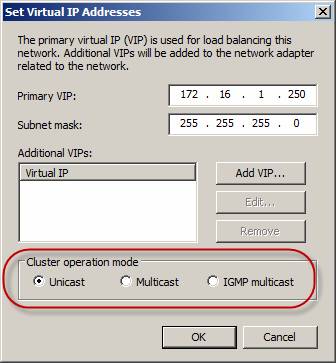
Figure 17
Previously, this change could only be made under the program. This makes it difficult to confirm the settings, requiring the administrator to use the command line tool to perform authentication.
Dashboard System Performance - The system performance indicator in the TMG management interface has new counters. CPU Usage and Available Memory; These two counters are really useful for TMG administrators a lot compared to Allowed Packets / Sec and Dropped Packets / Sec included in previous versions.

Figure 18
Connectivity Test - Clicking the Troubleshooting button in the console tree will display a new tab called Connectivity Test.
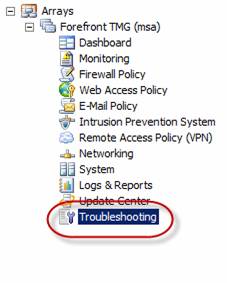
Figure 19
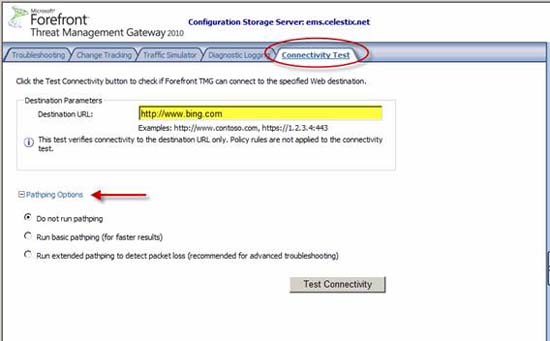
Figure 20
This new tool allows you to test basic web connectivity from the firewall in the management interface. Complete the Destination URL: field and click the Test Connectivity button to perform the test action. Optionally, you can run a pathping during the test to collect other information. Be aware that the destination URL does not have a path so if you are still familiar with entering the same URLs, then you will see the following error message:
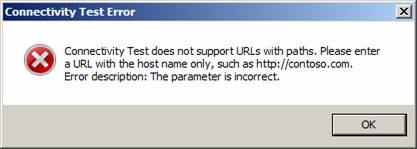
Figure 21
Firewall Policy Grouping - This is another feature that administrators with large volumes of complex rules will appreciate its value. To create a rule group, select one or more rules, right-click the selected rule number, select Create Group .

Figure 22
Name the description for the policy group and select Ok .
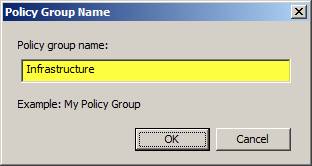
Figure 23
The selected rules will now be part of the group. By right-clicking on the group and selecting Properties , you can enable, disable, and move the entire group. You can also rename the group or cancel the group for these rules.
Conclude
These are the new favorite features that I have selected in the Forefront Threat Management Gateway 2010 management interface. There will definitely be many other features that you will find useful, so we recommend you Let's explore more about this new TMG management interface.