Create a Site-to-site VPN on ISA 2006 (Part 3)
In Part 1, you learned about using the Branch Office Connectivity Wizard to create a site to site VPN connection between ISA 2006 Enterprise Edition at the head office and the branch office. Part two, we perform the configuration of DNS server (server management system numb
Create a Site-to-site VPN on ISA 2006 (Part 1)
Create a Site-to-site VPN on ISA 2006 (Part 2)
In Part 1, you learned about using the Branch Office Connectivity Wizard to create a site to site VPN connection between ISA 2006 Enterprise Edition at the head office and the branch office. Also in part one, we discussed the core network infrastructure used in this series, then went into the details of prerequisites for site to site virtual private networks and how to debug one. Some common problems in site to site VPN.
In part two, we perform the configuration of the DNS server (the domain name management server) with the appropriate DNS entry points needed to operate the solution and stop using DDNS so that the gateway to the ISA Firewall virtual private network register PPP PPP interface in DDNS. Then install the CSS on a dedicated machine and create two ISA Firewall Array on CSS: one for the main office and one for the branch.
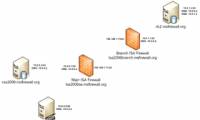
In this third part, we will install the services on the main office and branch office ISA Firewall.
Install the ISA Firewall services at the main office
Now we have the CSS and Firewall Array arrays defined within it. Next is to install the services on the main office ISA Firewall and point the main office ISA Firewall to the main office CSS. Remember, all member configuration information in ISA Firewall arrays is stored and retrieved from CSS. You cannot configure them directly. All configuration must be done on CSS and CSS will provide this configuration information for ISA Firewall array members.
The head office firewall will be configured during installation to use a dedicated CSS computer. It is also the CSS provider and will also be configured to link to the Main array at the same time. System Policy will be automatically configured to allow the ISA Firewall to communicate with both the CSS and the Domain Controller. We will look at this system policy after installing services on the host ISA Firewall.
Follow these steps:
-
Insert the ISA 2006 disc into the drive, wait a few minutes for the autorun menu (automatically run after receiving the disc) to appear. If this menu does not appear, double-click the ISAAutorun.exe file found in the disk's directory.
-
On the autorun ISA menu, click on the Install ISA Server 2006 link .
-
On the Welcome to the Installation Wizard page for Microsoft ISA Server 2006 , click Next .
-
On the License Agreement page, select I accept the terms in the license agreement and click Next .
-
Enter the customer information and product code on the Customer Information page and click Next .
-
On the Setup Scenarios page, select Install ISA Server Services and click Next .
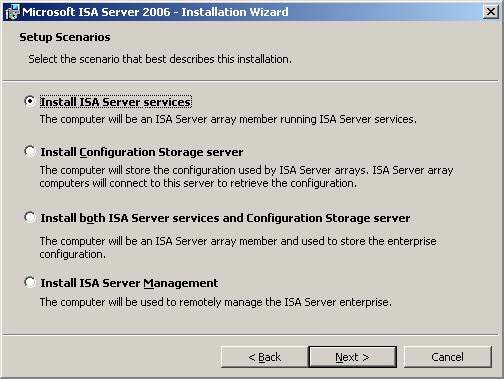
Figure 1
-
Accept the default settings on the Component Selection page and click Next.
-
On the Locate Configuration Server page, enter the FQDN for the CSS machine, in this example css2006.msfirewall.org . We will enter this information in the Configuration Storage server box (type the FQDN) . In the Connection Credentials box, select Connect using the credentials of the logged on user if you are logged in as the domain administrator. If not, select Connect using this account and enter the identity information to verify accordingly. In this example we will use the administrative role. So choose here the credentials of the logged on user , click Next .
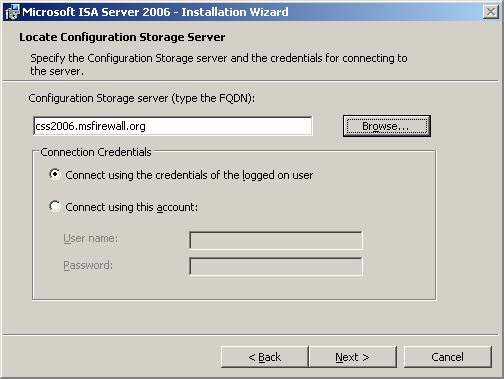
Figure 2
-
On the Array Membership page, select Join an existing array and click Next .
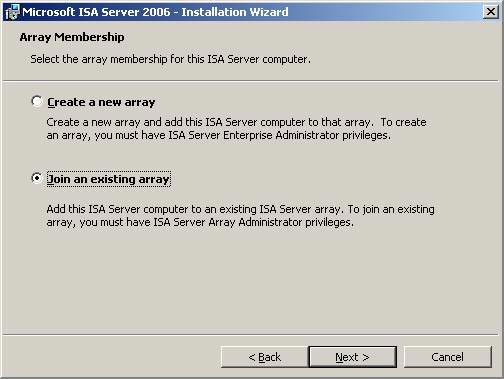
Figure 3
-
On Join Existing Array page, press the Browser button. The Arrays to Join dialog box appears, providing a list of available arrays. Select Main and click OK .
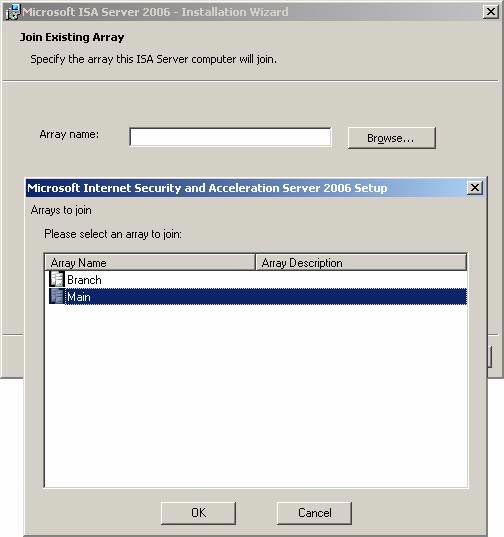
Figure 4
-
Click Next Join Existing Array page.
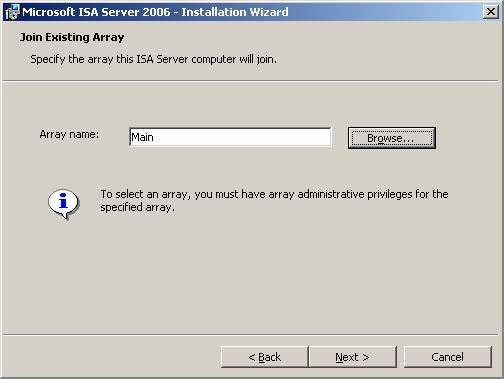
Figure 5
-
On the Configuration Storage Server Authentication Options page , select how the ISA Firewall verifies CSS. There are two options for you: Windows authentication ( authentication in Windows) and Authentication over SSL encrypted channel ( authentication over SSL encryption channel ). Often the first option is better, because it requires the ISA Firewall and CSS to be in the same domain, the safest configuration. If you are threatened by 'network intruders' or 'security teams' that do not fully understand the ISA Firewall, or do not know why the operating system is Windows 95 installing Zone Alarm, you may have been infected. stuck with ISA or even the ISA Firewall that is not a member of the domain. In that case you will have to use certificate authentication and SSL encryption channels.
If you have problems using authentication over SSL, you need to install the CA certificate of the machine issuing the certificate to the CSS on the ISA Firewall device.
In our current example, both ISA Firewall and CSS are domain members. So no need to worry about certificates, just select Windows authentication and click Next .
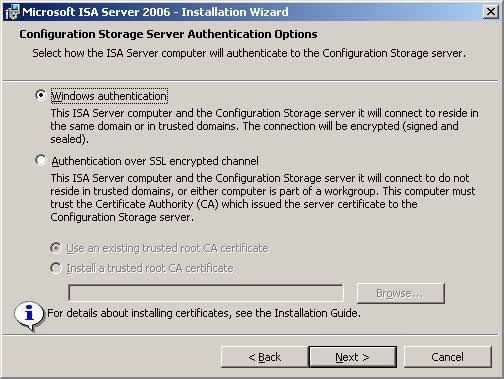
Figure 6
-
On the Internal Network page, define the IP address according to the default internal network (default Internal Network). The default local network is the network that contains Domain Controllers and many other key infrastructure servers such as DNS, WINS, and authentication services. Click the Add button.
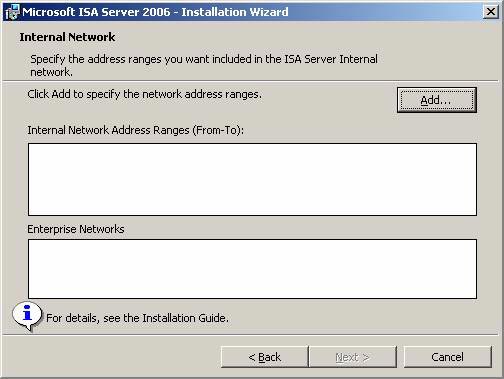
Figure 7
-
On the Addresses page, click the Add Adapter button.
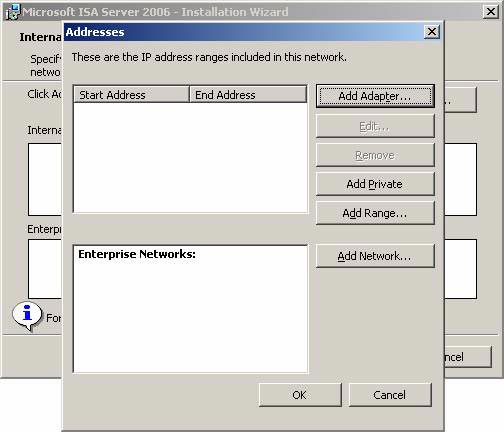
Figure 8
-
In the Select Network Adapters dialog box, check the box next to the NIC showing the internal interface of the ISA Firewall. In this example, I rename the NICs to make it easier to identify. Remember that you need to do more than just click on the NIC name. You need to check the checkbox in the checkbox. Click OK .

Figure 9
-
Click OK in the Select Network Adapters dialog box, and then click OK in the Addresses dialog box; Then click Next on the Internal Network page.
Note that the IP address range here is according to the definition of the default intranet. If you see that these addresses are not in the list, it means that you did not configure the routing table on the ISA Firewall to navigate to other network IDs behind the internal ISA Firewall interface. Then exit the installation program and reconfigure the routing table so that it contains all intranet IDs. Restart the installation program to continue.
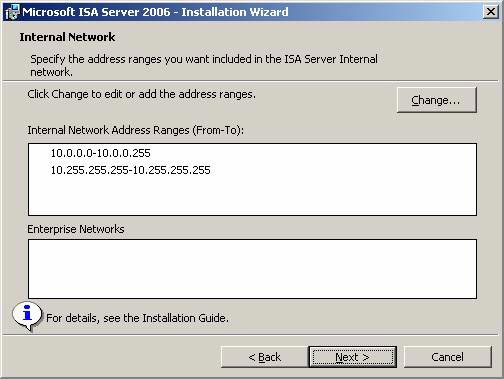
Figure 10
-
The Services Warning page informs you that during the installation process, the program will suspend SNMP Service , FTP Publishing Service, NNTP Service , IIS Admin Service and World Wide Web Publishing Service . With an accurate ISA Firewall installation program, none of the above services (except SNMP) is installed on the ISA Firewall. If you want to have the installation procedure for SNMP MIB objects, you need to install the SNMP service on the ISA Firewall before starting the Setup program. Click Next to continue.

Figure 11
-
Click Install .

Figure 12
-
The progress bar appears, providing installation status information and ongoing procedures.

Figure 13
-
Click Finish on the Installation Wizard Completed page at the end.

Figure 14
-
Go to the CSS machine, open the ISA Firewall console. Expand the Arrays node, then the array button Main > Configuration > Servers . You will see the name of the main office ISA Firewall there and the green check mark on the icon, ie the communication between the CSS and the main office ISA Firewall is working correctly.
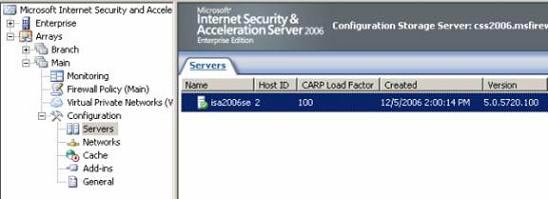
Figure 15
Local CSS settings and firewall services on the Branch Office ISA Firewall
One of the main problems ISA 2004 Firewall admin faces when deploying for branch offices is its complexity. The admin needs some backup methods for the branch office ISA Firewall device at the main office and needs a box ready to deploy at the branch. The complexity of the configuration is increasing as many ISA Firewall admins realize that domain membership is a key security factor with flexibility requirements. Turning a branch ISA Firewall into a destination for site to site VPN domain members is difficult and requires experienced administrators to do it.
The 2006 ISA Firewall solved this problem with the Branch Office Connectivity Wizard. The Wizard installer allows you to provision the branch office ISA Firewall at the main office and attach it to the branch office. Professional users at the branch office may be provided with instructions on how to plug in the source, the network cable and how to run the Branch Office Connectivity Wizard.
The user does not need to make any decisions because the backup ISA Firewall contains an answer file that provides all the answers to the Branch Office Connectivity Wizard. They just need to launch the application and make a click on the screen. The wizard will establish a VPN connection, link the ISA Firewall to the domain, restart and connect to the CSS, the array exactly.
Before attaching the box to the branch office, you should install the local CSS and ISA Firewall services on the branch firewall. This requires you to assign IP addresses to the internal and external interfaces that will be used at the branch office. All NICs need to be connected to the hub or switch during installation. Before installing the ISA Firewall software, you need to assign a valid local address machine and default gateway to be able to install all Windows Update versions.
After installing the updates, you need to change the IP address information on the ISA Firewall's NICs to match the numbers that will be used at the branch office.
Follow these steps:
-
Insert the ISA 2006 Firewall installation disk into the branch and wait for the autorun menu. If the autorun menu does not appear, double-click the ISAAutorun.exe file located in the disk directory. Click on the Install ISA Server 2006 link .
-
Click Next on the Welcome to the Installation Wizard page for Microsoft ISA Server 2006 .
-
Select I accept the terms in the license agreement on the License Agreement page. Click Next .
-
Enter the customer information and product code on the Customer Information page and click Next .
-
On the Setup Scenarios page, select Install both ISA Server services and Configuration Storage server and click Next .
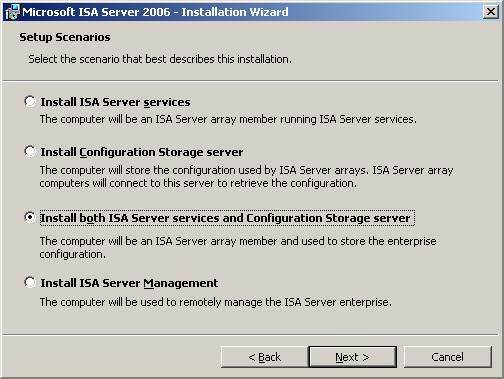
Figure 16
-
Accept the default settings on the Component Selection page and click Next .
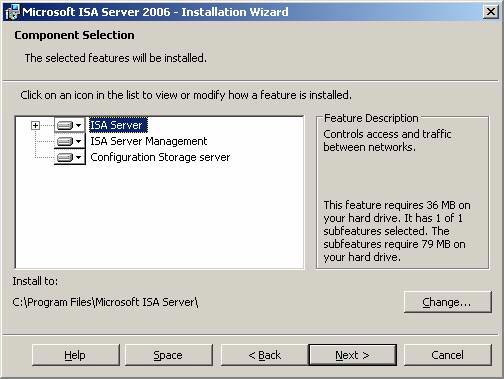
Figure 17
-
On the Enterprise Installation Options page, select Create a new ISA Server enterprise . We need to do this because the machine needs to be configured as a single server as a local CSS array member before running the Branch Office Connectivity Wizard to link the machine to the domain and configure using CSS at the main office. Click Next .
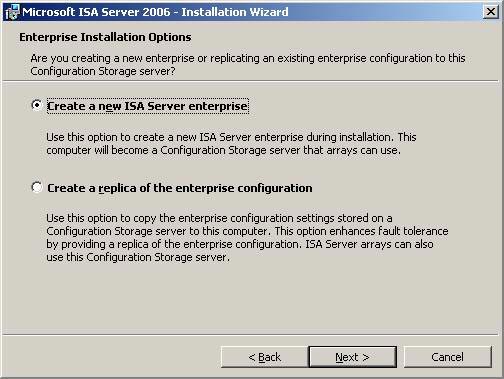
Figure 18
-
On the New Enterprise Warning page, there is some information regarding creating new ISA Firewall Enterprises. This information does not apply to our current configuration. Click Next .
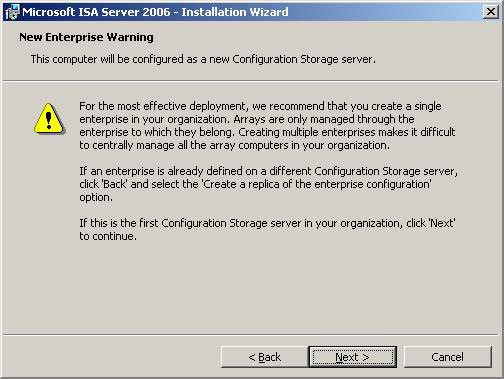
Figure 19
-
On the Internal Network page, click the Add button. In the Addresses dialog box, click Add Adapter .
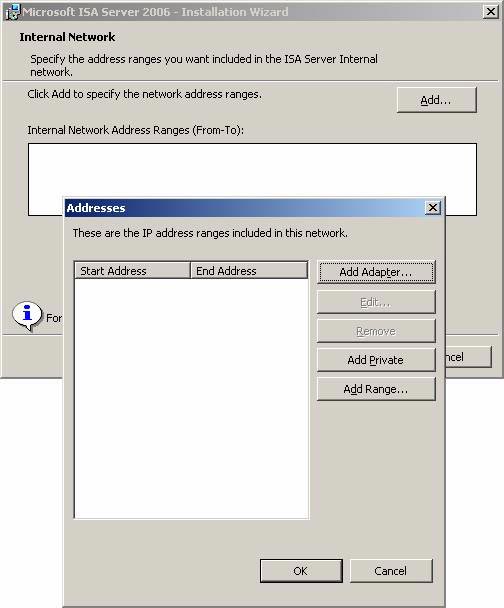
Figure 20
-
In the Select Network Adapters dialog box, put a checkmark in the checkbox next to the internal interface of the branch ISA Firewall. The IP addresses that define the default Internet Network at the branch office will appear in the frame in this Network adapter details dialog box. If the information given is incorrect, it means that the routing table on the branch ISA Firewall has not been properly configured. If there are multiple network IDs placed after the internal interface of the branch ISA Firewall, you must configure the routing table for these networks before installing the ISA Firewall. If you haven't done so, exit the installation program, make the information on the routing table correct and restart the ISA Firewall Installation Wizard.
In this example I name the NICs to make it easier to identify. Put a checkmark in the checkbox next to the internal interface and click OK .

Figure 21
-
Click OK in the Addresses dialog box .

Figure 22
-
The addresses that define the default Internet Network now appear on the Internet Network page. Click Next .
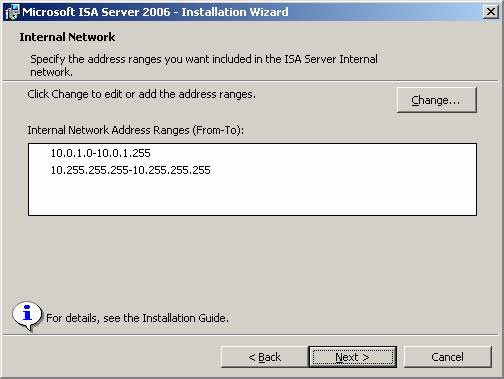
Figure 23
-
On the Firewall Client Connections page, accept the default settings that do not allow unencrypted client Firewall connections to the ISA Firewall and click Next .
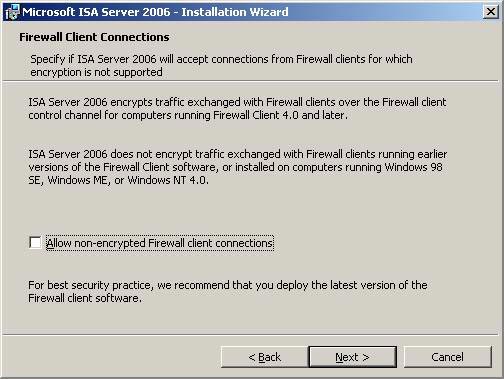
Figure 24
-
On the Service Warning page, there are some information informing you of SNMP Service , FTP Publishing Service , NNTP Service , IIS Admin Service and World Wide Web Publishing Service which will be stopped during installation. There will not be any services installed in the ISA Firewall, except SNMP. If you want to use MIB Firewall objects, you must first have SNMP on the ISA Firewall device before installing the ISA Firewall software. Click Next .
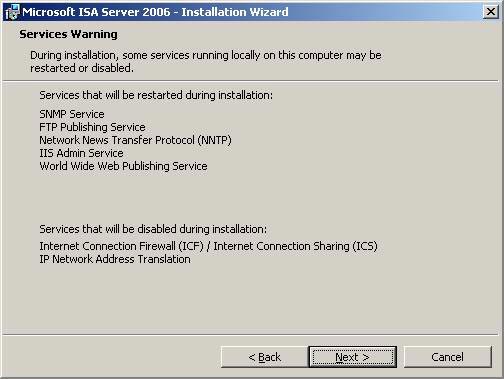
Figure 25
-
Click Install to complete the installation process.
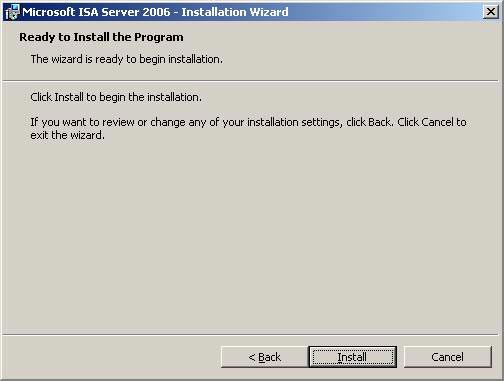
Figure 26
-
A progress bar appears showing the current status of the installation and what activities are happening.
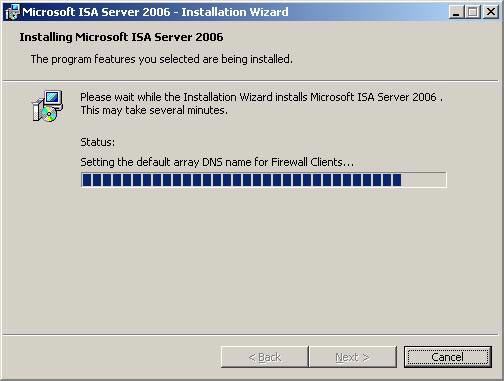
Figure 27
-
Click the Finish button on the Installation Wizard Completed page to finish.
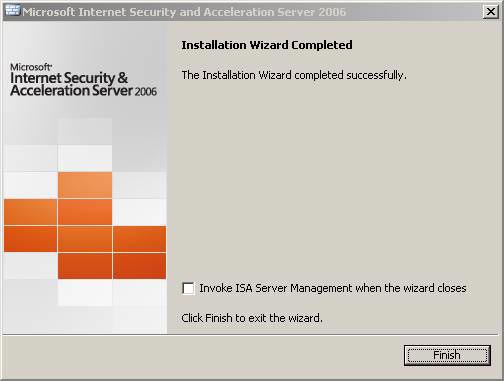
Figure 28
-
Close the Internet Explorer window and display the Protect ISA Server Computer page and restart the branch office ISA Firewall computer.
Until now, the branch ISA Firewall was almost ready to mount the branch office. However, before doing this we have to create the answer file on the main office CSS computer and create the answer file to the root of the C: drive on the branch office ISA Firewall. After completing this step, we can attach the box to the branch office.
Summary
In the third part of the series using the Branch Office Connectivity Wizard to create a site to site connection between the ISA 2006 Firewall VPN virtual gateway ports at the main office and the branch office, we looked at the installation procedures. The main office ISA Firewall service on the main office ISA Firewall and combine the ISA Firewall with the main office ISA Firewall array. Then, install the local CSS and ISA Firewall services on the branch ISA Firewall. This allows the branch office ISA Firewall to be created at the main office before attaching it to the branch office. In the next part of this series, we will create a virtual private network connection at the main office through creating Remote Network. Then create the answer file for the Power User user at the branch office to create a VPN connection to the main office.
Create a Site-to-site VPN on ISA 2006 (Part 4)
Was this article helpful?
Your feedback helps us improve.
Related Articles
 Create a Site-to-site VPN on ISA 2006 (Part 4)14 minutes read
 Create a Site-to-site VPN on ISA 2006 (Part 6)19 minutes read
 Create Site to Site VNP with the ISA 2006 Firewall Branch Office Connection Wizard - Part 221 minutes read
 Instructions for creating web pages in Wordpress from A to Z (Part 2)9 minutes read
 Create a Site-to-site VPN on ISA 2006 (Part 5)23 minutes read
 Create a Site-to-site VPN on ISA 2006 (Part 2)22 minutes read
Reader Comments 0
Sign in with email or Google to join the discussion.