Introduction to Network Access Protection (Part 7)
In Part 6, I showed you how to set up a VPN connection on a Windows Vista client. This part 7 will continue the discussion of how to complete the client configuration process.
Introduction to Network Access Protection (Part 1)
Introduction to Network Access Protection (Part 2)
Introduction to Network Access Protection (Part 3)
Introduction to Network Access Protection (Part 4)
Introduction to Network Access Protection (Part 5)
Introduction to Network Access Protection (Part 6)
In Part 6, I showed you how to set up a VPN connection on a Windows Vista client. This part 7 will continue the discussion of how to complete the client configuration process.
Start the configuration process by opening the Control Panel , clicking the Network and Internet link , then the Network and Sharing Center . When the Network and Sharing Center window is open, click the Manage Network Connections link . Then a window displays all the network connections that will be displayed and the VPN connection you created earlier.
Right-click the VPN connection and then select Properties from the shortcut menu. Windows will display the connection properties window, go to the Security tab and select Advanced (Custom Settings) as shown in Figure A.

Figure A: You must configure the connection to the Advanced (Custom Settings) security option.
Now click the Settings button to bring up the Advanced Security Settings dialog box. Once you have established a VPN connection using the Extensible Authentication Protocol, you must choose Use Extensible Authentication Protocol (EAP) . After making that selection, a list will be activated under this button. Select the Protected EAP (PEAP) (Encryption Enabled) option as shown in Figure B.

Figure B: You must select the Protection EAP security option (PEAP)
(Encryption Enabled) for VPN.
Now, click your mouse on the Properties button to bring up the Protected EAP Properties dialog box. When this dialog box appears, check the Validate Server Certificate checkbox and uncheck the Connect to these Servers checkbox. You must select the Secured Password option (EAP-MSCHAP V2) in the Select Authentication Method list . Finally uncheck the Enable Fast Reconnect checkbox and check the Enable Quarantine Checks checkbox as shown in Figure C.
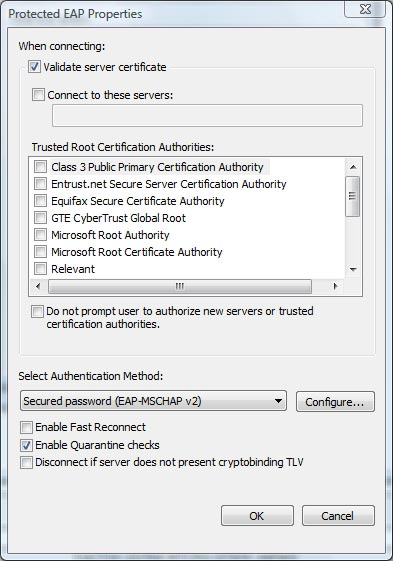
Figure C: The Protected EAP Properties window allows setting parameters
Authentication based on Extensible Authentication Protocol
At this point, you just need to click OK every time a dialog box appears to close them. Now you must configure the VPN connection to meet the requirements. In order for Network Access Protection to work, the Network Access Protection service needs to be set up to start automatically. By default, Windows Vista sets up this service to start manually, so you have to change them automatically.
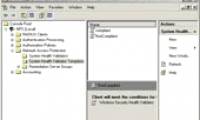
To do that, you must go to Control Panel, select System and Maintenance , then Administrative Tools . Windows will then display a list of different administrative tools. Double-click the Services icon to open the Service Control Manager.
Drag the slider in the list of services until you see the Network Access Protection Agent section . Double-click this service and then set to Automatic and OK . Please note that setting the service's startup type is automatic (Automatic) does not start the service immediately, it only ensures that the service will automatically run when we restart the machine next time. However, you can start the service without restarting the computer by right-clicking on the service and selecting Start . If you have any problems starting the service, check to make sure that both Remote Procedure Call (RPC) and DCOM Server Process Launcher services are working. Network Access Protection Agent service may not work when there are attached services under it.
Check Network Access Protection
Believe it or not, we have finally finished configuring Network Access Protection. Now perform simple tests to make sure everything is working as intended.
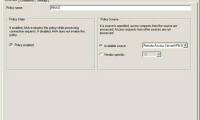
We can reconfigure the network policy server so that invalid computers are automatically quarantined and can also configure the network policy server only for standards that check if Windows firewall is available. enabled or not. In that case, you should disable the firewall on the client, then connect to the network policy server using the VPN connection you created. By doing so, the client's firewall is automatically activated.
Let's start disabling the firewall on the client. To do that, you need to open Control Panel and click Security > Windows Firewall to open the Windows Firewall dialog box. Assuming that the Windows firewall is running, click the Turn Windows Firewall On or Off link . You should now see a dialog box that allows you to enable or disable the firewall as shown in Figure D. The firewall is now disabled.
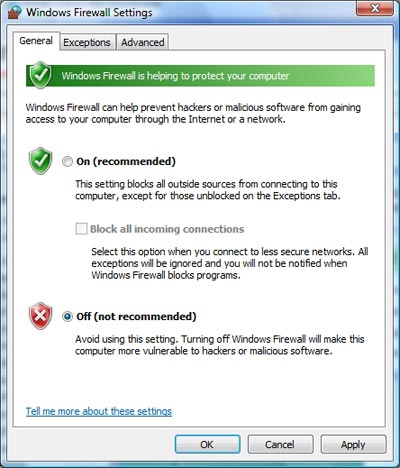
Figure D: Select Off (Not Recommended) to disable the firewall
Now turn off the Windows firewall, and this is also the time to set up a RRAS / NAP server VPN connection. To do that, open Control Panel and click Network and Internet , then Network and Sharing Center . When the Network and Sharing Center window is open, click Manage Network Connections . You will then see a list of existing LAN connections and VPN connections.
Double-click the VPN connection you created, then click Connect . You will now have to enter your username, password and domain name. Click OK after you have entered these information, and then a connection will be established for your VPN / NAP server.
As soon as the connection is established, you will see a message appear at the bottom of the message display:
This Computer Does Not Meet Corporate Network Requirements. Network Access is Limited.
( This computer has no network requirements. Network access is limited .)
You can see this message as shown in Figure E.

Figure E: When the firewall is disabled, you will get one
Notice by establishing a VPN connection.
If the Windows Firewall icon indicates that the firewall is enabled. When this happens, you will see another window appear showing the message:
This Computer Meets Corporate Network Requirements. You Have Full Network Access.
( This computer has all the network requirements. You have full access .)
You can see this message in Figure F.

Figure F: When the NAP server activates the firewall, this message is displayed
The message shown in Figure F is also displayed when the computer has the necessary requirements to connect to the NAP server through a VPN connection.
Conclude
In this article, I have shown you how to configure the NAP server to ensure that VPN clients have the necessary network security requirements. Please note that the time we wrote this article is that Longhorn Server is still in beta. Thus, some steps involved in the process may change when the official version of Longhorn Server is released. However, there will be no major changes and keep in mind that NAP will only test clients running Windows Vista.
Was this article helpful?
Your feedback helps us improve.
Related Articles
 Introduction to Network Access Protection (Part 2)8 minutes read
 Introduction to Network Access Protection (Part 4)7 minutes read
 Introduction to Network Access Protection (Part 5)8 minutes read
 Introduction to Network Access Protection (Part 1)8 minutes read
 Introduction to Network Access Protection (Part 3)10 minutes read
 Introduction to Network Access Protection (Part 6)9 minutes read
Reader Comments 0
Sign in with email or Google to join the discussion.