Block web browser with IPSec
This tutorial will explain how to block browsing of certain computers to the Internet but still have access to sites on the intranet.
In this tutorial, I will show you how to block the browsing of a certain Windows 2000 / XP / 2003 computer to the Internet but still allow it to access sites in the internal network. the set.
Windows 2000 / XP / 2003 computers have a built-in IP security mechanism called IPSec (IP Security). IPSec is a protocol designed to protect TCP / IP data packets when they are transmitted in the network by using common key encryption. In essence, the source machine will package the standard IP address inside an encrypted IPSec. This packet will then be maintained in encrypted state until it reaches the destination machine.
However, you can block some users' Internet access but still allow them to use a web browser to surf sites in the intranet. Absolutely possible with IPSec.
You can do so simply by creating a policy to instruct the computer to block all IP traffic using HTTP and HTTPS, which are protocols using TCP ports 80 and 443 as are their destination ports. By blocking this specific traffic, you can block certain computers, not allowing them to browse the Internet.
However, blocking all HTTP and HTTPS traffic will prevent your users from accessing local sites.
One solution is to add a policy that allows HTTP and HTTPS traffic but only for a specific IP address, a DNS name of a specific computer or an entire subnet.
You can configure this policy by adjusting that computer's IPSec policy, or better yet, you can configure the policy as a Group Policy Object (GPO) on a Site, Domain, or Organization Unit (OU ) somehow. To configure a GPO, you must have the appropriate Active Directory.
To configure this action for a computer, you can follow these steps:
Configure filter list and filter actions
1. Open the MMC window ( Start> Run> MMC ).
2. Add IP Security and Policy Management Snap-In .


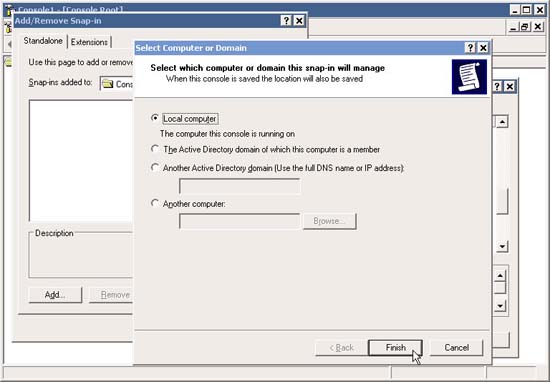
3. In the Select which computer this policy will manage window, select Local Computer (or whatever policies depend on your needs). Click Close and then click OK.
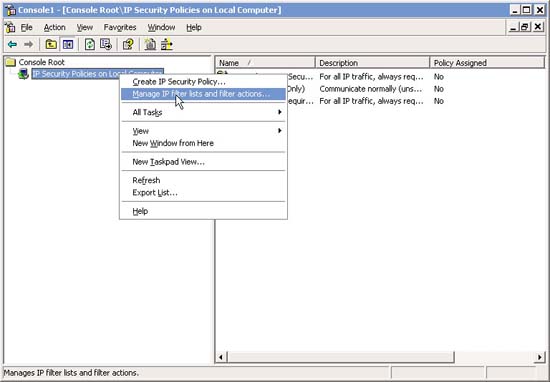
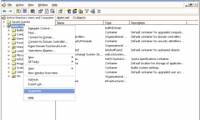
4. Right-click IP Security Policies in the left pane of the MMC console. Select Manage IP Filter Lists and Filter Actions.
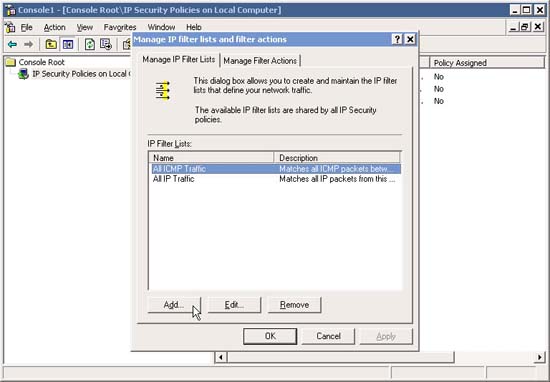
5. In Manage IP Filter Lists and Filter actions , click Add .
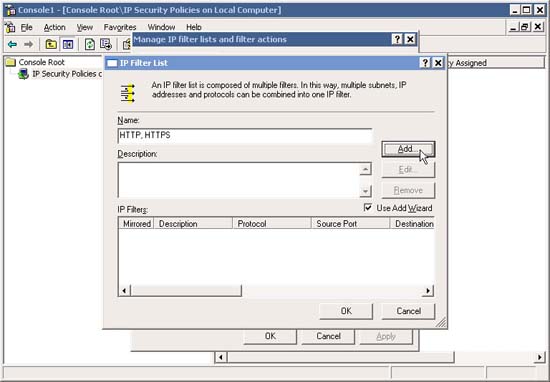
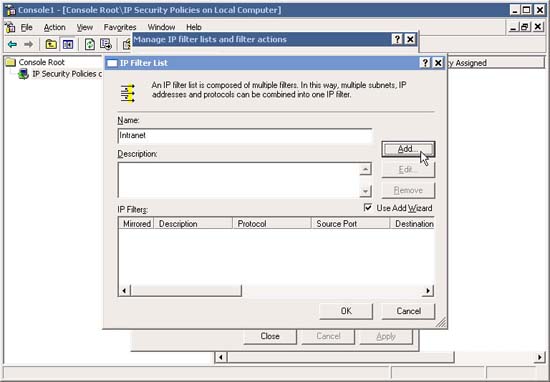
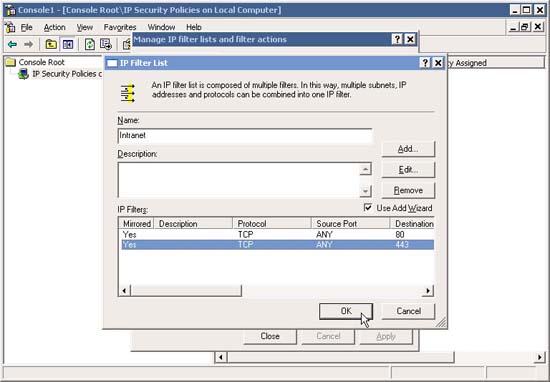
6. In the IP Filter List window, type a descriptive name (such as HTTP, HTTPS) and click Add to add new filters.
7. In the welcome window, click Next .
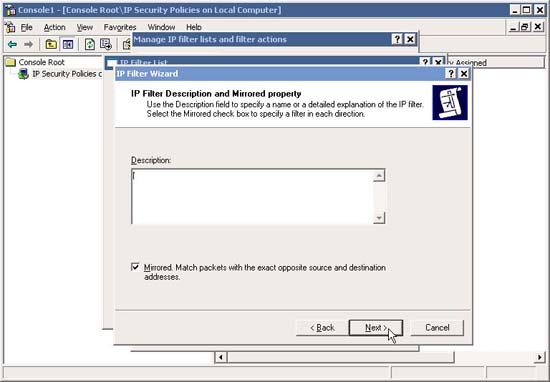
8. In the description box, type the description information if you want, and then click Next .
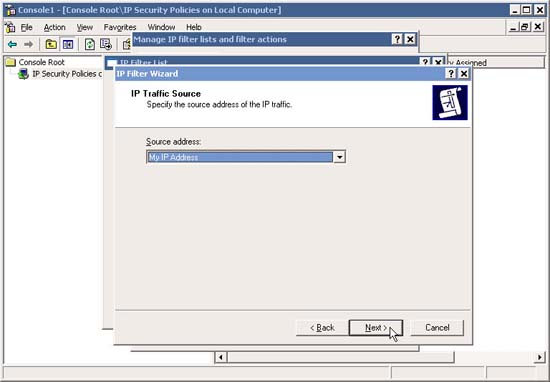
9. In the IP Traffic Source window, leave the My IP Address option selected and click Next .
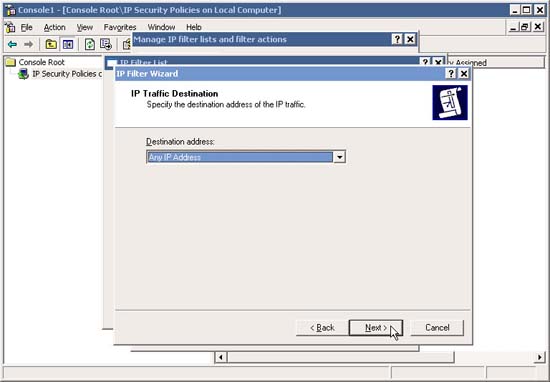
10. In the IP Traffic Destination window, to select Any IP Address option and click Next .
See page 2
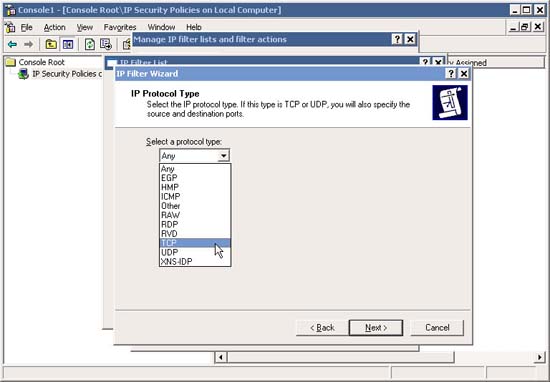
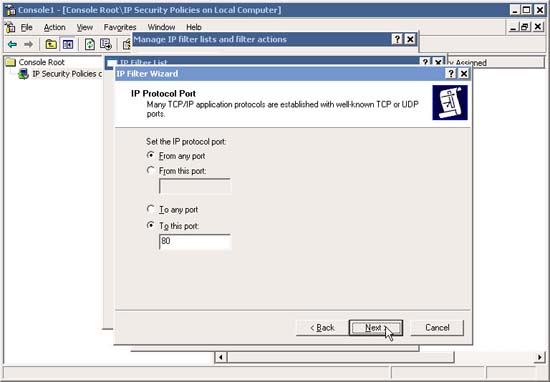
11. In the IP Protocol Type , scroll down to TCP and click Next .
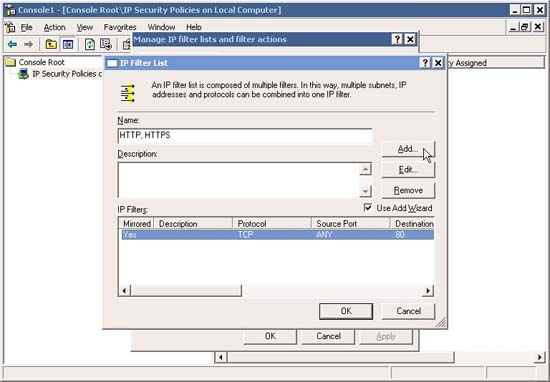
12. In IP Protocol Port , type 80 (for HTTP ) in the To This Post box and click Next .
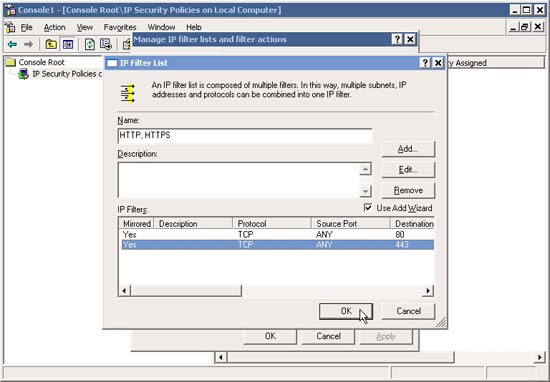
13. In the IP Filter List window, note how an IP Filter has been added . Now if you want, you can add HTTPS (Any IP to Any IP, Protocol TCP, Destination Port 443) in the same manner as above.
14. Now that you have set up both filters, click OK .
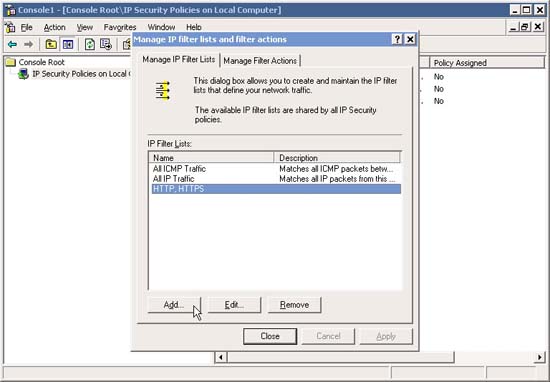
15. Go back to Manage IP Filter Lists and Filter actions , re-evaluate the filters (you can add or remove filters later). Now we are going to add a new filter to define the internal network traffic (INTRANET). Next, click Add .
16. Set the appropriate name for the new filter - for example - Intranet , then proceed to configure the filter by clicking Add .
17. In the IP Traffic Source window, leave the My IP Address option checked and click Next .
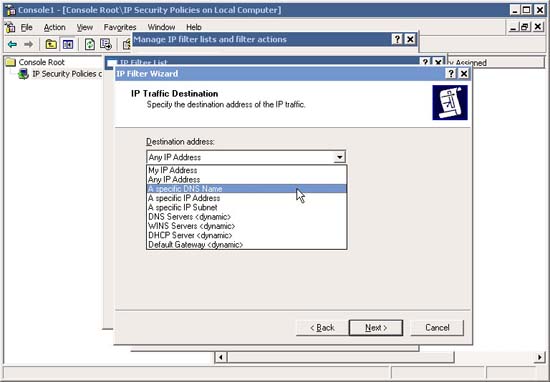
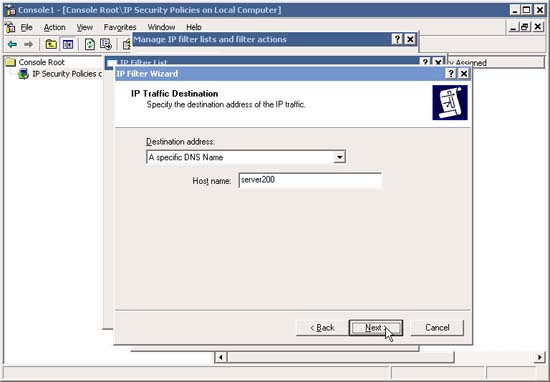
18. In IP Traffic Destination , click the drop-down list and select the destination type. For example, if you only want to allow web traffic from a web server on the local network (such as SERVER200 ), then select A Specific DNS Name .
Then, in Host Name , type SERVER200 and click Next .
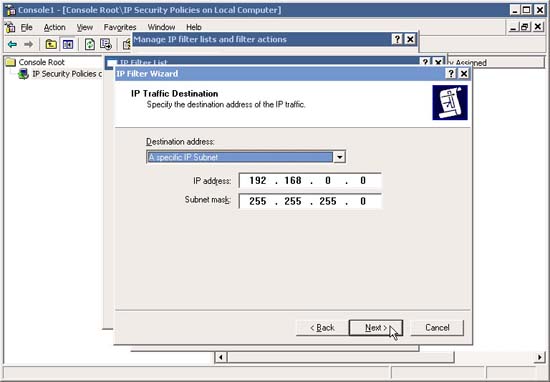
If you want to allow web traffic from a local network subnet, such as 192.168.0.0/24 , select A Specific IP Subnet , and type in the Network ID and Subnet Mask for the required subnet. Click Next .
19. Go back to the IP Filter list, add any other filters you want, and finally click OK .
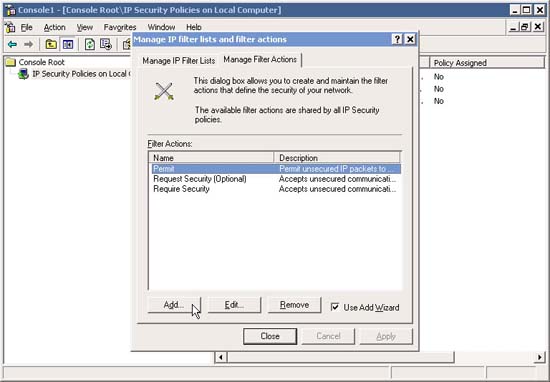
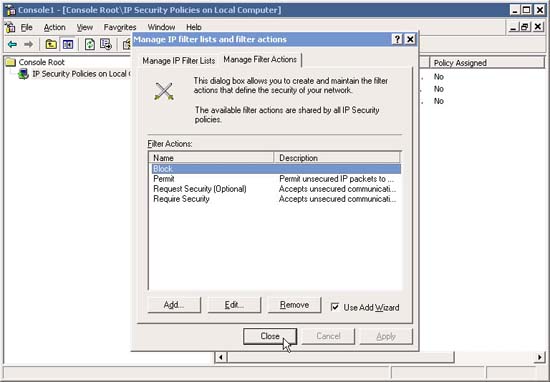
20. Go back to Manage IP Filter Lists and Filter actions , evaluate your filters and if all is ok, click the Manage Filter Actions tab. Now we need to add a filter action to block certain traffic, so click Add .
21. In the Welcome screen, click Next .
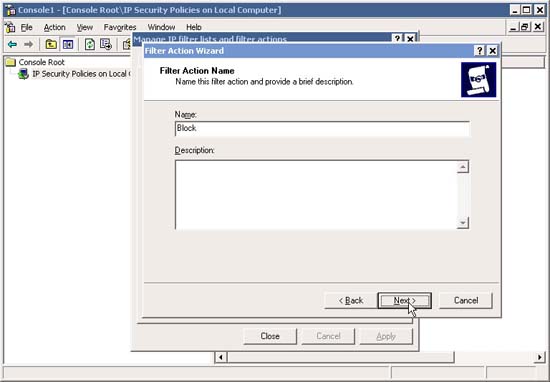
22. In Filter Action Name type Block and click Next .
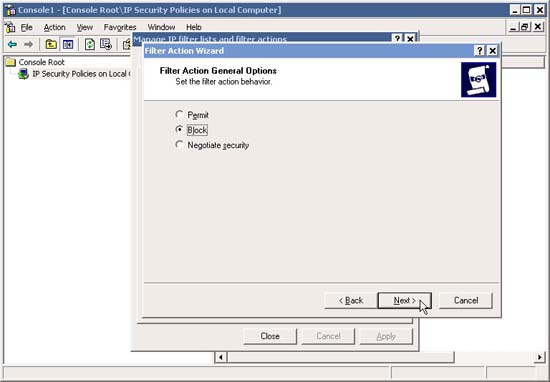
23. In Filter Action General Options , click Block and then click Next .
24. Go back to Manage IP Filter Lists and Filter actions , evaluate your filters, if all is ok, click the Close button. You can add Filters and Actions Filter anytime if you want.
The next step is to configure IPSec Policy and assign it.
See page 3
Configure IPSec Policy
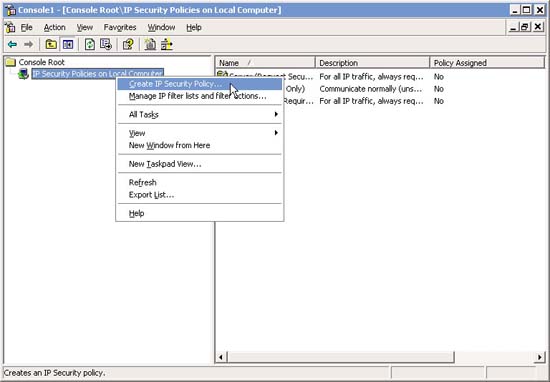
1. In the MMC interface, right-click IP Security Policies on the Local Computer and select Create IP Security Policy
2. In the Welcome screen, click Next.
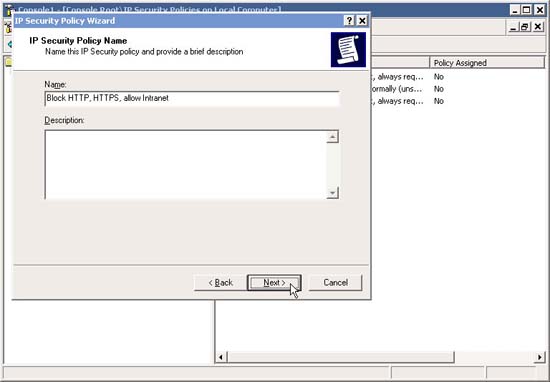
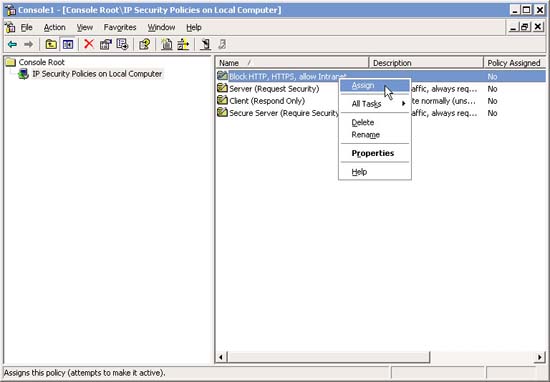
3. In the IP Security Policy Name , enter a descriptive name, such as " Block HTTP, HTTPS, allow Intranet ". Click Next .
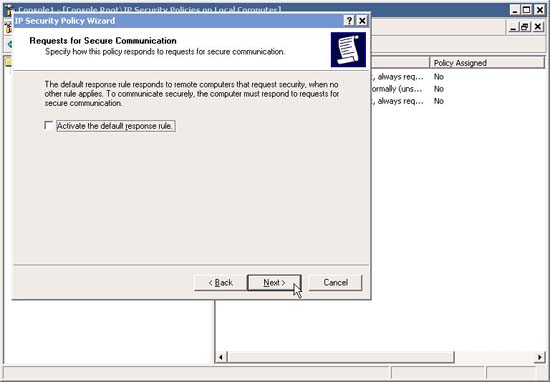
4. In the Request for Secure Communication window, uncheck the Active the Default Response Rule check box. Click Next.
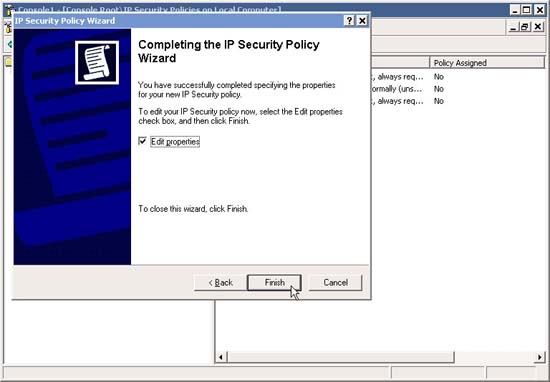
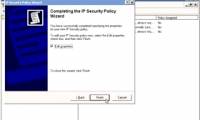
5. In the Completing IP Security Policy Wizard window, click Finish
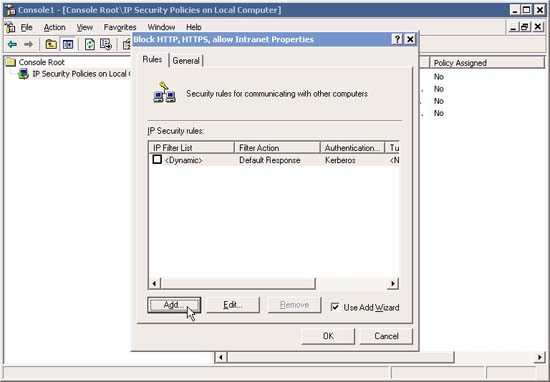
6. Now we need to add IP Filters and other Filter Actions to the new IPSec Policy . In the new IPSec Policy window, click Add to add IP Filters and Filter Actions
7. In the welcome window, click Next.
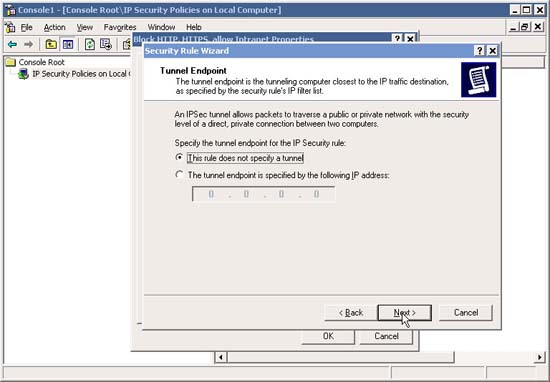
8. In Tunnel Endpoint , make sure that the default settings are selected and click Next.
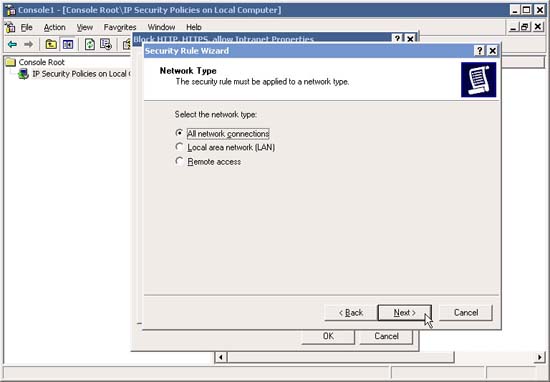
9. In the Network Type window, select All Network Connections and click Next.
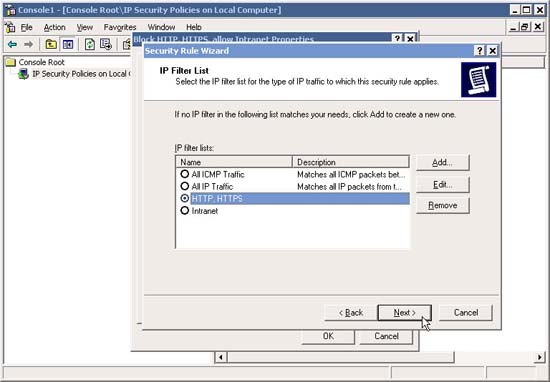
10. In the IP Filter List window, select one of the pre-configured IP Filter, for example "HTTP, HTTPS" (configured in step 6 above the article). If for some reason, you did not properly configure the IP Filter beforehand, you can click Add and add it at this time. When done, click Next .
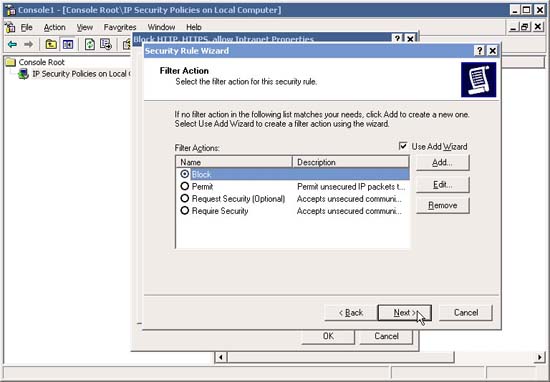
11. In the Filter Action window, select one of the previously configured Filter Actions, for example "Block" (configured in step 20 above). Next, if you haven't configured the right Filter Action before, you can click Add and add it now. When done, click Next
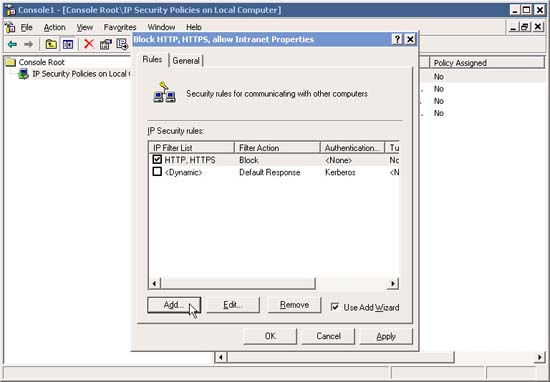
12. Back in the new IPSec Policy window, make sure that the new IP Filter is selected. Click Add to add additional IP Filters and Filter Actions just like you did above. In this example, we will add the "Intranet" IP Filter .
Follow steps 7 to 11.
13. Add "Intranet" IP Filter .
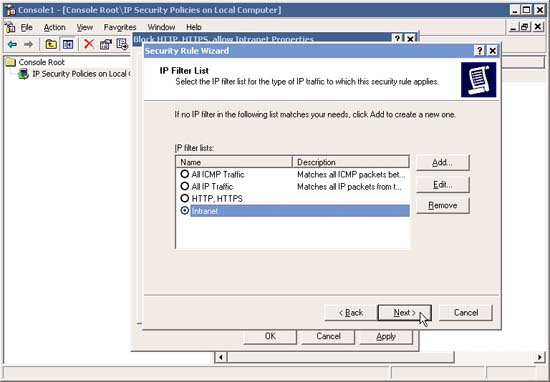
14. Configure it to use the Permit Filter Action .

15. Notice how the two IP Filters are added .

Note that you cannot change their order like in dedicated firewalls. However, this configuration works quite well.
The next stage is to assign the IPSec Policy.
Assign IPSec Policy
In the MMC interface, right-click on new IPSec Policy and select Assign.
When done, you can test the configuration by trying to surf to a blocked Windows and a website is not blocked.
Lock multiple computers
Locking multiple computers can be done in two ways:
Export and Import IPSec Policy
Configure IPSec Policy through GPO
Both of these methods are used to prevent some computers from using ICMP (for other IPSec Policies).
Was this article helpful?
Your feedback helps us improve.
Related Articles
 Lock Ping traffic with IPSec6 minutes read
 10 reasons why IPsec VPN failed3 minutes read
 How to set up IKEv2 IPsec on Windows3 minutes read
 How to connect L2TP / IPsec VPN on Windows 103 minutes read
 How to prevent GIFs from automatically playing in the browser4 minutes read
 IPSec Policy Agent security4 minutes read
Reader Comments 0
Sign in with email or Google to join the discussion.