Table of Contents
Understanding Tutorial requires more than a headline. The overview below breaks down the key facts, changes, and user impact.
Tutorial Overview
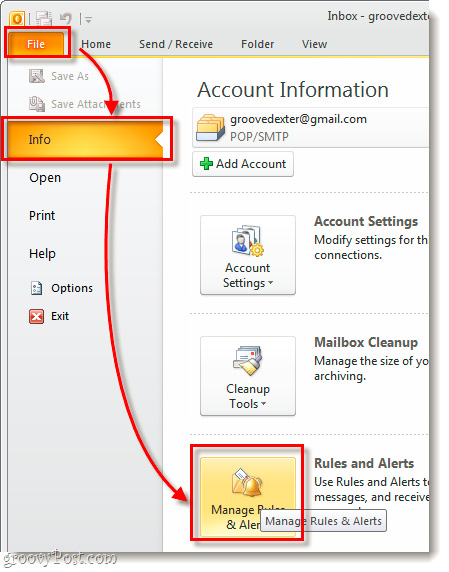
First, open Outlook, and select the menu Info> Manage Rules & Alerts:
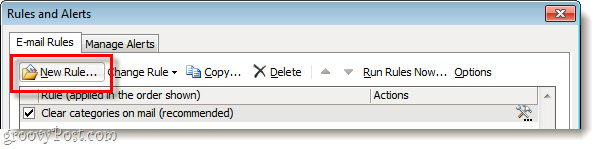
A pop-up window will appear with the heading Rules and Alerts. Here, we click the New Rule button. At the top left corner:
The process of setting up the Rules Wizard displays, here we need to apply the rules from the beginning, so please select Apply rule on messages I receive and click Next.

On the next page, check the checkbox with marked as importance content, then move the information under Step 2 into high importance. Click Next to continue:

The next window displays the same content as the previous step, tick the it as importance mark, but this time we will move the Step 2 cell into a normal importance. Click Next:

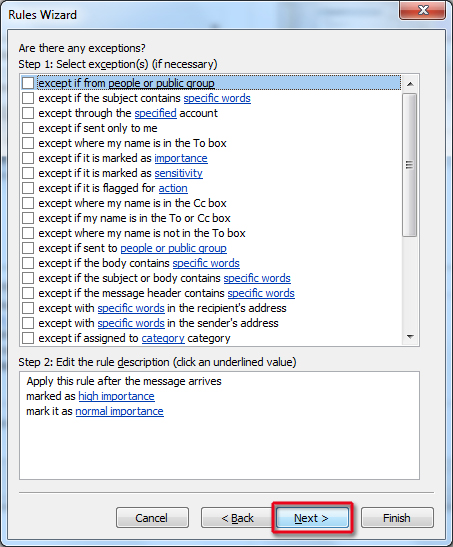
After that, you will see the information sheet accompanying some sorting rules. Leave these items as they are and continue to click Next:
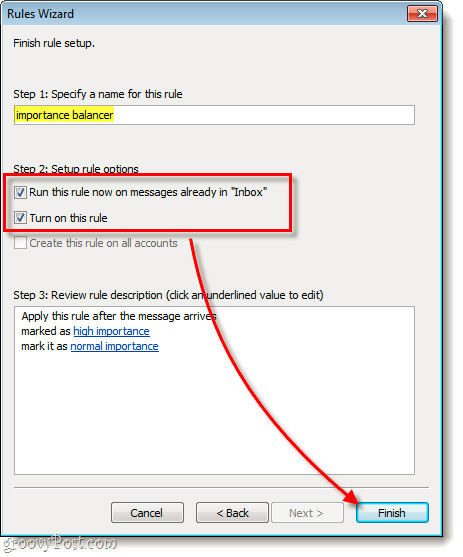
All you have to do in the next step is to name the rule you just created and activate the mode. After completing this process, check all check box boxes and click Finish:
Now, we have finished setting up our own rules according to the needs of use. The entire email you receive will automatically change to Normal even if they have been marked Important by the sender:
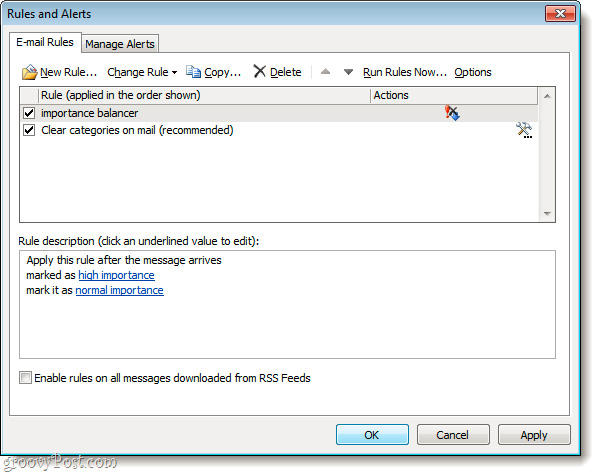
But if you want to go back to normal mode, open the Rules and Alerts control panel, uncheck the check box or delete the created rule. Good luck!
FAQ
What happened in Automatically Convert Important Email to Normal in Microsoft Outlook?
Understanding Tutorial requires more than a headline.
What factors influenced Tutorial?
The overview below breaks down the key facts, changes, and user impact.
What was the practical impact on users?
Tutorial Overview First, open Outlook, and select the menu Info> Manage Rules & Alerts: A pop-up window will appear with the heading Rules and Alerts.
Related Articles
 How to Convert Outlook Email into Event Invitation3 minutes read
 How to Schedule Email Sending in Outlook3 minutes read
 How to Print Email in Outlook3 minutes read
 Move Daily Email to a Folder in Outlook2 minutes read
 How to Set Up Email in Outlook Latest 20225 minutes read
 The Best Options Replace Microsoft Outlook: Email Applications13 minutes read
Reader Comments 0
Sign in with email or Google to join the discussion.