Tips for using iDevice do not need iTunes
IPod, iPhone and iPad users have been forced to connect their devices to iTunes on a PC to enable, update and synchronize data. Luckily, with new improvements, iTunes has become redundant. With a large music store, you'll soon realize that iTunes works very slowly and may also hang abnormally.

The amount of hard drive iTunes uses to store your digital library information can be up to more than 1GB. In addition, having to plug in the iPhone is quite inconvenient for users.
Luckily, your iOS device can now function completely independently. You can abandon the tasks associated with iTunes from now.
Activate the device
When the iPad came out, the tablet was advertised as a complete replacement for Windows and Mac computers. But you need to connect the iPad to PC and Mac to activate it to be able to use it.
Luckily, with the new iPad, iPhone and iPod Touch, the first time you start up, simply connect your mobile device to a Wi-fi or 3G network, log into your Apple ID account. I can activate the machine. You still have the option to activate via iTunes, but that is not entirely necessary if you are connected via Wi-fi.
IOS update

You no longer need to go to iTunes to update to new iOS versions. When a new update is released, the iPhone / iPad will send you a notification from Settings . After opening the Settings section, access the General settings (General) section , select Software Update. Your iPhone and iPad will automatically update. However, please note that you must have enough space on your iPhone and iPad to perform updates right on your device.
Buy digital content

Apple allows you to easily access content you have purchased from iTunes on any device. You don't need to go to iTunes to listen to music or watch videos on your iPhone or iPad.
After purchasing music / videos from the iTunes Store on any device (iPhone, iPad, PC, Mac .), simply open the iTunes Store application on your iOS device, select the Purchased item. In this section, you can see all the content you have purchased. You can choose among the purchased content to download directly to iPhone or iPad.
Likewise, with the app, simply open the Purchased item in the App Store app to see a list of apps you've purchased / selected (if it's a free app). You can download the application directly from this section.
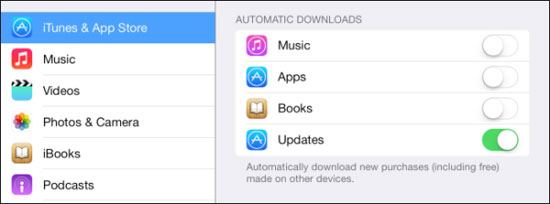
You can also choose to allow iOS to automatically download digital applications / content from the iTunes Store and App Store. In the Settings menu, find iTunes & App Stores, then turn on the option corresponding to the type of content you want to download: Music, Apps, Books and Updates.
Music

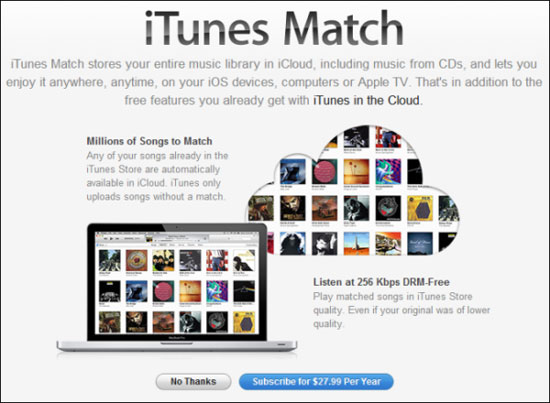
Synchronizing music purchased from the iTunes Store is easy. However, most likely your music store is not purchased from iTunes. Luckily, Apple also brought a very good solution: iTunes Match.
Once you've saved the music to iTunes Match, you can download the music from any device: iPod, PC or iPad. For those with low bitrate music or large music stores, iTunes Match is the perfect cloud storage option.
iTunes Match is the only option if you want to skip iTunes when copying music to iPhone / iPad. If you don't want to use iTunes Match, you can connect your iPhone / iPad to iTunes, then turn on the sync option via Wi-fi: in the Summary section, scroll down to the Options section and select Sync with this iPhone over Wi-fi.
Every time your computer and iPhone are connected to a Wi-fi network, you can turn on the Settings (Settings) application, select General settings, and then select iTunes Wi-fi Sync to sync. content for iPhone as when plugging in Lighting cable. You will still need to go to iTunes, but skip the connection.
Podcast
If you are a person who likes to listen to Podcasts, you can download the Podcast application from the App Store. You can use this application to find, track podcasts and customize to download podcasts that you want to track to your device. Besides Apple's official Podcast app, third parties have also developed many high quality applications.
Data backup

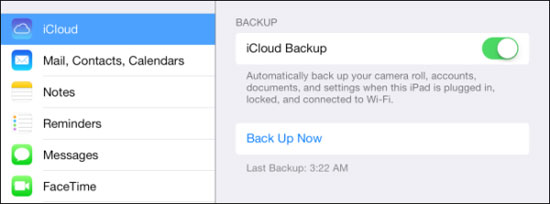
Many people have a habit of backing up data from iPhone to iTunes to prevent problems with the phone. However, new iOS devices have the feature to backup data to iCloud. You just need to create an Apple ID account (free) to start using iCloud, with 5GB of free storage. When you plug in the charger and turn on the Wi-Fi connection, the iPhone / iPad will automatically sync the data for you, and so you won't lose any time and still be able to secure the data. Important on the phone.
Personal data
In an age where we need to use Windows applications to sync email, contacts and appointments have been a long time. You only need to log in to your email account (eg Gmail) on iPhone, iOS will automatically sync your emails, contacts and appointments to iPhone.
Take photos from iPhone / iPad

Instead of plugging your iPhone into a computer to copy pictures, you can turn on iCloud Photos feature. After that, you can select a folder on your computer to save iOS photos (the default is located in the Pictures folder). Every time iPhone backups to iCloud, your photos will be saved in this folder. You can enable the iCloud to synchronize data immediately by pressing the Backup Now button in iCloud / Storage & Backup section of the Settings app (Settings).
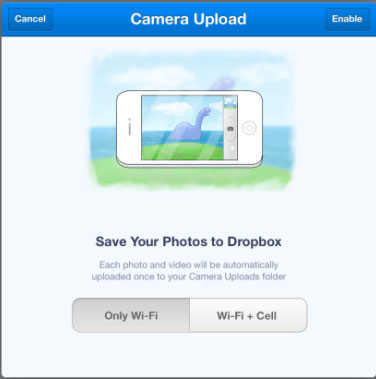
In addition, you can also automatically upload photos to Flickr, Dropbox and Google+ Photos services.