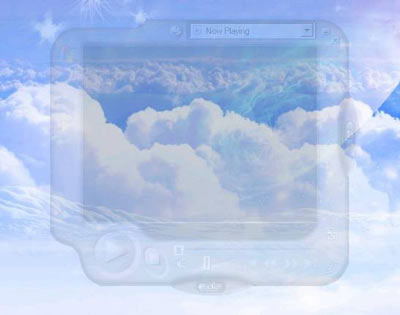
Create a transparent interface for the skin of Windows Media Player
Windows Vista has supported transparent interface not only for Windows Media Player (WMP) but also for other windows interface. As for Windows XP, users are forced to rely on software to make windows transparent.
Many of the software on the interface is made transparent to windows XP. With this article, I will show you a small trick that uses Windows itself to "enable magic" to make WMP transparent with beautiful Face In and Face Out effects. Although not quite the same as WMP11 on Vista, I guarantee you will be satisfied. (The article applies to WMP 10 and above and Windows XP SP2 and later operating systems.)
You may not know in WMP that there is a skin that supports this transparent effect. Go to View > Skin Chooser and select the skin called Revert , click Apply Skin to switch to the Revert interface. Now that you try to move the mouse out of the WMP window, you will be surprised to see that this window will slowly fade and become transparent, so you can see the Desktop background. When you slowly hover your mouse over the WMP window, the window will appear as usual.

Now hover over the WMP window

Move the mouse outside the WMP window
You try other skins immediately and see this effect. Here I guide you to make this special transparent effect for other WMP skins. Suppose you have a WMP * .wmz skin, here I use the built-in Compact skin of Windows ( Compact.wmz file). First, in the Explorer window, go to Tools > Folder Options . , in the View tab , uncheck Hide extensions for known file types so that Windows can display the file extension. In essence, the Compact.wmz file is a ZIP file, you can fix wmz to zip, we get the Compact.zip file. Open this ZIP file with Explorer, find the file with the * .wms extension ( Compact.wms in this example), right-click this file and choose Copy and copy (Paste) to a folder outside the ZIP file . Open this Compact.wms file with Notepad, press Ctrl + F , enter onload = " press Find Next to find, in this case I will find the line:
onload = "InitCompact (); InitVideoSettingsView ();"
Notice and delete the quotation marks ( ' ) at the end of this line, then add the quotation marks and delete the following text:
alphaBlendTo (40,9000); "
Press Enter and add below the following 4 lines:
alphaBlend = "255"
onmouseover = "alphaBlendTo (255,300)"
onmouseout = "alphaBlendTo (40,300)"
onkeydown = "alphaBlendTo (255,300)"

Notice the first number in brackets next to alphaBlendTo in the last 3 lines, which is the number that indicates the transparency of the WMP window, which is in the range of 0 to 255, the number 0 is completely transparent and 255 is not transparent. The onmouseover , onmouseout , and onkeydown items refer to the states that affect the WMP window in turn: when dragged by the mouse, drag the mouse outside and when you press the key. You can change it to suit your needs.
Then save the file wms, and then copy the ZIP file again. Fix the zip tag back to wmz as the original. Now double click on this wmz file, select Next now to see your results (Figure 3).
