Table of Contents
This guide explains how to create a Virtual Drive with UltraISO Software, with clear steps, practical tips, and important checks before you begin.
Today, TipsMake. com will show you how to create a virtual drive with UltraISO quickly.
Create virtual drives with UltraISO software
Step 1: Download and install the software at https://ultraiso. vi. softonic. com/. The installation process is very simple, you just need to click Next in the windows to do it.

Notice of successful installation:

Step 2: After installing successfully, you will see a new virtual drive appear.

Step 3: To use a virtual drive, open UltraISO software, in the main interface, select Tools >> Mount to Virtual Drive.

Select the browse icon:
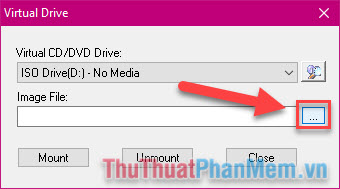
Step 4: Select the ISO file you downloaded from the web, this file can be game, Supported operating systems or anything else, then Open.
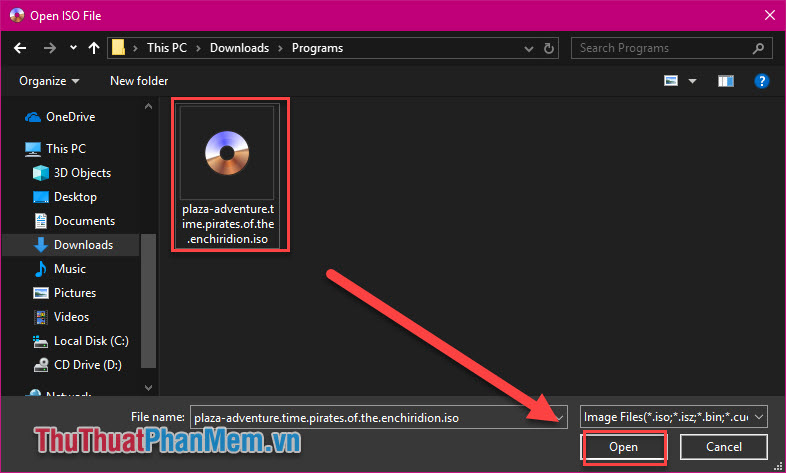
Step 5: Once the file has been added, click Mount.

After the Mount process is finished (about 2-3 seconds), open the virtual drive and verify the results.
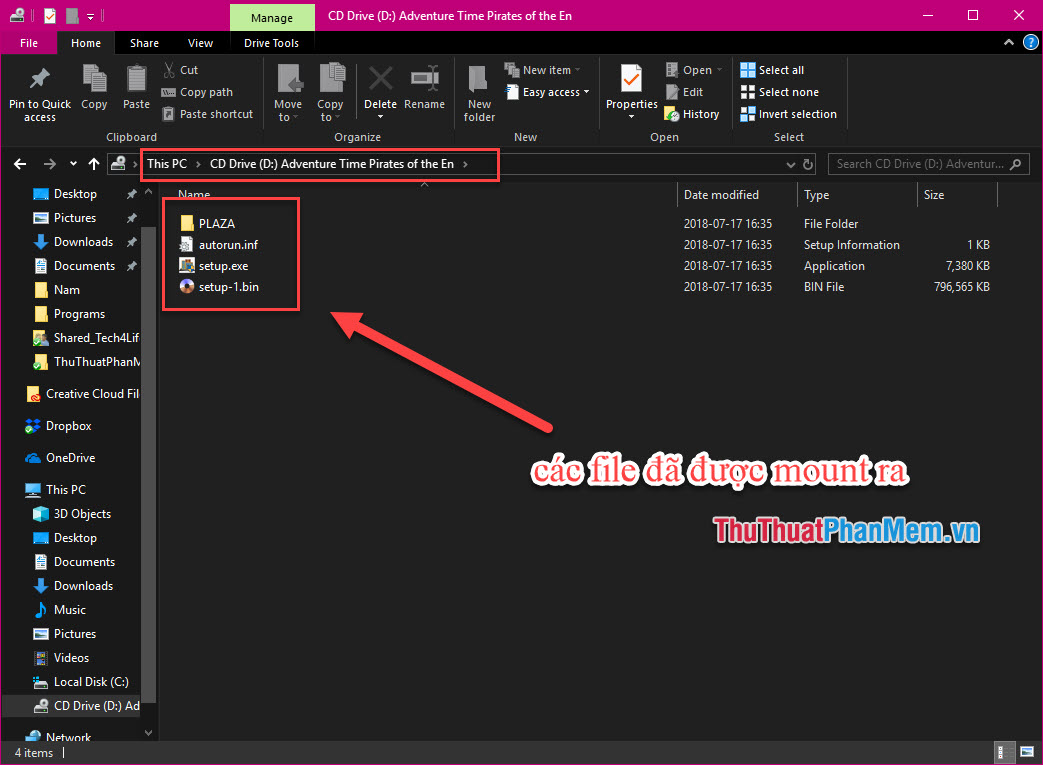
From there you can use a virtual drive like the drive on your computer, select, open, change internal files at will.
So after completing this article, you know how to create virtual drives, mount ISO files using UltraISO. Good luck!
FAQ
What should I know about Create a Virtual Drive with UltraISO Software?
Focus on the key features, requirements, limitations, and practical use cases explained in this guide.
How do I get the best results with Create a Virtual Drive with UltraISO Software?
Follow the recommended steps, use current software or information, confirm compatibility, and review settings before major changes.
Are there any risks or limitations?
Potential limitations depend on compatibility, data quality, cost, privacy, support, and how the product or method is used.
Related Articles
 Create a Virtual Drive Using UltraISO on Your Computer4 minutes read
 How to Install UltraISO and Creating Virtual Drives Using UltraISO3 minutes read
 Ultraiso - Download Ultraiso5 minutes read
 Back Up DVD/CD/VCD Discs to ISO Using UltraISO4 minutes read
 What Is UltraISO? Instructions for Downloading, Installing and Using6 minutes read
 The Simplest Way to Create a Virtual Drive Using Virtual Drive5 minutes read
Reader Comments 0
Sign in with email or Google to join the discussion.