Table of Contents
This guide provides a practical overview of Summary of Tips, Good Excel Tips for Accounting People, including its main features, benefits, limitations, and important considerations.
1. Select and add lines completely by the keyboard
To add (subtract) the row or column you select the row or column next to the row, the column needs to add (remove) and perform the following key combination:
- Add row (column): Press Ctrl + Shift + '+'
- To delete a single row (column): Press Ctrl + Shift + '-'
2. Copy and move data fast
To copy and move data quickly, you only need to select the data area you want to move -> hover over the edge of the selected data area until the cursor changes to 4-way arrow -> hold down and move move to a new area.
In case you want to copy quickly, press and hold Ctrl key during the move.
3. Delete empty cells in a data range
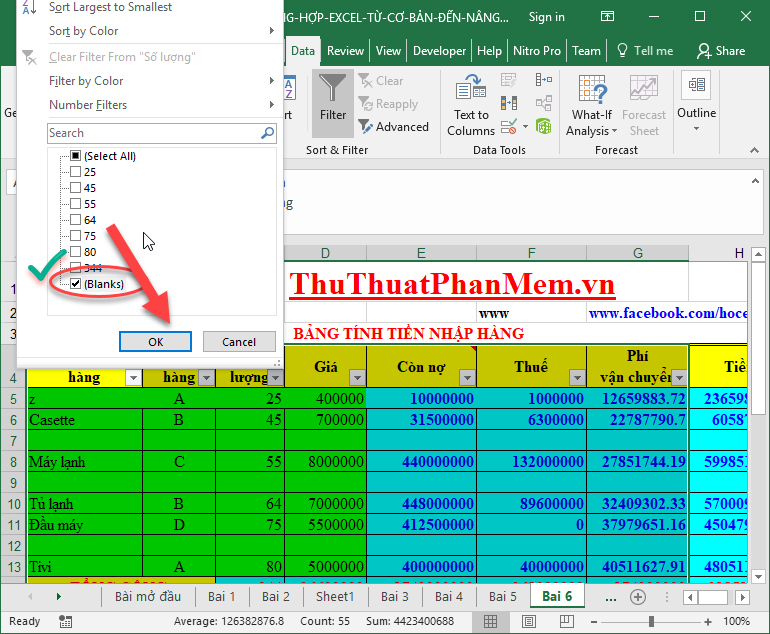
In case your data file has many blank lines that are not adjacent to each other, selecting and deleting each blank line is very time consuming. To delete all blank lines in the data area, follow these steps:
- Step 1: Select the entire data range you want to delete blank rows -> click Data Filter -> click the drop-down arrow in any cell -> deselect Select All -> select the Blank -> click OK:
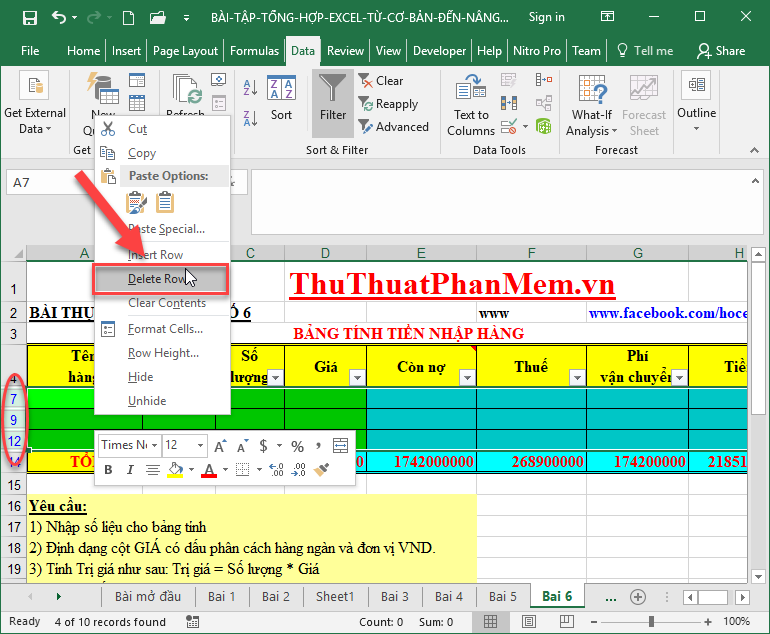
Step 2: After ticking Blank all blank lines are displayed adjacent to each other, the rest you need to select those blank lines -> right-click and select Delete Rows:
4. Application of data filtering features in Excel
With the large amount of data you want to see the results of an object, an individual, or filter the list of students in a class or a school when attending competitions, you should quickly apply the filtering feature in Excel to save useless time.
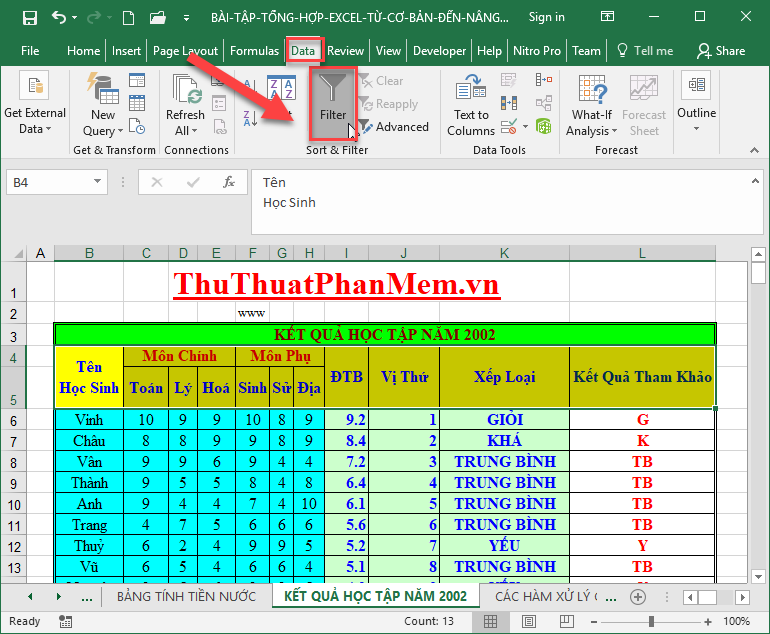
Execute headline -> on Data tab -> Filter:
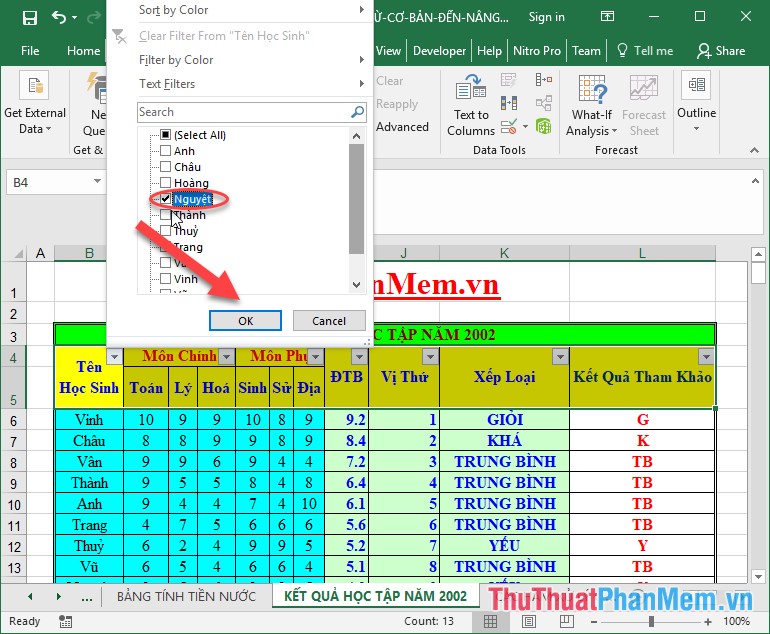
On the title line showing dropdown arrow, click on the arrow and filter the data as you like:
5. Limit input values in Excel spreadsheets.
For example, to avoid someone who corrects your data to a higher value, you set a value limit for the data cell.
Step 1: Select the data area to be restricted -> go to Data tab -> Data Validation:
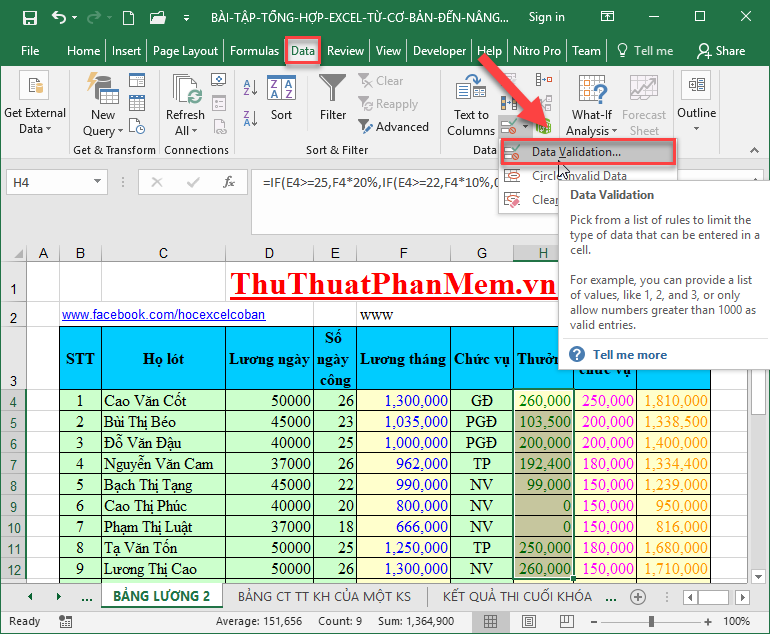
Step 2: The dialog box appears in the section Alow select Whole number value -> Data item select Between -> enter the limit of the first and last values corresponding to Minimum and Maximums
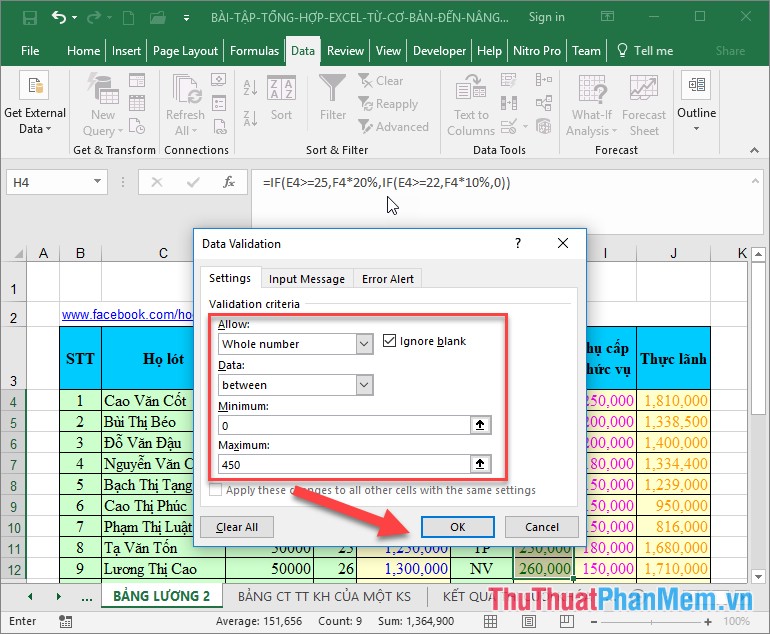
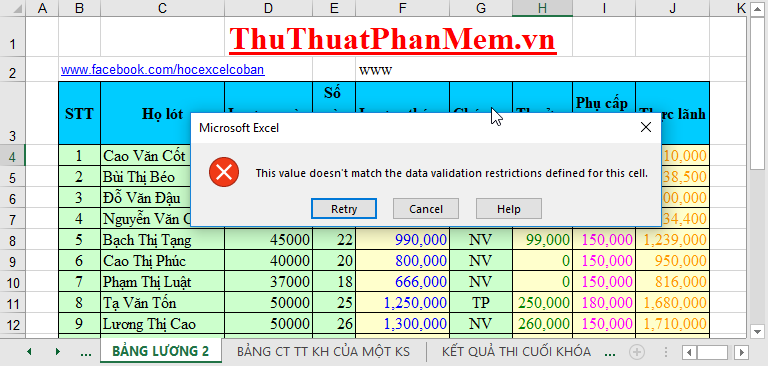
Now if you enter the bonus value of 600k -> the system reported an excessive error:
6. Managing the list of fixed goods with Validation
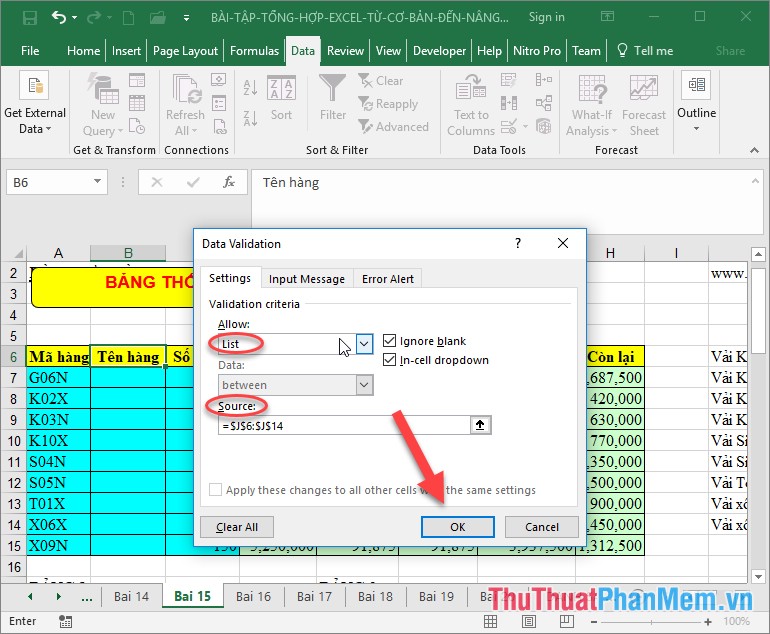
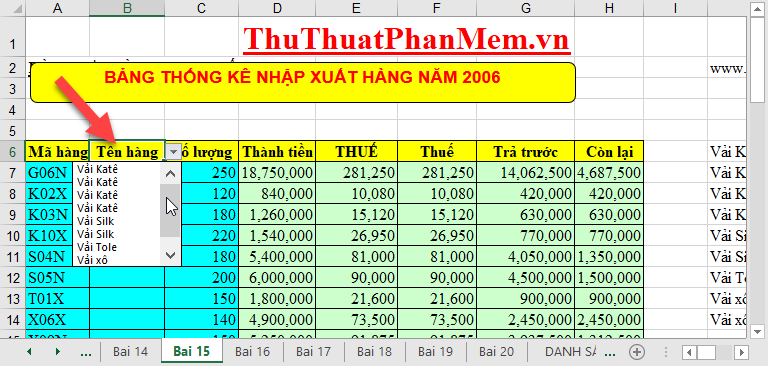
You want to manage the list of goods to avoid importing items that are not listed in the list. Very simple with just a few taps you can closely manage your warehouse. For example, create a list of item names in the row name column so that users can limit incorrect entries and items without a name in the list:
- Create a list of items -> click the item name box -> on the Data tab select Data Validation -> dialog box appears in the Alow section select List item Source select the data area containing the item name -> click OK:
And this is the result:
7. Use Format Painter repeatedly
Format Painter is applied to the previous format for the following objects. If you want to use multiple objects later, instead of left clicking and selecting objects to apply multiple times, simply double-click on the brush and select the objects to apply.
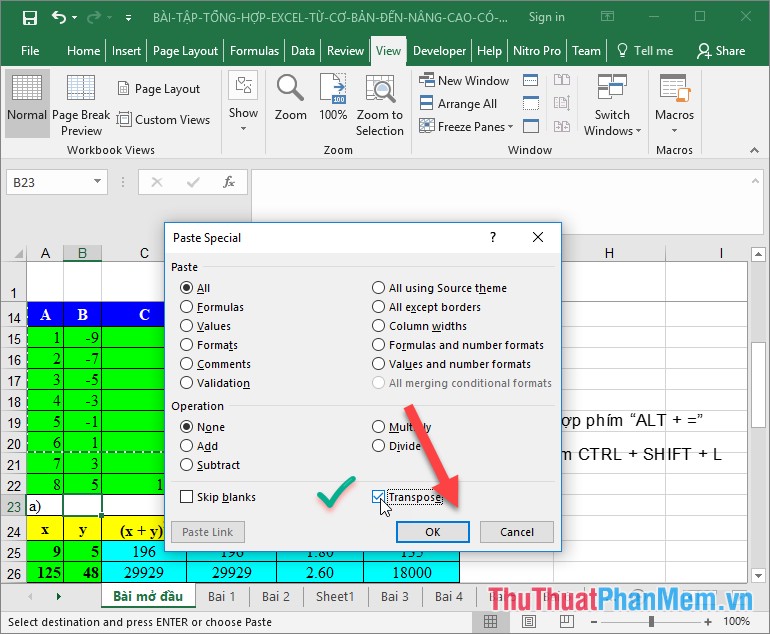
8. Convert data from columns to rows and vice versa
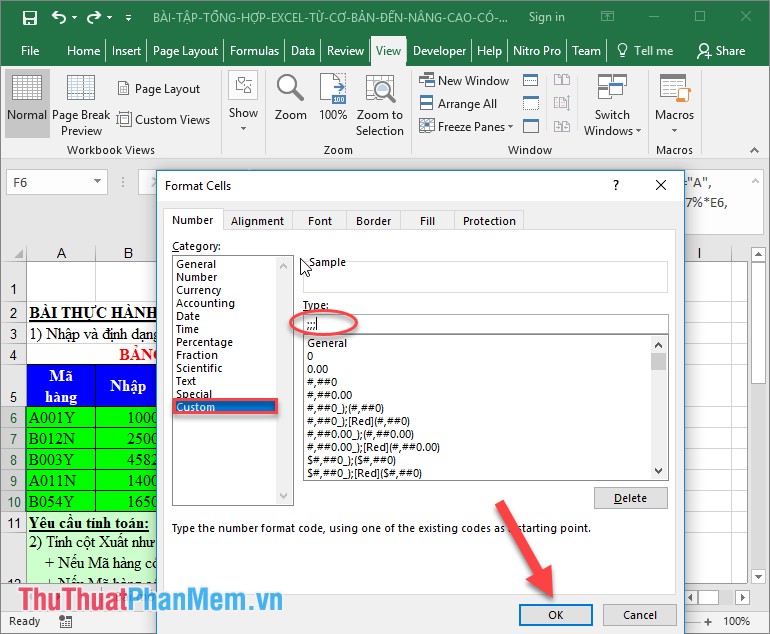
9. Hide data types
10. How to enter numeric data begins with 0
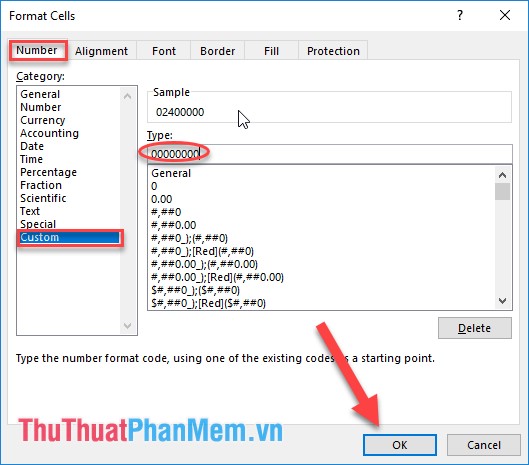
Normally Excel will not allow you to enter a number starting with the number 0. There are two ways to overcome this situation:
Method 1: Enter apostrophes' before the value you need to enter
Method 2: Format the data cell, in the Type field, enter 8 digits 0:
11. How to create drop-down lists in Excel
Very simple, you do the same thing in Section 6. Managing the list of fixed goods with Validation
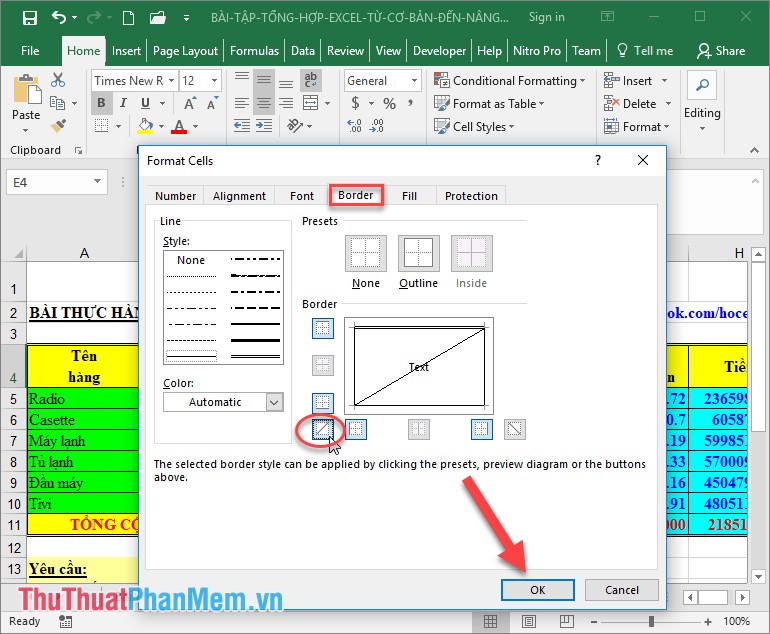
12. Add 1 diagonal in one cell
Select the data cell to add a diagonal -> right-click and select Format Cell to select the cell containing the diagonal in your direction:
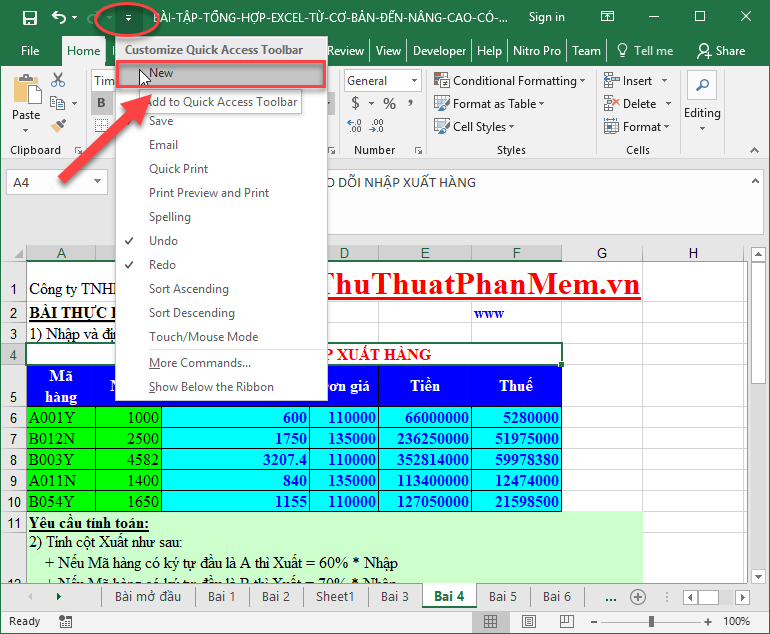
13. Create quick access keys on Quick Access
Quick Access gives you quick access to commonly used features available in Excel. To add other features, click the arrow -> select the feature to be added on Quick Access
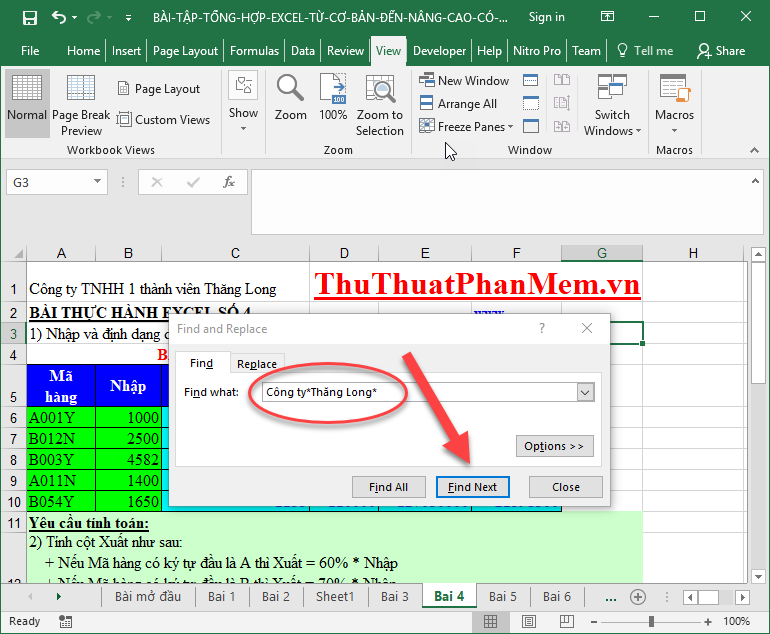
14. Smart search application in spreadsheets
When you do not remember search terms, use the smart search feature by combining additional characters *
15. Create titles for multiple sheets at once
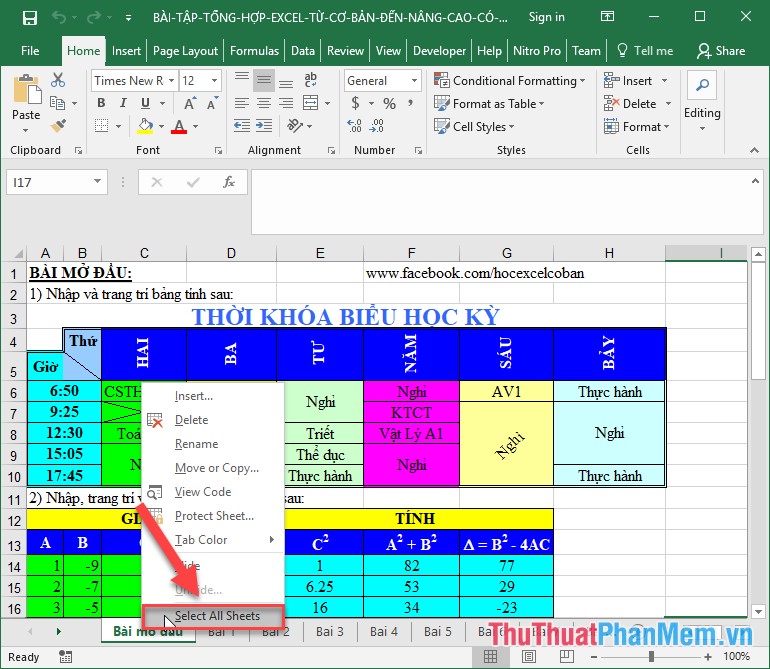
Your Excel file contains multiple sheets, you want to set the title for all of the same sheet when printing:
Right-click on any sheet -> select Select All Sheets:
Perform the general title to create for the sheet:
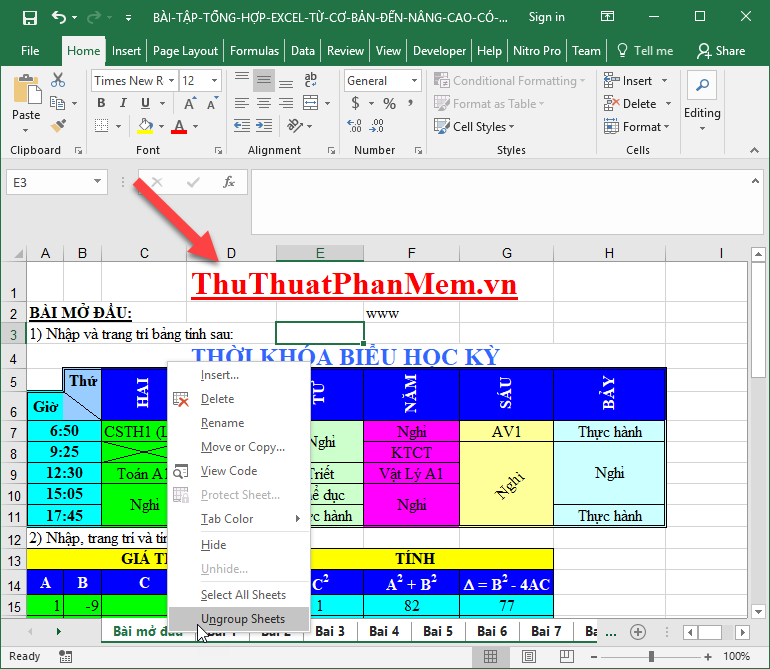
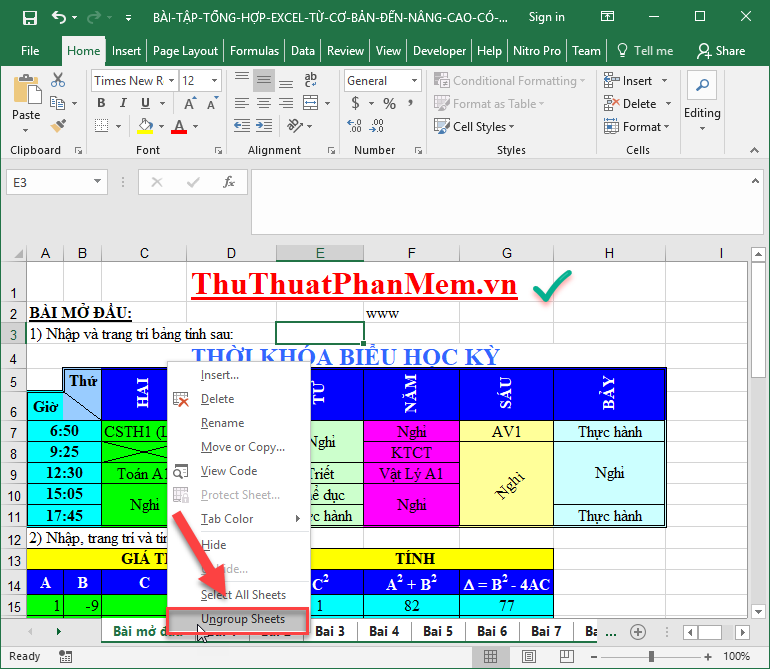
Right-click on any sheet and choose Ungroup Sheets:
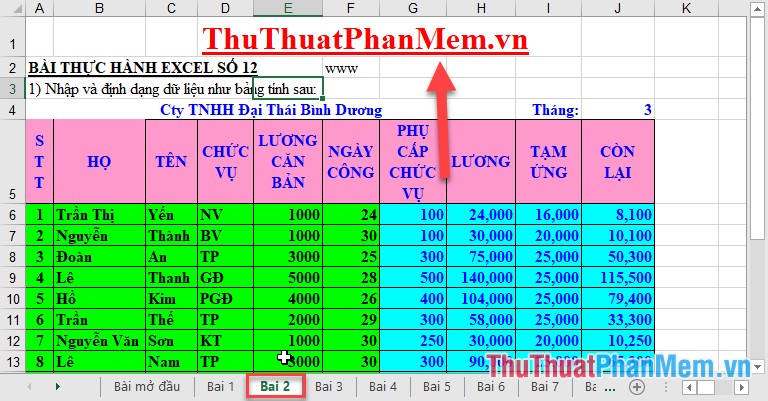
The results on all sheets in the Excel File have the same title:
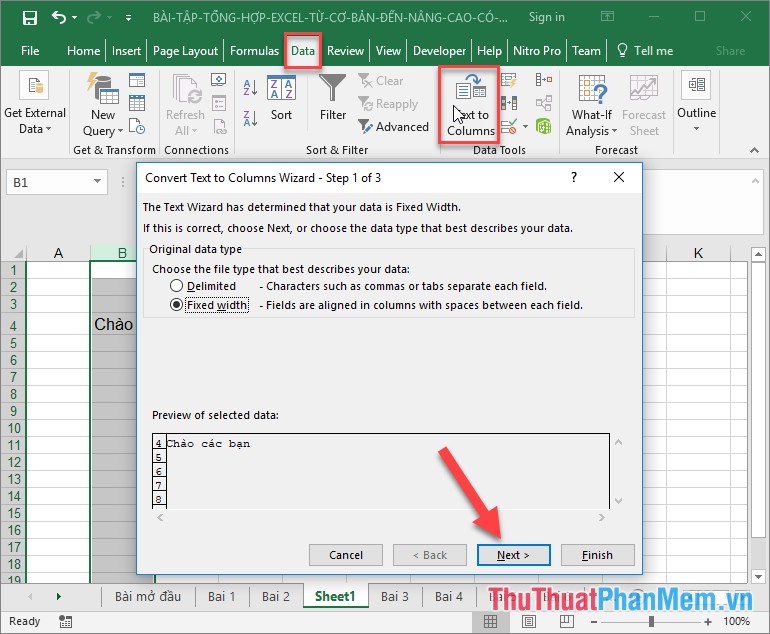
16. Import text data to Excel
Word data is in tab format, you want to switch to Excel where the data on each tab corresponds to 1 column. To do that, paste the text from Word to Excel -> on the Data tab -> Data Validation -> the dialog box appears, click Next until the completion of Finish:
17. Freeze the headline
The content of your data is too big, you want to fix the headline when moving -> place the cursor under the headline to be fixed -> go to View tab -> Freeze Panes:

18. Link Excel and Word data
Your data exists on two Word and Excel files, when the data in any data file changes the remaining files updated by you as follows:
After copying data from Word file, select Paste Special -> dialog box appears and select Paste Link to select Microsoft Word Document.
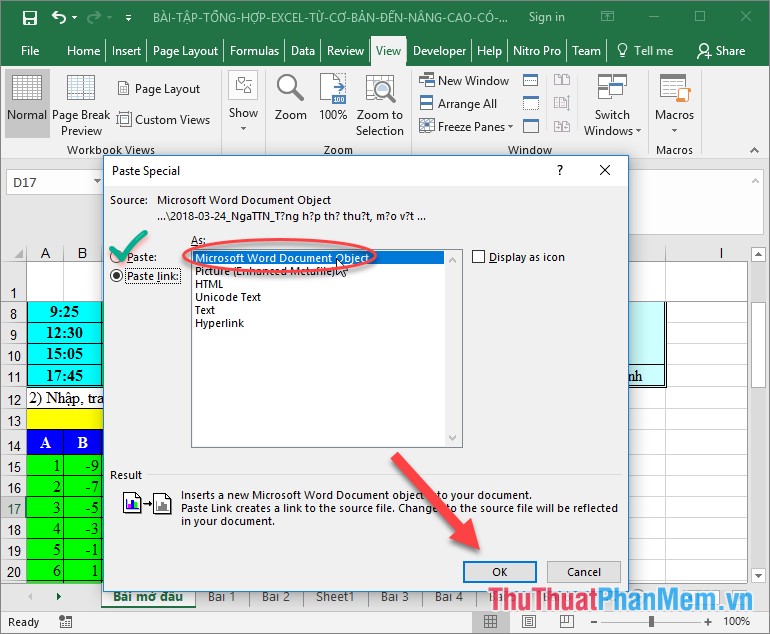
So 2 data files are linked together.
Also you need to grasp some useful shortcuts in Excel:
1. Quick sum without using function with key combination 'ALT + ='
2. Enable fast data filtering with CTRL + SHIFT + L
3. Display the formula with CTRL + ~ keys
4. Move quickly between sheets with CTRL + PAGE UP, CTRL + PAGE DOWN
5. Move between Workbooks with CTRL + SHIFT TAB
The above is a detailed introduction of tips and tricks in Excel for accountants. Good luck!
FAQ
What should I know about Summary of Tips, Good Excel Tips for Accounting People?
Focus on the key features, requirements, limitations, and practical use cases explained in this guide.
How do I get the best results with Summary of Tips, Good Excel Tips for Accounting People?
Follow the recommended steps, use current software or information, confirm compatibility, and review settings before major changes.
Are there any risks or limitations?
Potential limitations depend on compatibility, data quality, cost, privacy, support, and how the product or method is used.
Related Articles
 14 Excel Tips to Help You Work Faster5 minutes read
 Basic Excel Functions in Accounting12 minutes read
 Common Excel Functions You Need to Know About Accounting13 minutes read
 Summary Keyboard Shortcuts in Excel3 minutes read
 Applying AI in Accounting24 minutes read
 10 Excel Functions That ACCOUNTERS Often Use8 minutes read
Reader Comments 0
Sign in with email or Google to join the discussion.