Summary of tips to adjust Windows 10 very well
Windows 10 with overall upgrades in interface, security and a host of new features compared to previous versions of Windows. In today's article, TipsMake.com will introduce to readers good and interesting tips on tweaking Windows 10.
1. Slide to turn off the machine
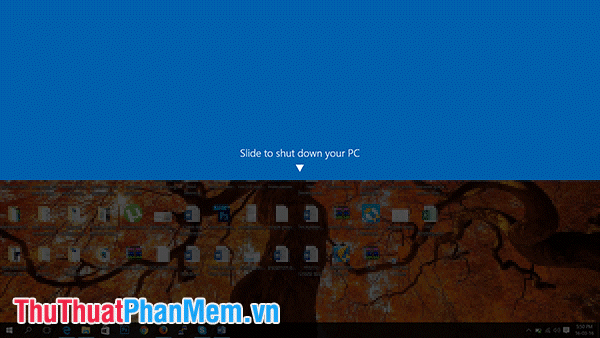
Features Slide to unlock, Slide to shut down commonly found on smart phones, now we can do that on Windows 10 with features Slide to shut down .
Step 1: To enable this feature, right-click on the desktop and select New> Shortcut .
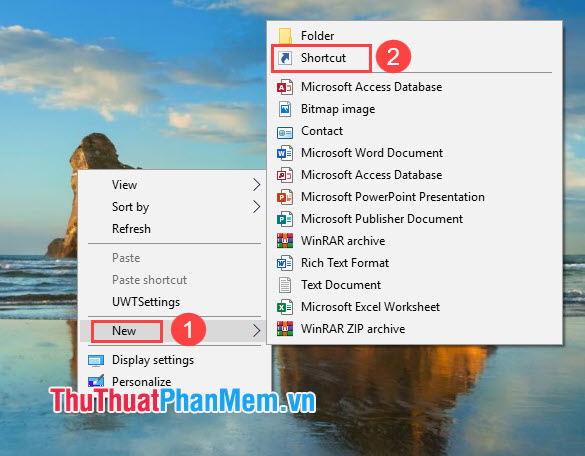
Step 2: In the next popup window, paste the code line % windir% System32SlideToShutDown.exe .
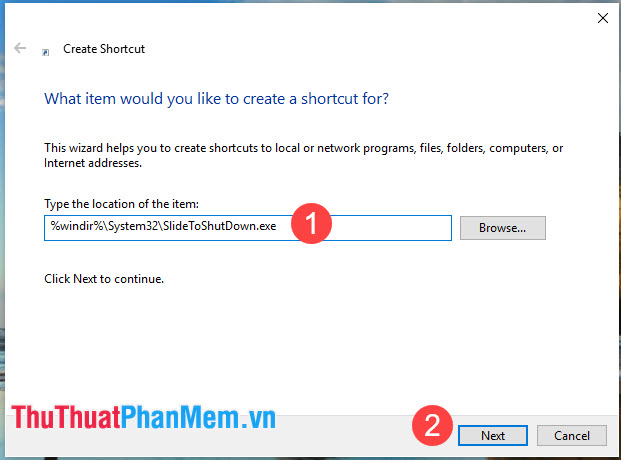
This creates a clickable icon on your computer, which you can freely rename to whatever you want. To turn off the machine by sliding down, double-click the newly created icon, you will see a ghosting appear.
2. "God Mode" mode
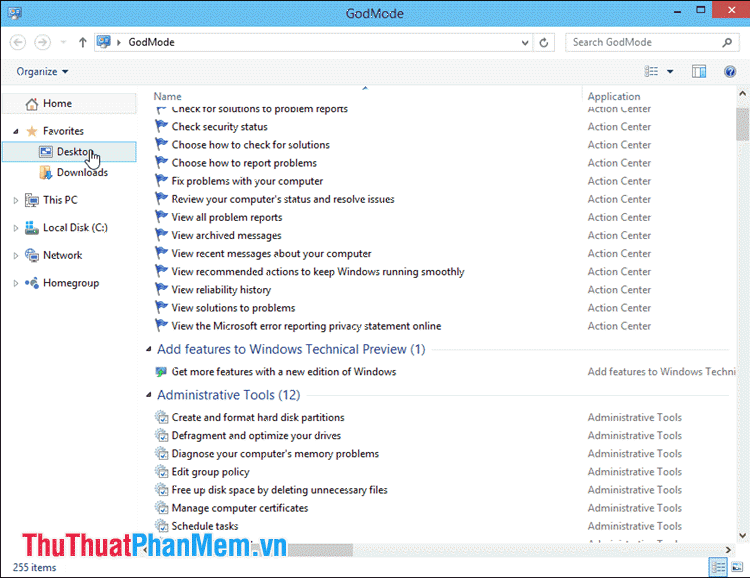
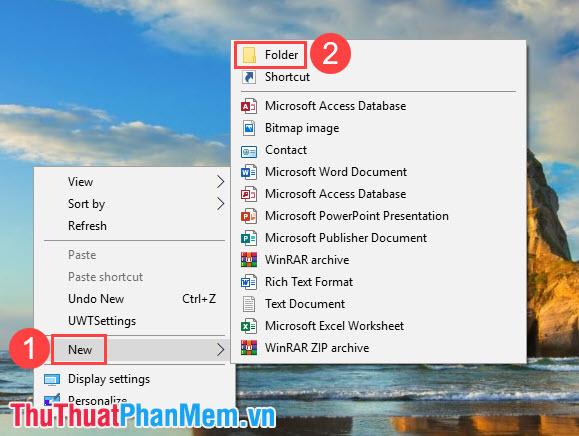
Step 1: Here's how to access God mode. Right-click on the desktop, select New> Folder .
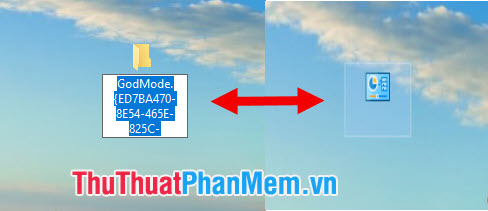
Step 2: Then you name the folder with GodMode code . {ED7BA470-8E54-465E-825C-99712043E01C} .
3. Turn off the Quick Access feature in File Explorer
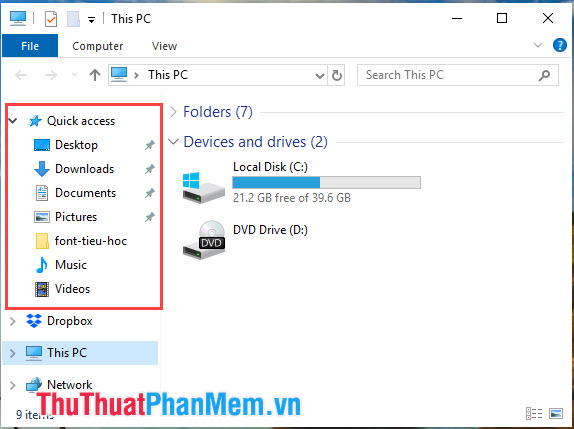
The Quick access feature on Windows 10 gives us quick access to the folders we often open. However, this feature is sometimes a little annoying if you want to hide the history of opening folders without letting strangers know.
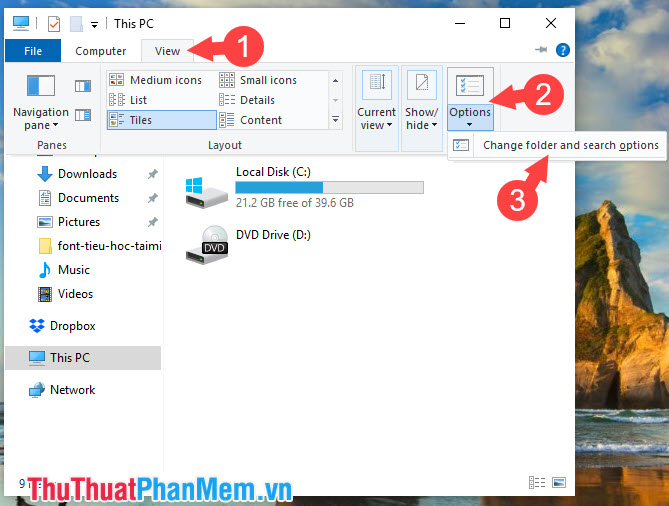
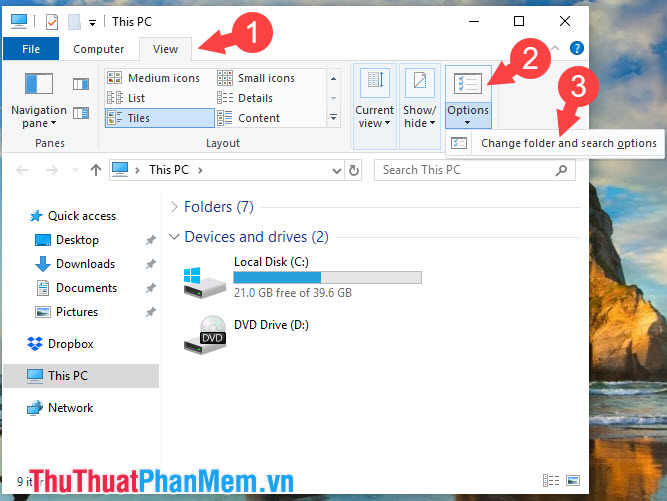
Step 1: To turn off this feature, click on View => Options => Change folder and search options .
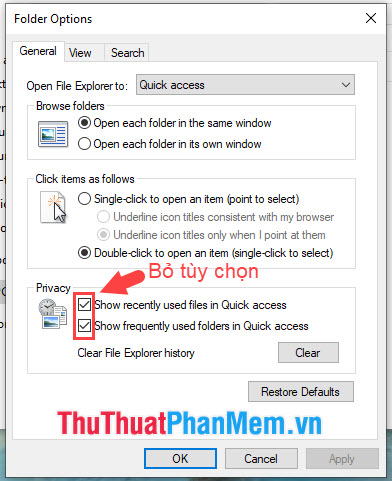
Step 2: On the General tab , uncheck the two options in the Privacy line and you 're done. Then click OK to save.
4. Tablet mode (Tablet mode)
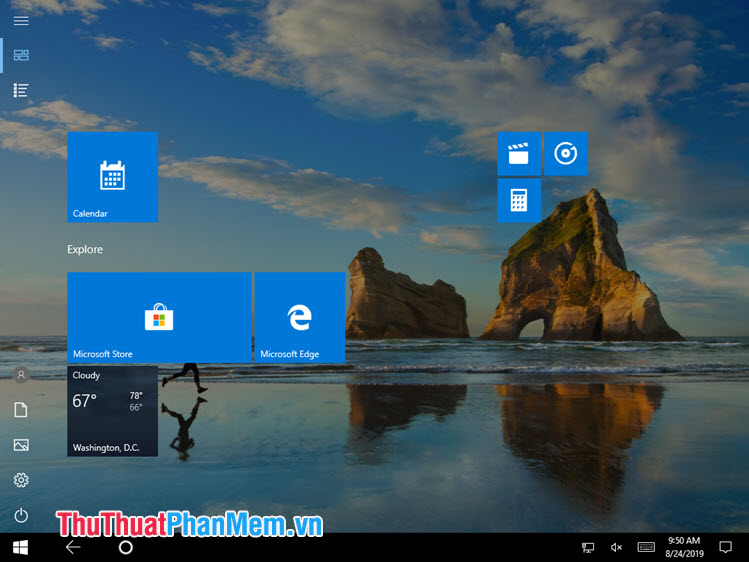
Windows 10 is compatible with touch screen computers and portable mobile devices such as phones and tablets. If you want to experience Windows 10 in tablet mode, we activate by the following:
Click on Notifications & Actions in the bottom right corner of the screen and click on Tablet mode .
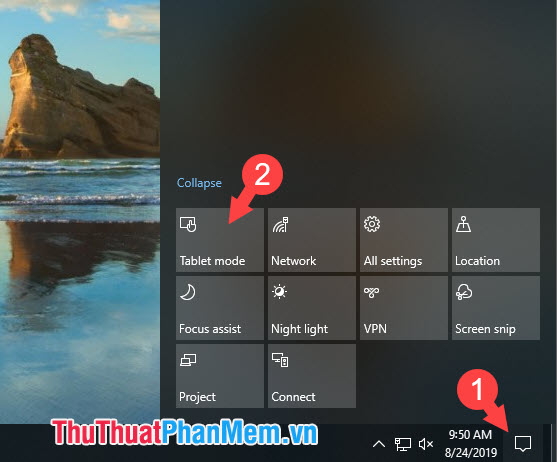
Then, the interface on your computer will change to Tablet mode . Looks pretty neat and unique, isn't it? To turn off this mode, just go to Notifications & Actions again and click on Tablet mode to finish.
5. Virtual Desktop Multitasking interface
We often know Task Manager and File Explorer multitasking, but on Windows 10 there is a new multitasking mode that allows you to create 2 different working screens (Desktop) called Task View .
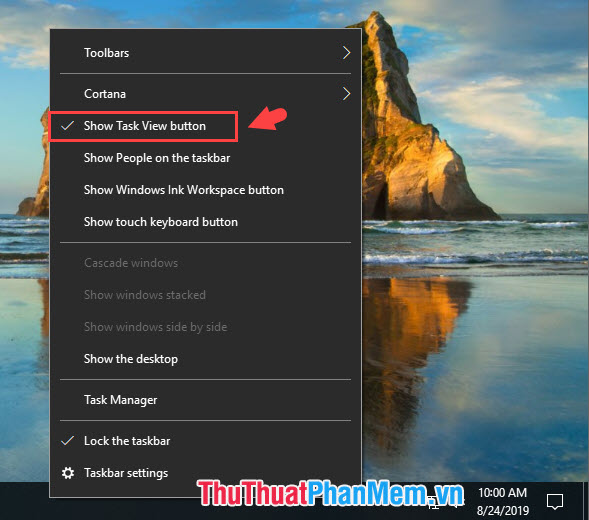
Step 1: To activate Task View , right-click on the Taskbar => Show Task View button .
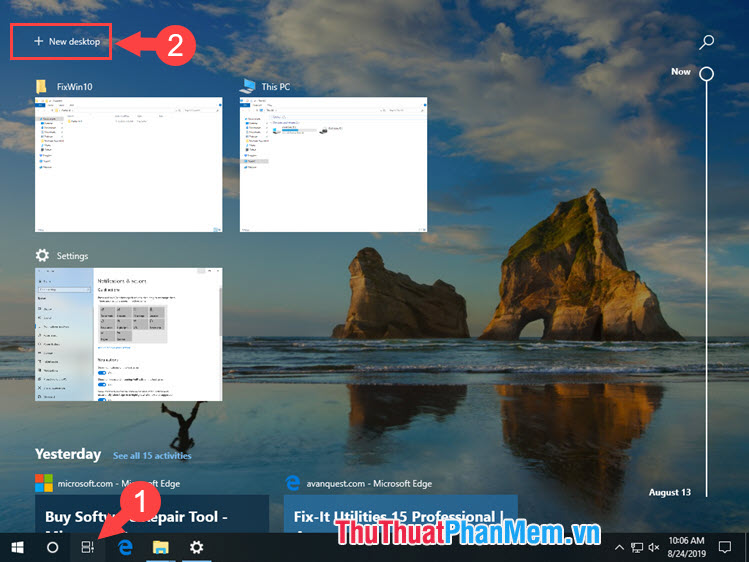
Step 2: Click on Task View . Here we can visually see which folders and software you are opening. To create more virtual desktops, click on New Desktop and a new desktop screen will be created.
6. Collapse the Start menu
If you feel confused and bored with the Start menu interface on Windows 10, we can collapse and make them simpler with the following tip:
Step 1: Right-click the application on the Start menu => select Unpin from start . Do it one by one until there is no longer any application on the Start menu .
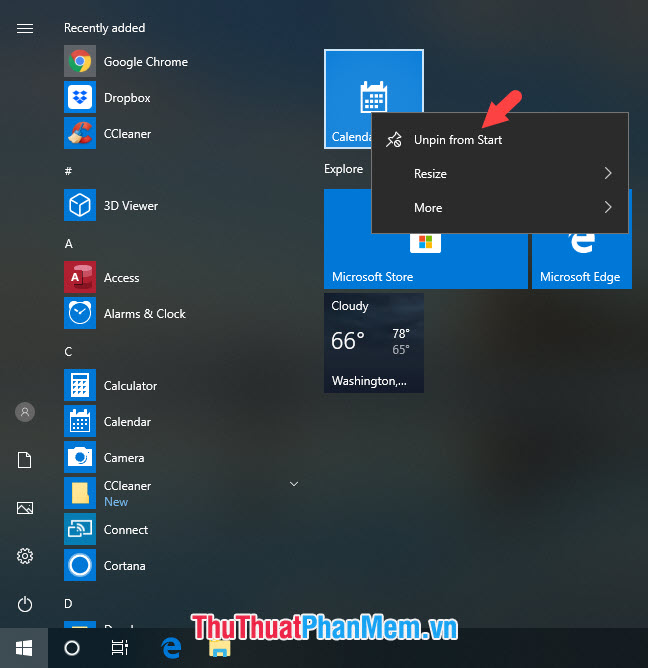
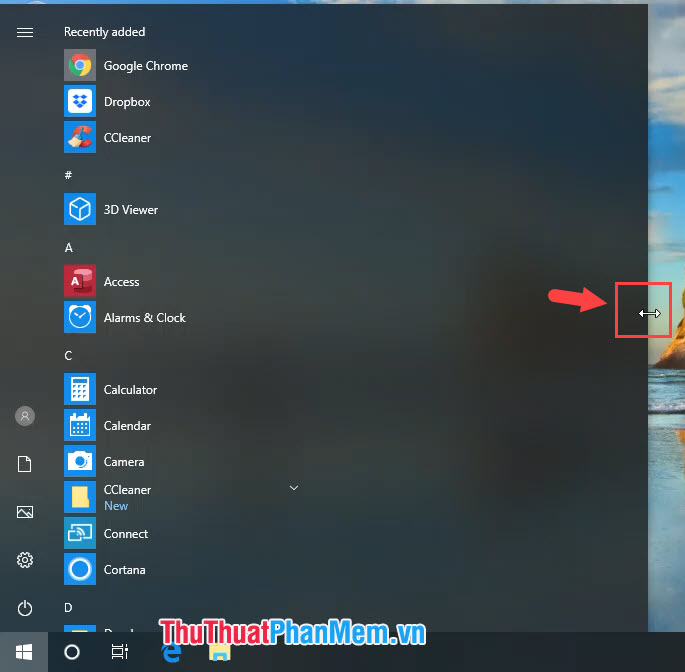
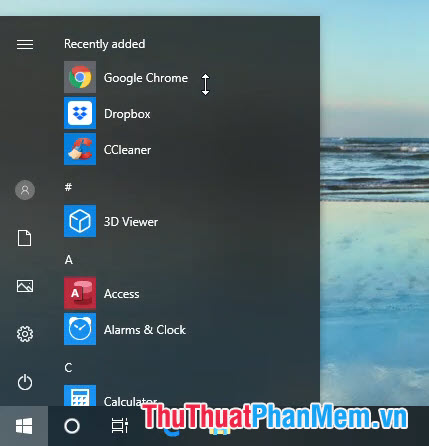
Step 2: Move the cursor to the right edge until the double-headed arrow icon appears. Then you hold and drag the mouse inside to collapse the Start menu . Continue dragging the upper area to collapse the Start menu 's size .
And finally, you have a cleaner and more visible Start menu interface.
7. Change the default folder when opening File Explorer
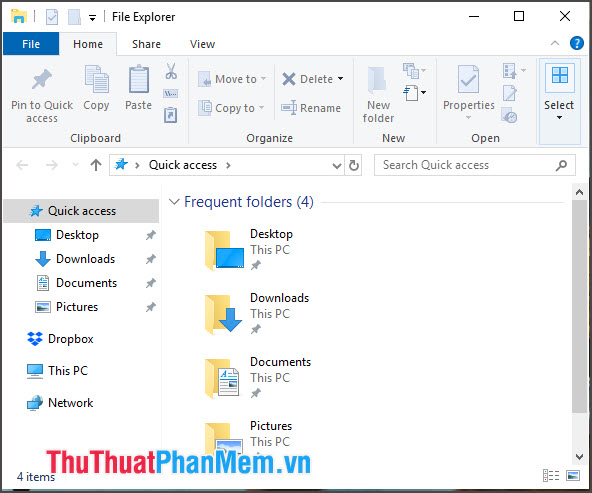
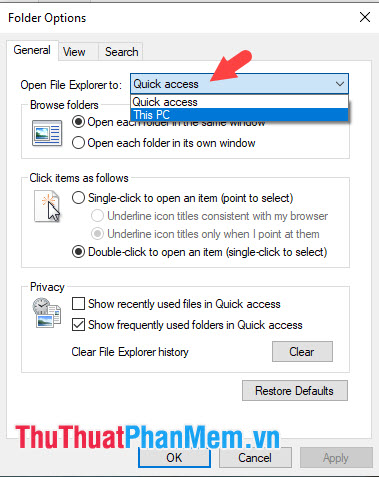
The default File Explorer , when opened, automatically accesses the Quick Access folder . To change back we do the following:
Step 1: At the File Explorer interface => Click on View => Options => Change folders and search options.
Step 2: At General tab , select the line Open File Explorer to: and convert it to This PC . Each time you open File Explorer the next time it will automatically switch to This PC and no longer open Quick Access.
8. Change the position of the icons in the Actions Center
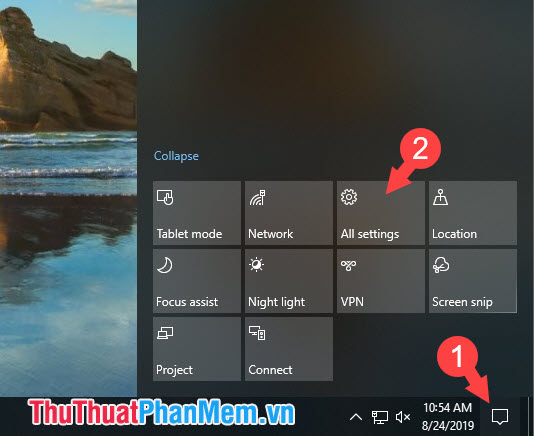
The icons in Notifications & Actions are not fixed and we can change their position or hide them. Proceed as follows:
Step 1: Click on Notifications & Actions => All Settings .
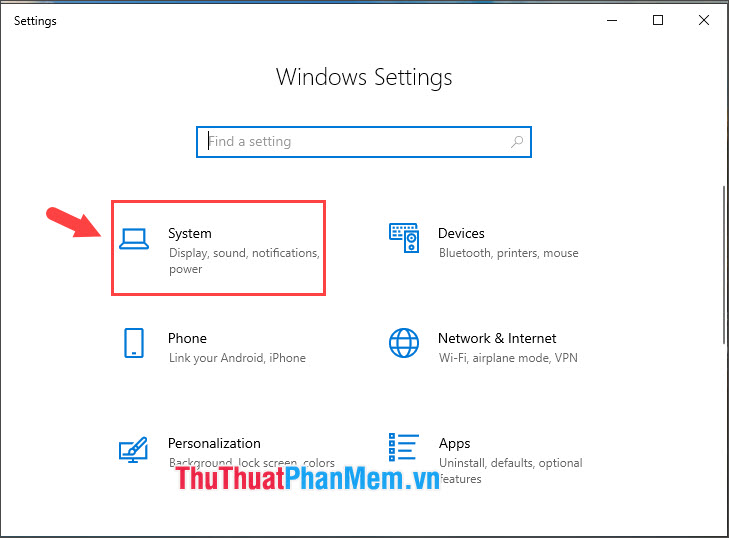
Step 2: Select System.
Step 3: Select Notifications & Actions. Here you can move function buttons or add or hide function buttons by tweaking in Add or remove quick actions .
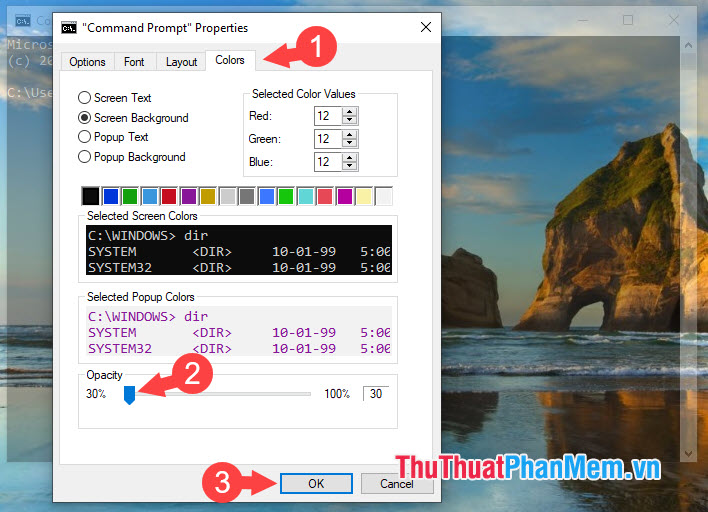
9. Dim the window in the Command Prompt
On previous versions of Windows, we could customize the Command Prompt interface to be different colors. On Windows 10 we can make the Command Prompt interface transparent by the following:
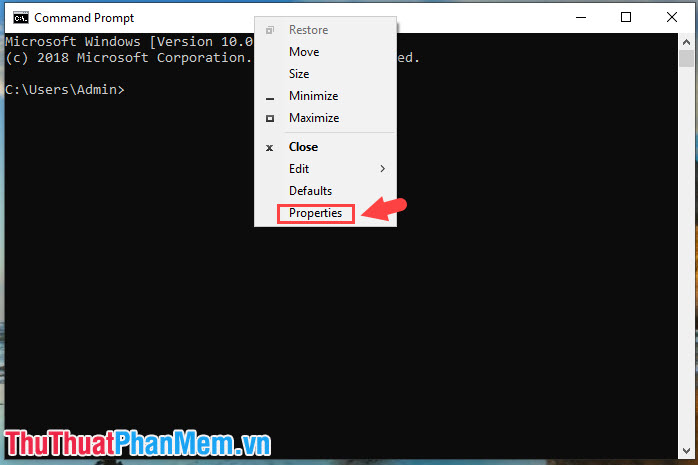
Step 1: Right-click the title bar of Command Prompt => Properties .
Step 2: Switch to the Colors tab and slide the Opacity slider to the left to dim the Command Prompt interface . After setting all the left, the opacity is 30% and the interface is almost transparent as shown below.
