Table of Contents
This guide provides a clear, practical overview of steps to install fonts for Windows 11, with useful context, important details, and straightforward takeaways for everyday readers.

1. Install Fonts on Windows 10 and Windows 11
The new Windows 11 operating system has just been released and they are said to be a slight upgrade from the popular Windows 10 operating system. Compared to the design, Windows 11 has made many valuable changes in terms of interface, especially the display interface outside the main screen and some tasks. The change in interface does not make too much difference in the process of using and manipulating the computer.
Because Windows 11 only upgraded the interface from Windows 10, installing Fonts on Windows 11 and Windows 10 is exactly the same. This means that you can use the Windows 10 font installation method for Windows 11 systems.
2. How to install Fonts on Windows 10, 11
For Windows 10, 11, the way to install the Font is completely the same, so Tipsmake will do the instructions on the latest Windows 11 operating system.
How to install Fonts directly on Windows 10, 11
Step 1: Download the fonts you need to use to your computer.
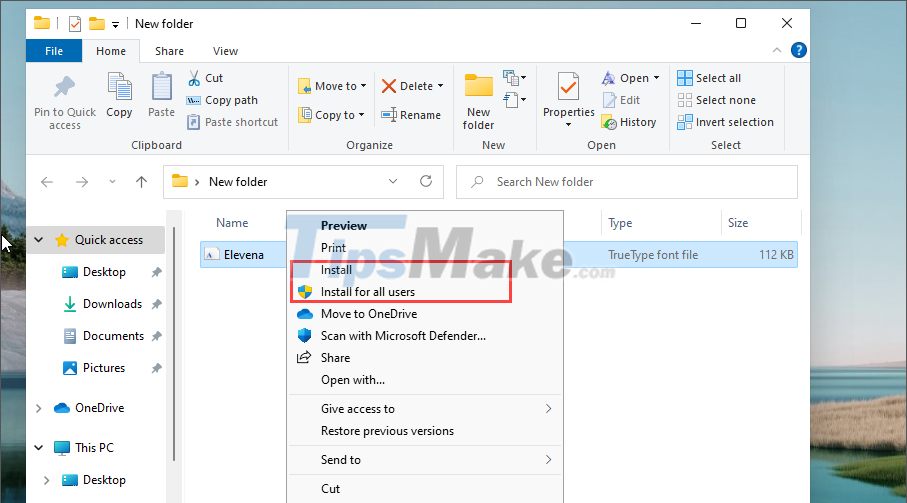
Step 2: Once you have the font file, you just need to right-click and choose one of the settings below.
- Install: Install for the Windows account in use
- Install for all users: Install for all Windows accounts on the computer
If you only want to install the Font for yourself, you only choose Install to avoid affecting other accounts on Windows. In case you want all Windows accounts to be able to use the font being installed, select Install for all users.
How to install Fonts via Preview on Windows 10, 11
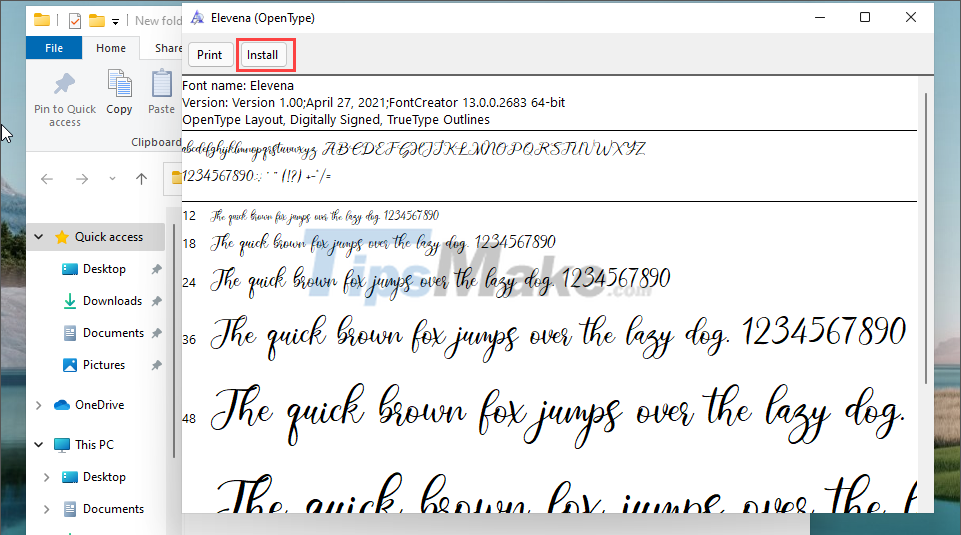
Before installing the Fonts on Windows 10, 11, you can preview the font's sample when installing.
Step 1: Double-click or Right-click on the font and select Preview.

Step 2: In the Font Preview window, you will be able to preview the font in many different sizes. To install the Font to your computer, simply select Install.
How to install Fonts in Control Panel on Windows 10, 11
Control Panel gives you the right to manage all the fonts available on your Windows 10, 11 computer.
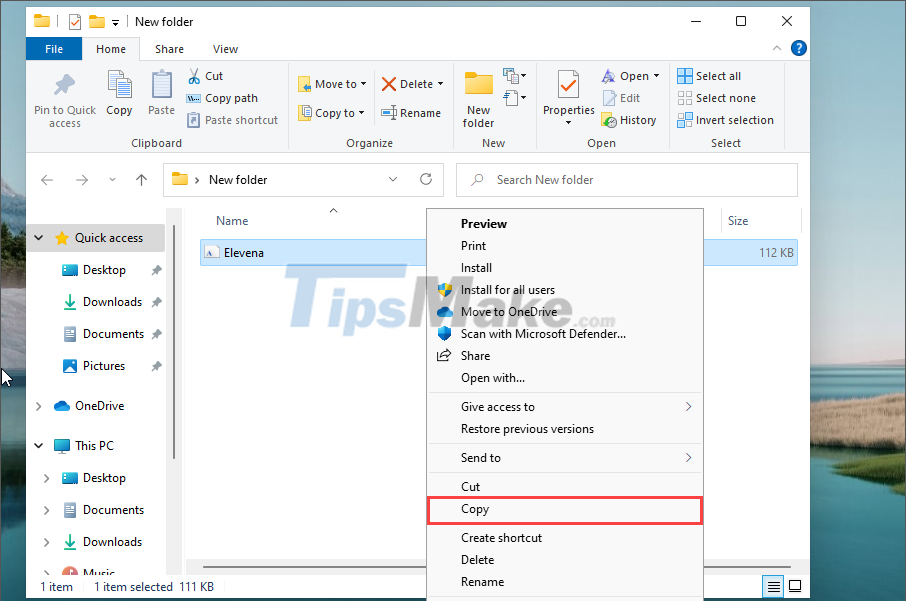
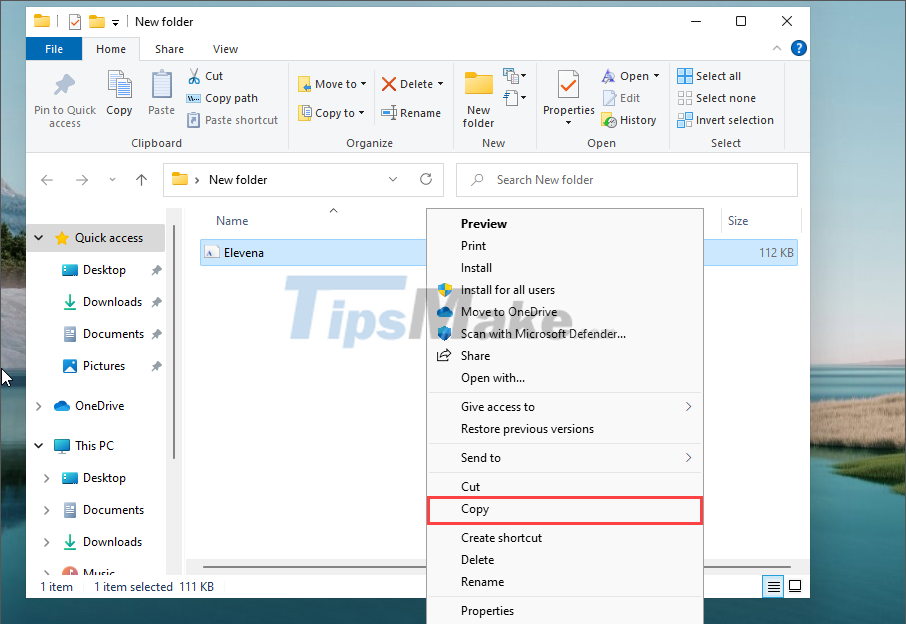
Step 1: Right-click the Font file on your computer and select Copy to copy.
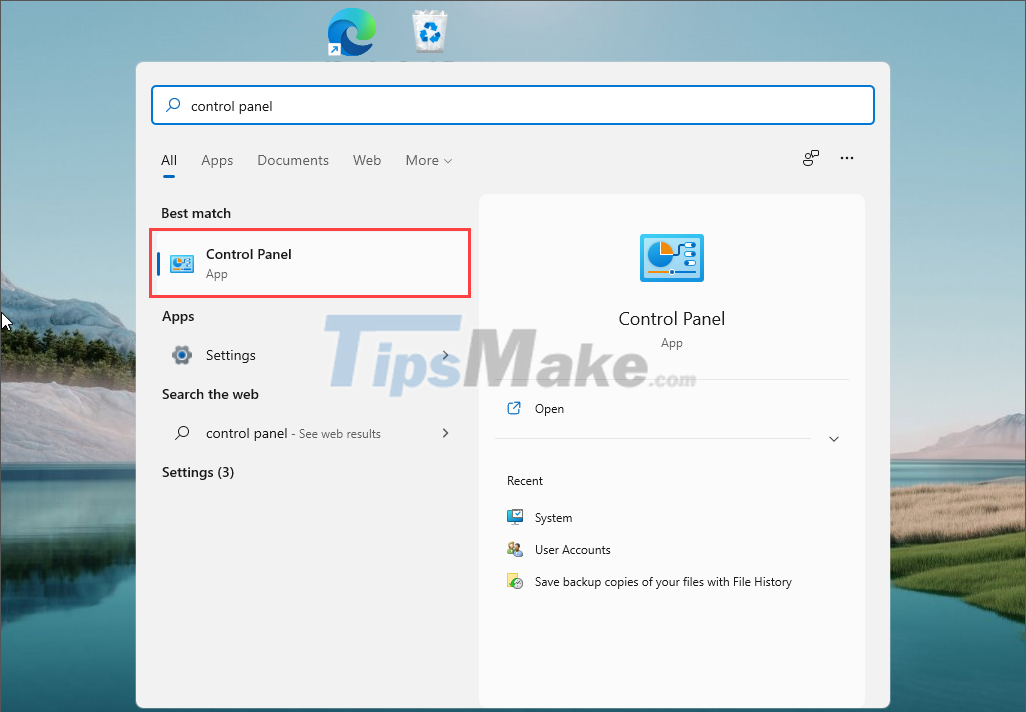
Step 2: Then, open the Start Menu window and enter Control Panel to open the manager on the computer.
Step 3: To search for the Font folder, change the View by view to Large icons and select Fonts.
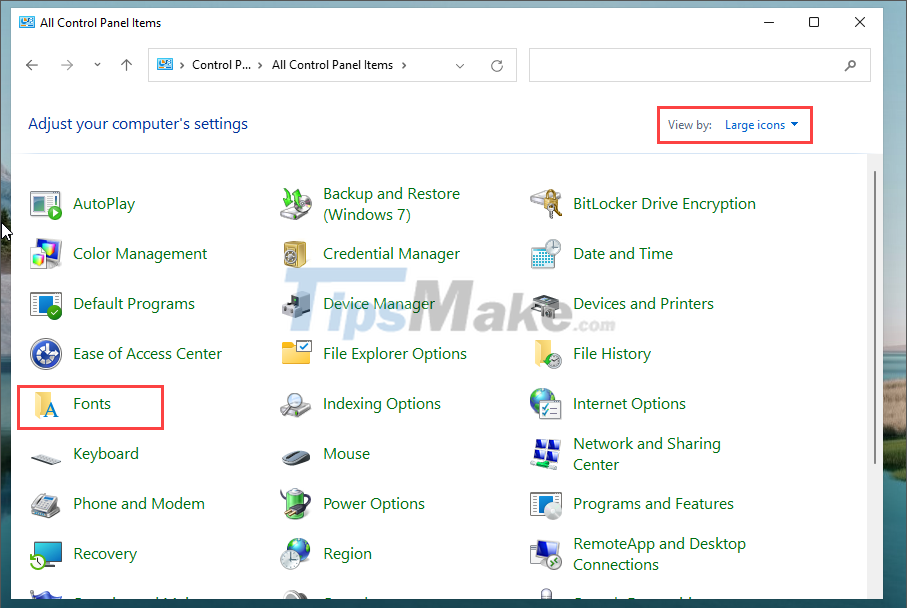
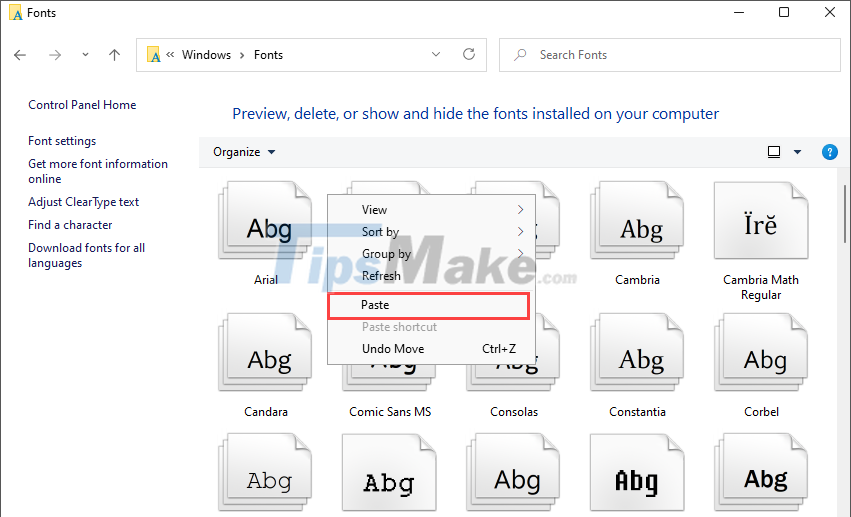
Step 4: Here, you just need to right-click and select Paste to paste the font into the computer system.
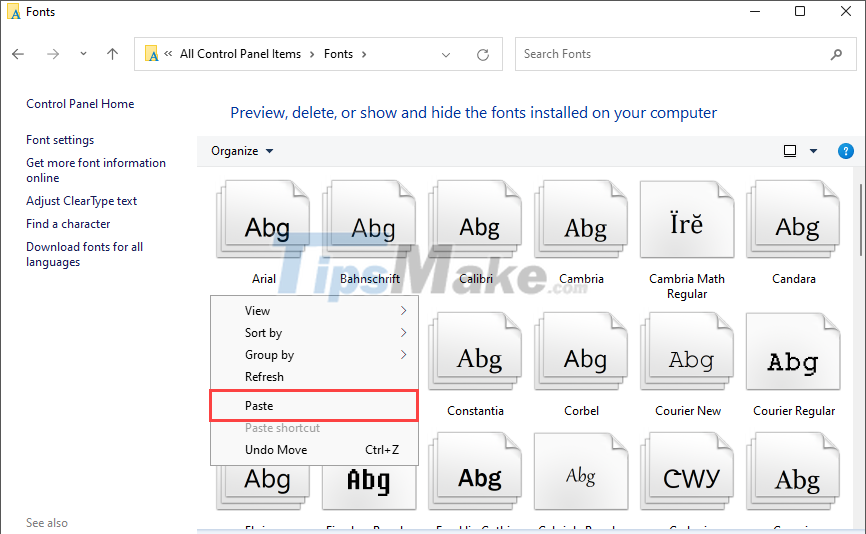
How to install Fonts in the RUN window on Windows 10, 11
The Run window allows you to install Fonts by copying the Font data and pasting it into the total folder on your computer.
Step 1: Right-click the Font file on your computer and select Copy to copy.
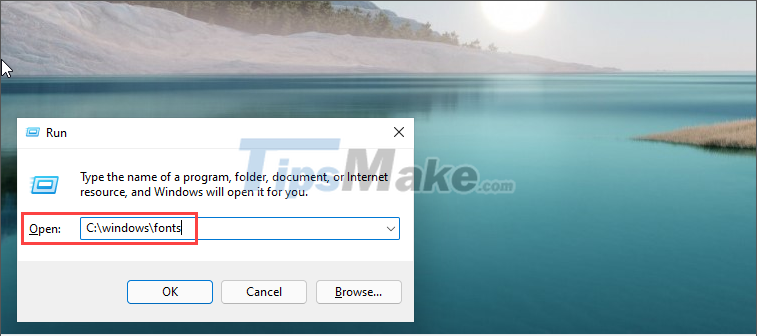
Step 2: Then, press the Windows + R combination to open the Run window and enter the path below to open.
C:WindowsFonts
Step 3: Finally, you just need to right-click and select Paste to paste the font into the system.
3. How to remove fonts on Windows 10, 11
In case you install the wrong Font or do not want to use the Font, you can quickly remove them from your computer through the settings.
Step 1: Open the Start Menu and enter Font Settings to open the font settings on your computer.

Step 2: Then, find the font you want to remove on your computer through the name of the font.

Step 3: To remove Fonts on your computer, simply select Uninstall to remove them from your computer.

In this article, Tipsmake has shown you how to install Fonts and remove Fonts on Windows 10, 11. Good luck!
Key Takeaways
Use the information above as a practical reference for steps to install fonts for Windows 11. Review each step carefully, confirm any requirements, and choose the option that best fits your situation.
FAQ
What does this guide explain about Steps to Install Fonts for Windows 11?
It explains the main concepts, practical considerations, and useful steps related to steps to install fonts for Windows 11 without requiring advanced knowledge.
Who can benefit from learning about Steps to Install Fonts for Windows 11?
This information is useful for readers who want a clear overview, practical guidance, and reliable steps related to steps to install fonts for Windows 11.
What should I check before applying this information?
Review the requirements, confirm that your device, software, or situation matches the instructions, and back up important data before making major changes.
Related Articles
 How to Install and Uninstall Fonts on Windows 11: Step-by-Step Guide5 minutes read
 How to Install and Remove Fonts on Mac: Install Fonts on Mac11 minutes read
 How to Install (and Uninstall) Fonts on Windows 114 minutes read
 How to Download and Install Fonts on Windows 11 Simply5 minutes read
 How to Install Fonts on Windows Simply and Quickly4 minutes read
 The Simplest Way to Install Additional Fonts for Computers4 minutes read
Reader Comments 0
Sign in with email or Google to join the discussion.