Table of Contents
This updated guide explains how to Show / Hide Fonts in Windows 10/8 through clear steps, practical examples, and important checks that help prevent common errors.
Steps to Hide Fonts
To hide fonts, you need to use the Fonts folder of ControlPanel. The new Fonts page in the PC Settings application has no option to hide the fonts you do not want to see.
1. First, open Control Panel by searching in Start menu. If you have added Control Panel to the Win + X menu, you can also use it to open.
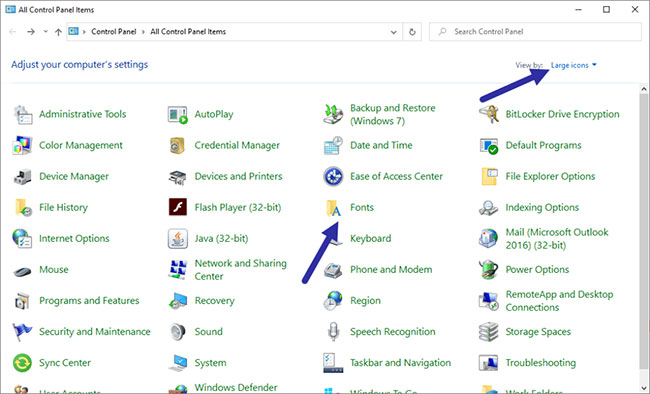
2. In the Control Panel window, set "View by" to "Large" . Next, click the "Fonts" option . This action will open the Fonts folder.
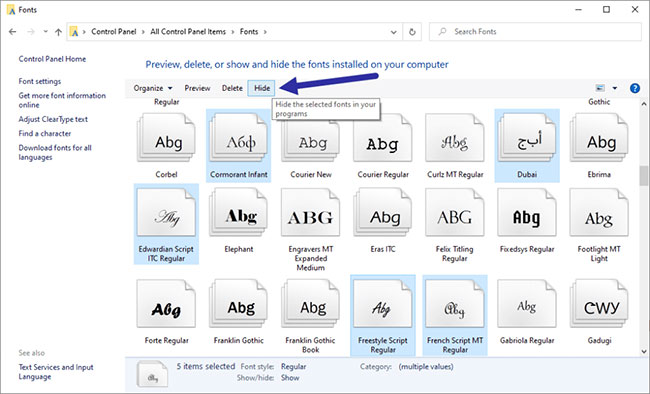
3. In the Fonts folder, find and select the font you may need to hide. You can select multiple fonts by holding down the Ctrl button. When you have selected the font (s), click the "Hide" button that appears on the toolbar.
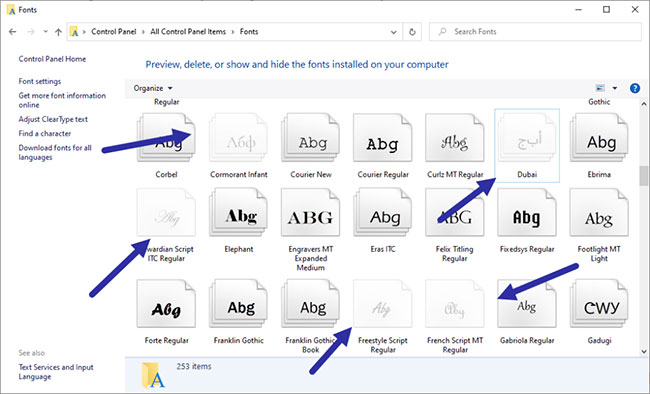
4. As soon as you do that, the font will fade (hidden).
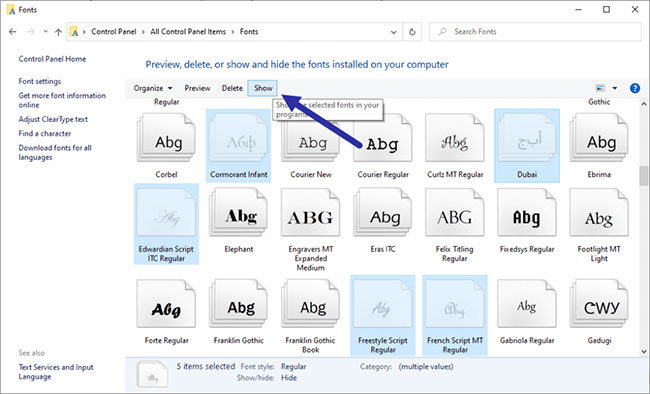
It's done! The fonts will be hidden from all programs and you will no longer see them. However, they are not uninstalled. So if you may need to show or unhide them, just select those hidden fonts and click the "Show" button.
Hide Fonts Based on Language Settings
If you have multiple languages installed and want to hide fonts that are not designed for the current language, you can do that too. The good thing about this method is that depending on your current language, Windows will automatically hide and unhide fonts for other languages.
1. Open Control Panel by searching in the Start menu. In the Control Panel window, set View By to "Large" and select the "Fonts" option .
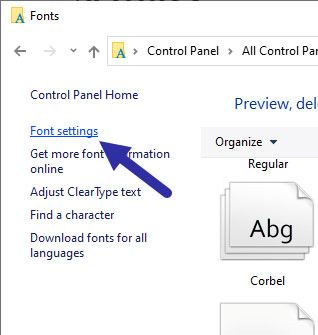
2. In the Fonts folder, click the "Font Settings" link on the left panel.
3. Now, select the "Hide fonts based on language settings" checkbox and click the OK button .
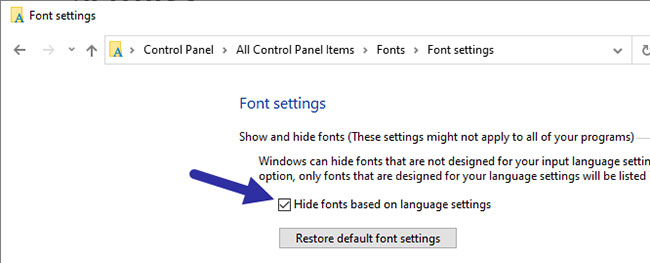
From now on, Windows will automatically hide fonts that are not in the current language.
FAQ
What is the easiest way to Show / Hide Fonts in Windows 10/8?
Start with the requirements in this guide, then follow each step in order. Check the result after every major change so problems are easier to identify.
Can beginners follow these instructions?
Yes. The process is organized into practical steps, and you can repeat any step before moving forward.
What should I check if the method does not work?
Confirm your software or device version, permissions, settings, file format, and internet connection when the task depends on online services.
Related Articles
 How to Manage Fonts in Windows4 minutes read
 How to Install and Uninstall Fonts on Windows 11: Step-by-Step Guide5 minutes read
 How to Hide and Show the Recycle Bin on Windows 114 minutes read
 How to Show and Hide Files in Windows 103 minutes read
 How to Hide and Show the Taskbar on a Windows Computer5 minutes read
 The Simplest Way to Show and Hide Folders on Windows 103 minutes read
Reader Comments 0
Sign in with email or Google to join the discussion.