Instructions on how to install and remove fonts in Windows
Instructions on how to install and remove fonts in Windows. Almost anyone who uses a computer needs to install external fonts. TipsMake.com will guide you to install and remove fonts in windows.
Table of Contents
If you are a person who often works with documents or you are a Desginer, then fonts will be indispensable for your computer. Because the default font in the machine is too few and not nice and will have font errors when opening documents using special fonts. Therefore, almost anyone who uses a computer needs to install additional external fonts. And this article TipsMake.com will guide you to install and remove Fonts in windows, invite you to follow along.
1. Install Fonts
Method 1: Very simple, you just need to select the entire font you want to install on the computer, then right-click and select Install is done.
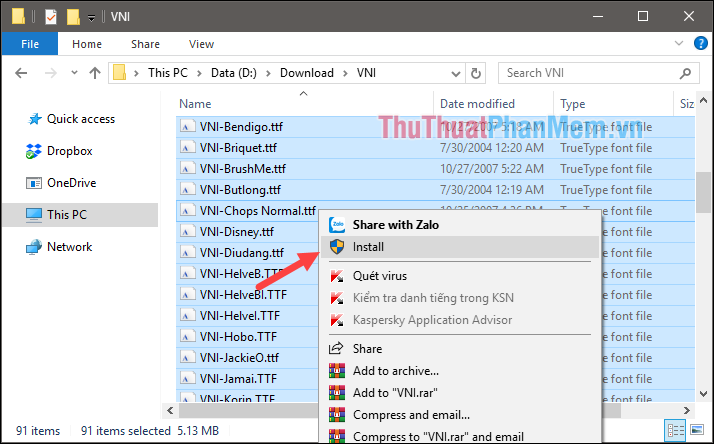
Method 2: Copy all the fonts you want to install into the 'C: WindowsFonts' folder and you're done.

2. Remove Fonts
To remove the font, go back to the 'C: WindowsFonts' folder, select the font you want to remove and then remove it.

So with just a few simple steps, we can install and remove fonts on the windows computer. Good luck!
Was this article helpful?
Your feedback helps us improve.
Related Articles
 How to install and uninstall fonts on Windows 113 minutes read
 How to install and remove fonts on Mac10 minutes read
 How to install (and uninstall) fonts on Windows 113 minutes read
 How to install and remove fonts on Linux7 minutes read
 Instructions for installing Font on Windows3 minutes read
 5 notes to help capture beautiful and virtual fonts5 minutes read
Reader Comments 0
Sign in with email or Google to join the discussion.