How to install and remove fonts on Linux
The Linux system has many integrated fonts but you still can't find the font you need. Downloading and installing new fonts is very easy on Linux and we will show you how to do this in the following article.
Font management on Linux
The Linux distribution comes with different desktop environments and applications for font management. We will show you how to install fonts on Ubuntu with Font Viewer and how to install Ubuntu's Nautilus fonts manually. Most other Linux distributions have similar tools.
Install fonts on Ubuntu with Font Viewer
Ubuntu comes with Font Viewer which allows you to easily install fonts but only for current users. If you want to install fonts for all users, you must install them manually (we will guide you in the "Manual font settings for all users" section below). .
Download the font you want to install in TrueType (.ttf) or OpenType (.otf) format . The font usually has the .zip format, so right-click the .zip file and select Extract Here .

Then, double click on the font file.

The preview window in Fonts Viewer shows what the font looks like.
Click Install .
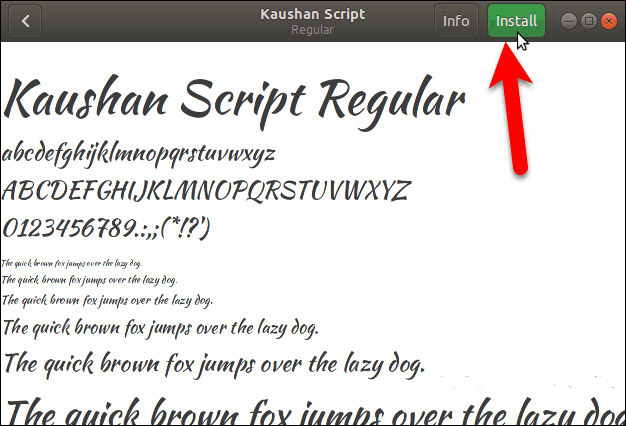
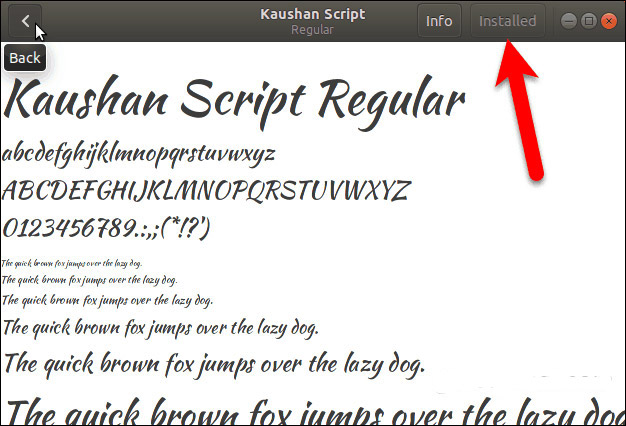
The ' Installed ' message will replace the Install button when the font is installed.
To return to the All Fonts window, click the Back button in the upper left corner.
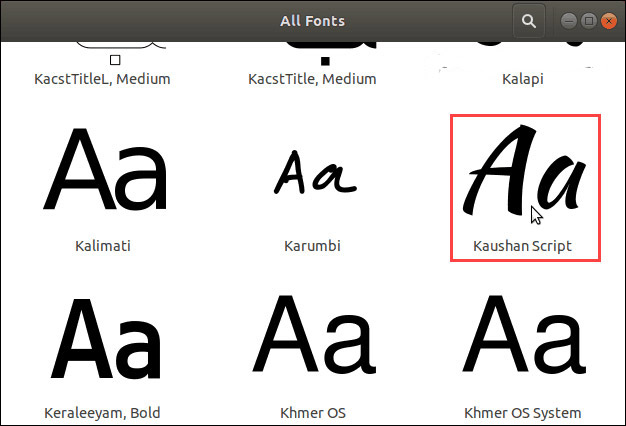
The installed font is displayed in the list of all fonts on your system.
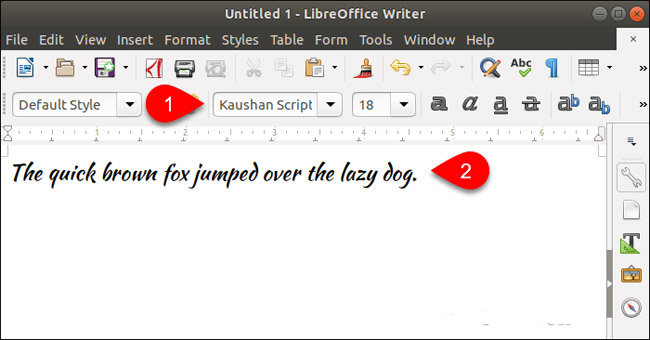
Now, you can choose a new font in any word processing application, such as LibreOffice Writer .
Manually install fonts for a specific user
To manually install fonts for specific users, first log in to that user's account. Then, open the file manager, Nautilus example in Ubuntu and move to the ~ / .local / share folder. The tilde character ( ~ ) represents the Home folder, for example / home / lori .
Files and folders starting with dots ( . ) Are hidden. So if you don't see the .local folder in the Home folder, press Ctrl + H to display hidden files and folders.
If you see the Fonts folder in the Share folder your job is complete. If not, create a new folder called " Fonts " in the Share folder. In most file managers, just right-click and select New Folder .
Copy and paste the font files into the ~ / .local / share / fonts directory to install them for the current user.
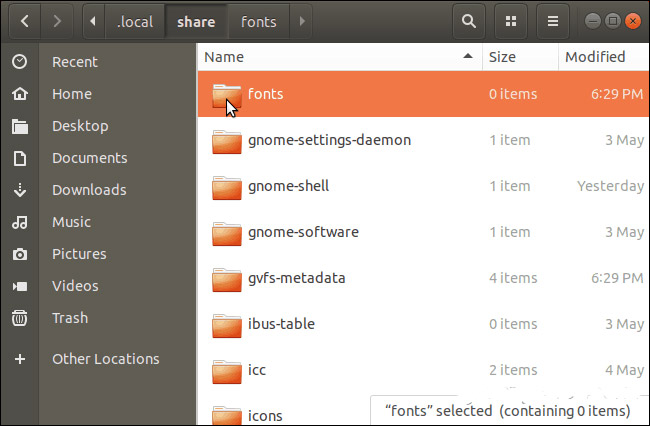
After installing the font manually for the current user, you must update your font cache to register the font in the system.
Press Ctrl + Alt + T to open the Terminal window. Type the following command at the prompt and press Enter .
fc-cache -f
The -f option forces you to recreate all font files, whether they have been changed or not. This ensures all your fonts are available.

Manually install fonts for all users
If you want your font to be available to all users on the system, you must install it manually. This procedure is similar to the manual font installation process for current users. But you will need to access the directory you will paste the font into with admin permissions. We will use Nautilus in Ubuntu to manually install fonts for all users. So before proceeding, install the necessary options into the right-click menu in Nautilus.
This process is very similar in manager files in other Linux systems, such as Linux Mint or Fedora.
In Nautilus, navigate to the folder containing the fonts you want to install, select the font files and copy them (using the Ctrl + C key combination).
Then, click Other Locations at the bottom of the list on the left and click Computer on the right.
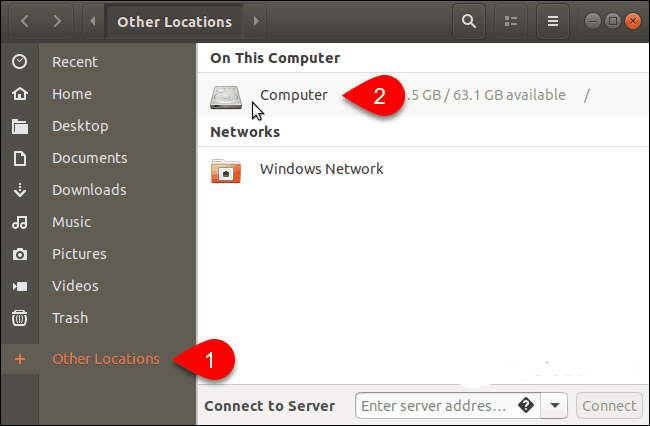
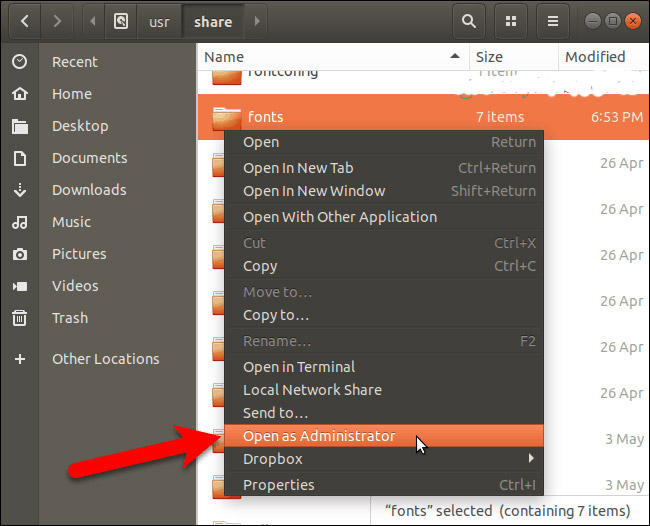
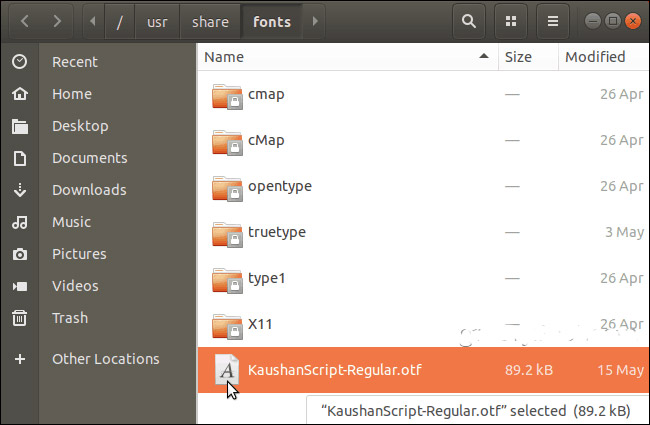
Navigate to the / usr / share folder. You will paste the copied fonts into the Fonts folder. But first, open the Fonts folder with administrator privileges by right-clicking on the Fonts folder and selecting Open as Administrator .
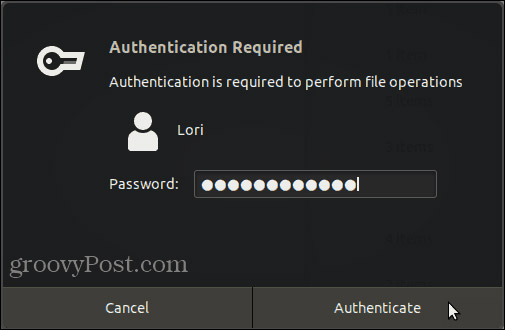
Enter the password in the Authentication Required dialog box and click Authenticate .
A new Nautilus window opens directly to the Fonts folder with administrator privileges.
Paste the font files you copied into the Fonts folder.
After installing the font manually for the current user, you must update the font cache to register the font in the system.
Press Ctrl + Alt + T to open the Terminal window. Type the following command at the prompt and press Enter .
fc-cache -f
Remove fonts on Linux
Removing fonts on Linux must be done manually, no matter which method you use to install them. Fonts Viewer does not provide a way to remove fonts.
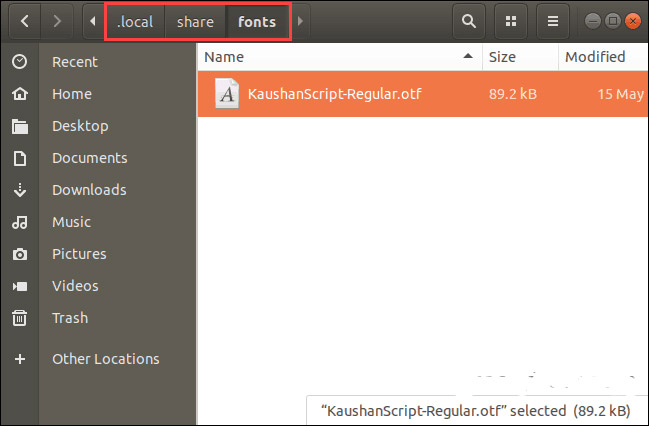
To remove an installed font for current users only, open Nautilus and navigate to the ~ / .local / share / fonts folder.
After that, select the font you want to delete and press Delete . You will not see the confirmation dialog.
If you are deleting the installed font for all users, you must use the command line. You must open the Fonts folder in the / usr / share folder as an administrator as described in the previous section.
Select the font you want to delete and press Delete . Then, click Delete on the display confirmation dialog.

After deleting the font installed for all users, you must update the font cache to unsubscribe the font in the system.
Press Ctrl + Alt + T to open the Terminal window. Type the following command at the prompt and press Enter .
fc-cache -f

Good luck!
See more:
- How to install fonts and print Vietnamese on Linux
- Instructions for installing Windows Fonts on Ubuntu
- Install and use fonts in Linux
