How to install Hebrew fonts on Windows Vista
Windows Vista (and Windows 2000/2003 / XP) are capable of displaying Hebrew fonts on your system without having to install language packs..
Windows Vista (and Windows 2000/2003 / XP) are capable of displaying Hebrew fonts on your system without having to install language packs or localized versions of the system. To install Hebrew fonts on Windows Vista you must follow these steps. If it does not work it will probably make your computer show string ???? instead of Hebrew fonts, especially in Office applications.
Unlike previous operating systems, the installation of Hebrew is much simpler and does not require a reboot. You can choose to install Hebrew fonts during Windows Vista installation, or at any time after the installation is complete.

1. Install Hebrew font during Windows Vista installation
After restarting the computer during the installation of Windows Vista, you need to wait for the blue progress bar to run until the end.
You will then have the opportunity to choose your language and location settings

2. Hebrew font installation when Windows Vista installation is complete
If you have Windows Vista installed, you need to go to Control Panel and you need to have a Windows Vista installation disk because the system will require copying files from this disk.
- Open Control Panel and go to the Clock, Language and Region section .

If you are running Control Panel in classic mode - go to the Regional and Language Options section .
- When it is opened, select the Administrative tab and then select the Change System Locale button.

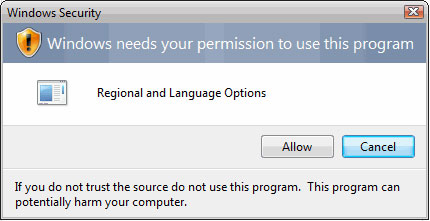
You may encounter a Windows Security warning, asking you for permission to use Regional and Language Options. Click the Allow button
- In this window, note that English is the default selected language.

Change it to Hebrew.

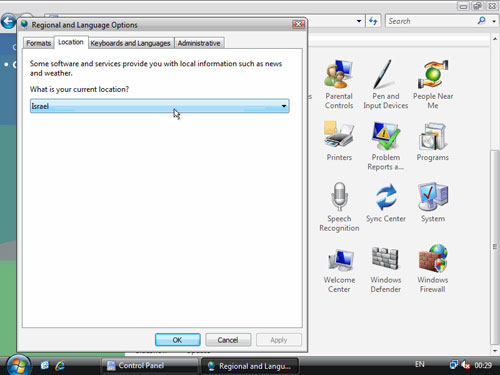
- At the Location tab, select Israel .
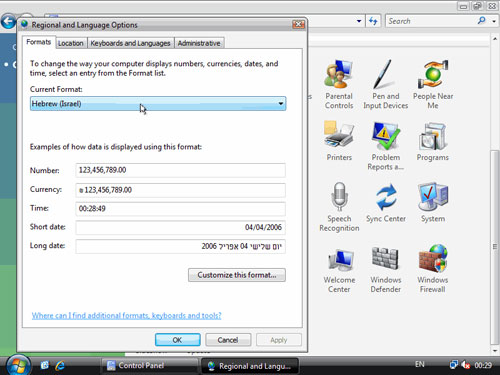
- At the Formats tab in the Current Format drop-down list select Hebrew (Israel)
- Click OK . Now you need to insert the Windows Vista installation disc into the drive.
- Then restart the computer.
You now have Hebrew fonts on your computer
Good luck!