Steps to Delete junk files on Windows 10 thoroughly and effectively
1. Delete junk files of each hard drive on Windows 10
Manufacturer Microsoft has understood the needs of users, they provide a self-cleaning feature for you to use to save time and free up memory space on Windows.
Step 1: First you need to open This PC and right-click on the drive to clean the junk file, then select Properties.

Step 2: When the Properties window appears, go to General and select Disk Cleanup to clean up junk on the drive.

Step 3: After cleaning is complete, you tick all the items (1) in the Disk Cleanup for section and click OK (2) to start deleting junk files.

2. Use Ccleaner software to clean up trash
Step 1: You proceed to visit Ccleaner homepage to download the software.
Step 2: At the main interface of Ccleaner, you proceed to select the Health Check item and click on the Skip to start Health Check item to conduct a check for junk data.

Step 3: After the cleaning is complete, you will see the junk file on the computer to be deleted and you just need to click Make it Better.
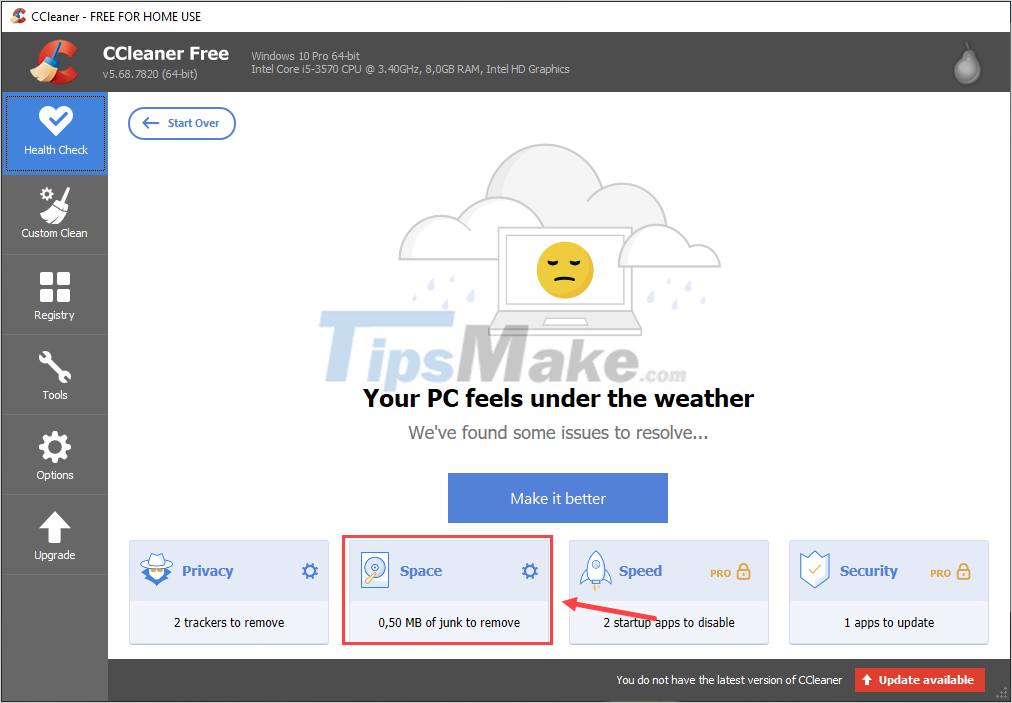
The system will automatically process and delete junk for you, after completing you will see your drive freed up space.

3. Clear Application Cache Storage on Windows 10 Computers
In order to access applications quickly, the Windows 10 operating system has created a series of different Caches and they are also classified as junk files because the Cache file is only generated by itself, without the auto-delete feature.
Step 1: First you need to open MenuStart and enter Run to open.
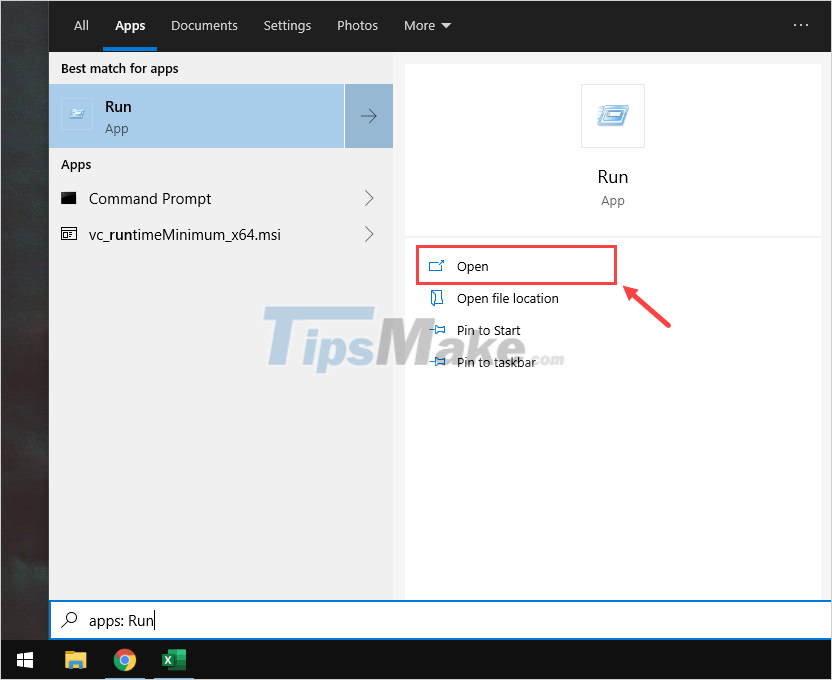
Step 2: Then you proceed to enter Prefetch and click OK to open.
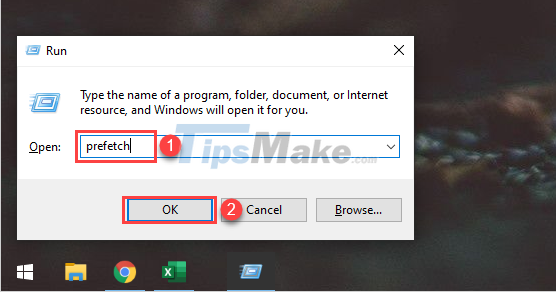
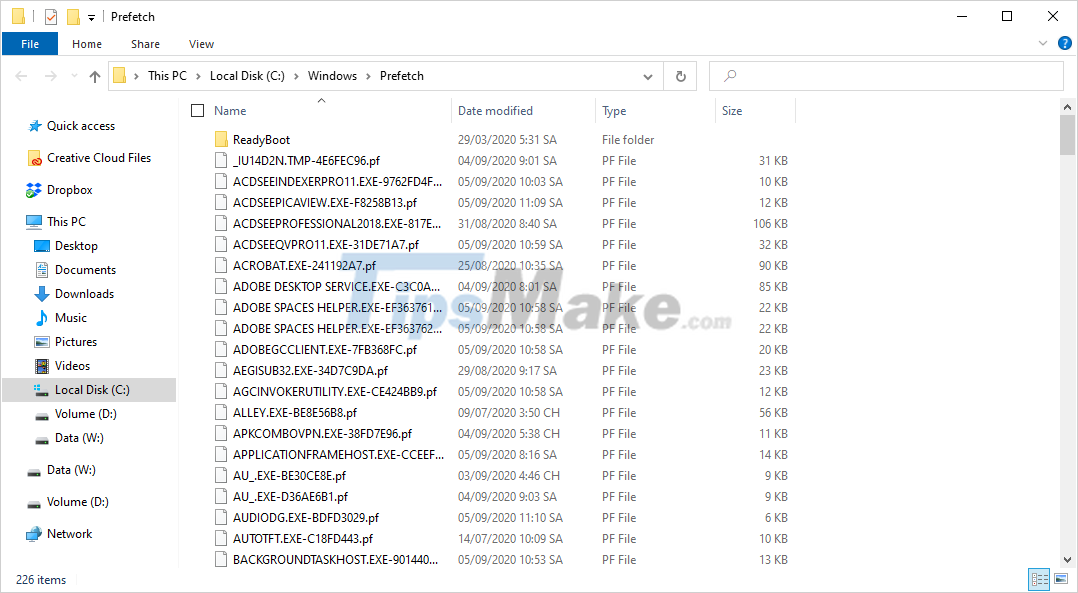
Step 3: When the Prefetch folder appears, press Ctrl + A to select all and press Delete to delete all.
4. Delete temporary files of applications
When you use certain software, they will create temporary files in this Temporary folder to work. After the operation is complete, the temporary files in Temporary will not delete themselves, but they will need your influence.
Step 1: You proceed to open MenuStart and enter '%temp%' to open the Temporary folder.
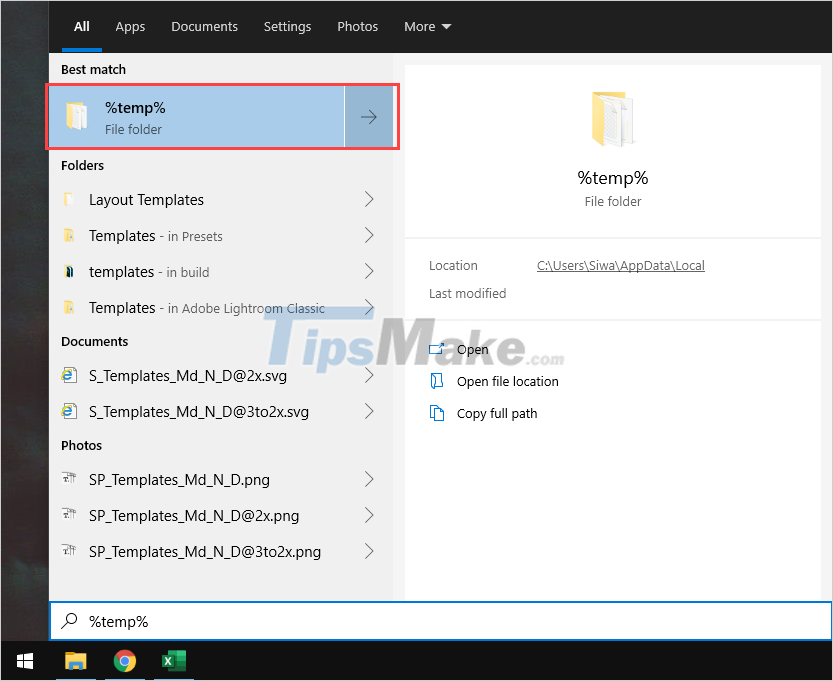
Step 2: When the Temp window appears, press Ctrl + A to select all and press Delete to delete them all.

5. Create a professional garbage collection tool
If you regularly clean up trash on your Windows 10 computer, you can create a professional garbage removal tool yourself and just start them. This is a way that is favored by many people because of its high efficiency and thorough cleaning of data.
Step 1: First you need to open MenuStart and enter NotePad to open the software.
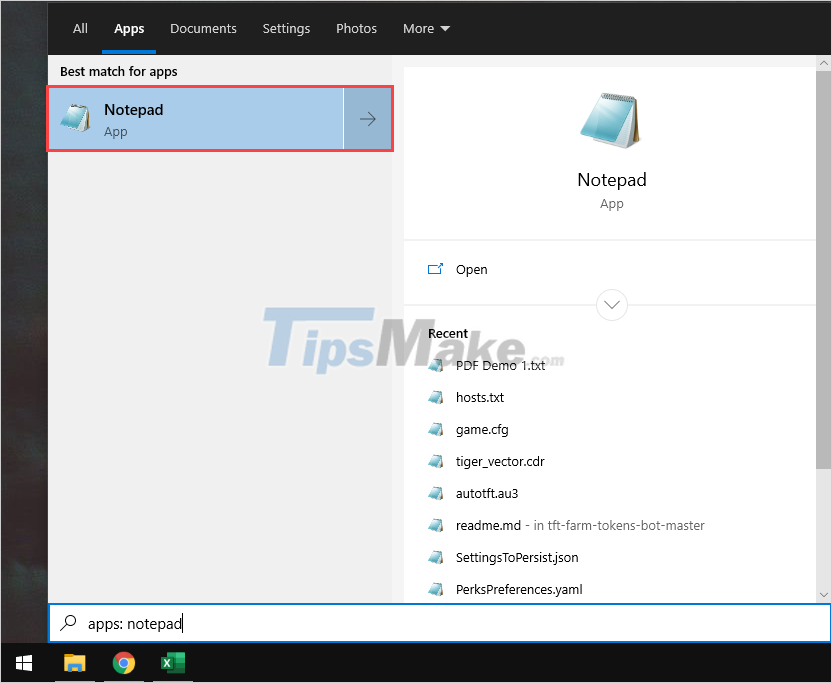
Step 2: When NotePad appears, proceed to Copy the code below and paste it into Notepad.
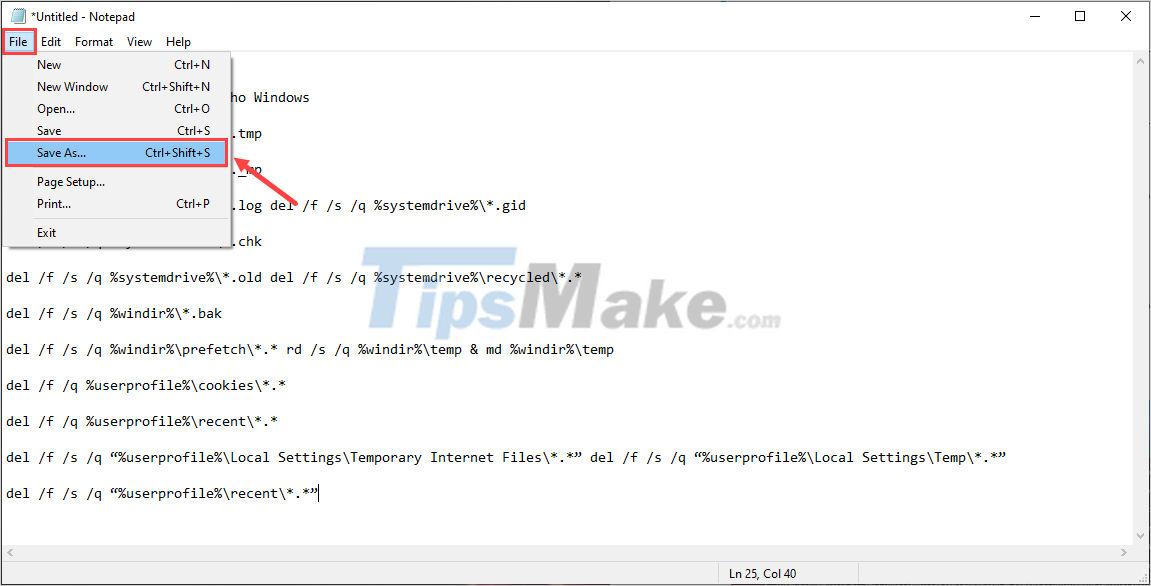
@echo off color 0C echo Delete rac file for Windows del /f /s /q %systemdrive%*.tmp del /f /s /q %systemdrive%*._mp del /f /s /q %systemdrive%*.log del /f /s /q %systemdrive%*.gid del /f /s /q %systemdrive%*.chk del /f /s /q %systemdrive%*.old del /f /s /q %systemdrive%recycled *.* del /f /s /q %windir%*.bak del /f /s /q %windir%prefetch*.* rd /s /q %windir%temp & md %windir%temp del /f /q %userprofile%cookies*.* del /f /q %userprofile%recent.* del /f /s /q '%userprofile%Local SettingsTemporary Internet Files*.*' del /f /s /q '%userprofile%Local SettingsTemp *.*' del /f /s /q '%userprofile%recent*.*'

Step 3: After entering the commands, proceed to select File -> Save As… (Ctrl + Shift + S) to save.
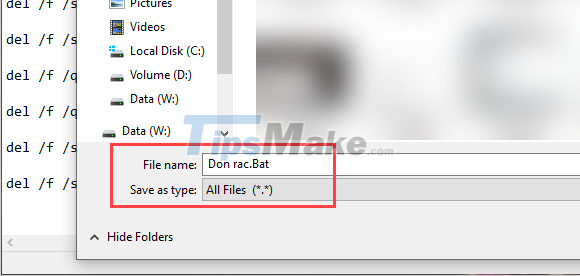
Step 4: When saving the file, you need to pay attention to the following information:
- Save as type: All files (*.*)
- File name: Name anything but must have the extension '.Bat'
Once done, click Save to save the garbage removal tool.
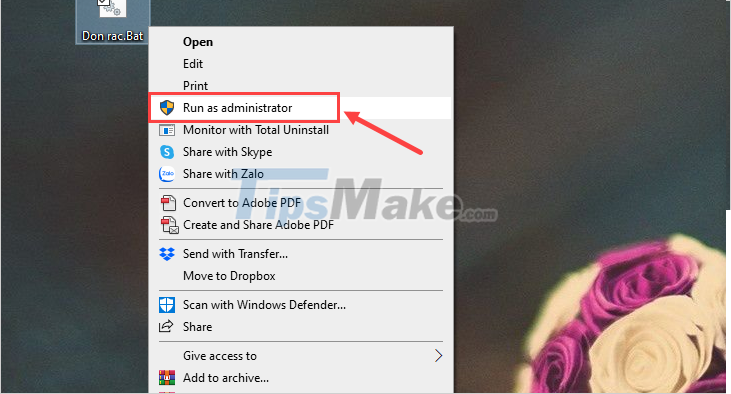
Step 5: The system will create a professional garbage cleaning tool for you, now right-click on the newly created junk file and select Run as administrator.
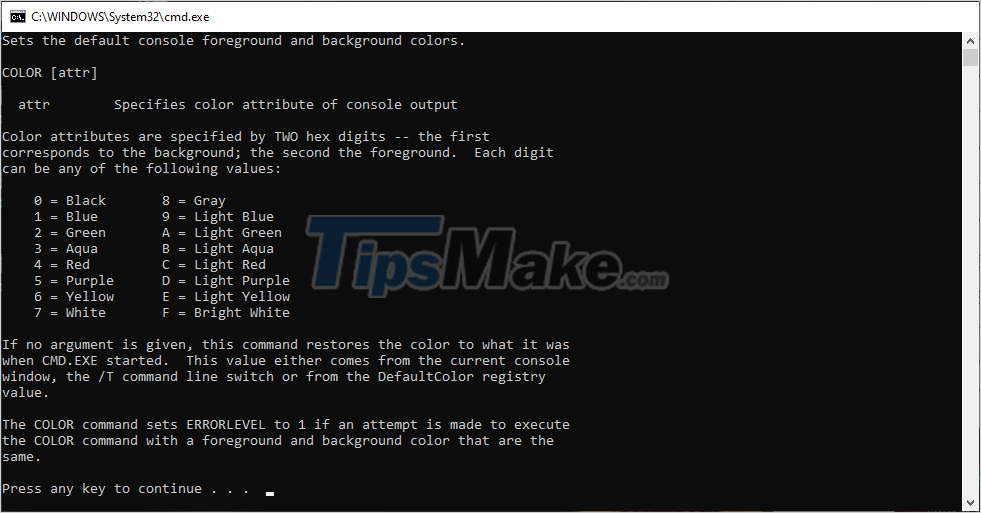
Step 6: Self-created garbage removal software will work based on CMD, when they are opened, press Enter or any key to start.
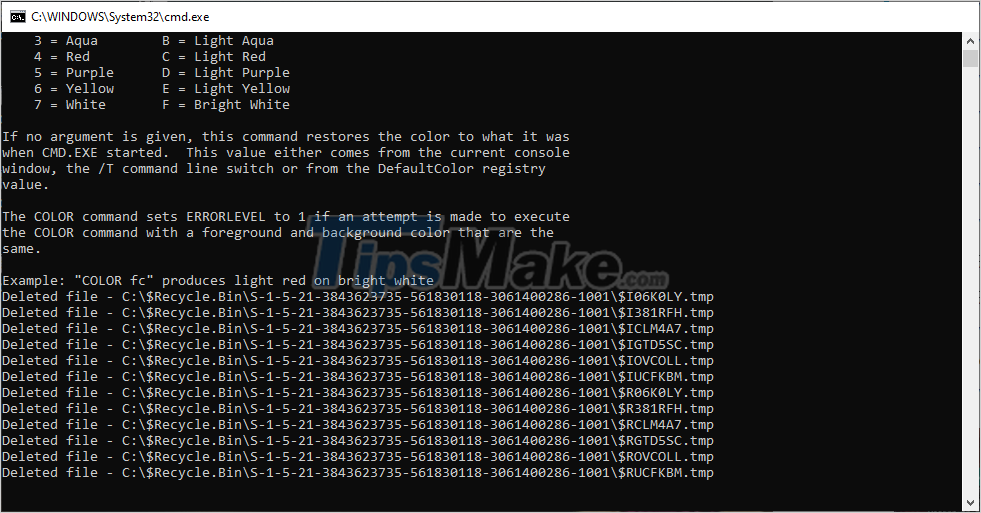
Step 7: The software will automatically clean up the garbage on your entire computer, the cleaning time will take quite a while because it will scan the entire computer.
In this article, TipsMake has shown you how to clean junk on Windows 10 computers quickly and effectively. Have a nice day!