Numbering in Excel 2016
Numbering in Excel is a great feature that Excel supports to help users work effectively and reach the fastest speed. The following article provides detailed instructions for Numbering in Excel 2016.
Table of Contents
Numbering in Excel is a great feature that Excel supports to help users work effectively and reach the fastest speed. The following article provides detailed instructions for Numbering in Excel 2016.
1. Numbering with the value being a numerical value
In the process of creating a numbered list is an indispensable operation. There are two ways to number with numbers as follows:
- Use drag and drop
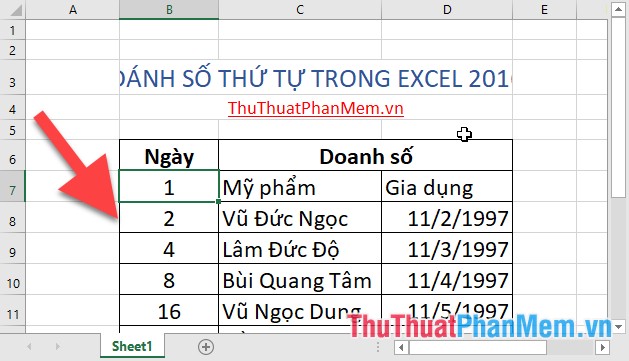
For example, you want to number the table. Enter the starting number and next value in the first 2 cells of the ordinal column -> select the 2 recently entered values move to the lower right corner of the selection when the mouse pointer changes to plus sign -> drag and drop to the last position to be numbered:

The result you have numbered in a simple operation:

- Use the Fill feature
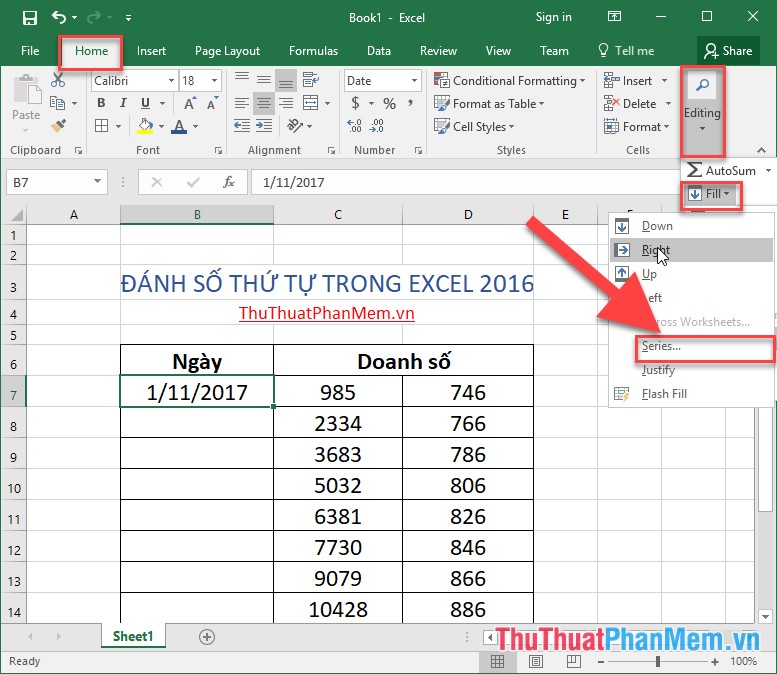
In addition to drag and drop to number, you can use the Fill feature. Enter the first numbered value in the first cell of the ordinal column. For example, here the numbering starts with 1 -> on the Home tab -> Editing -> Fill -> Series:
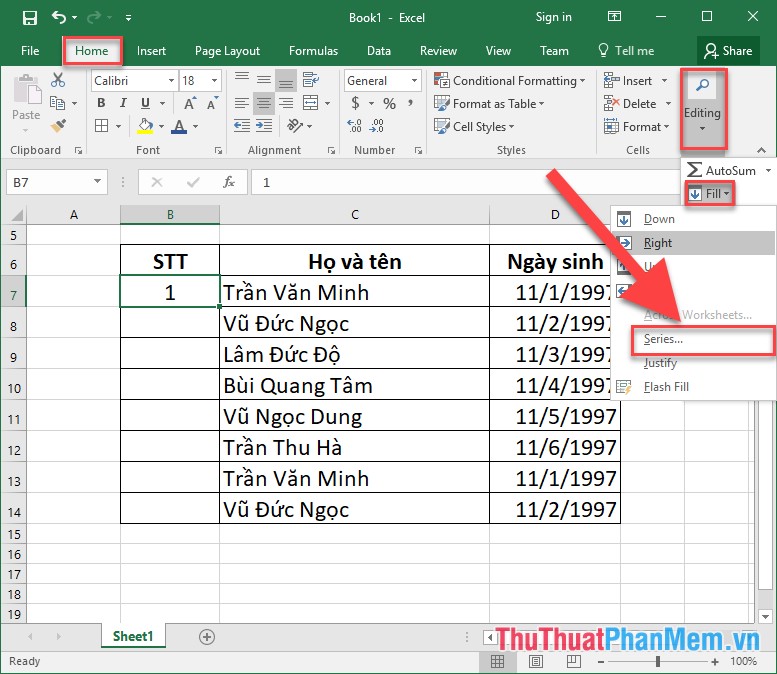
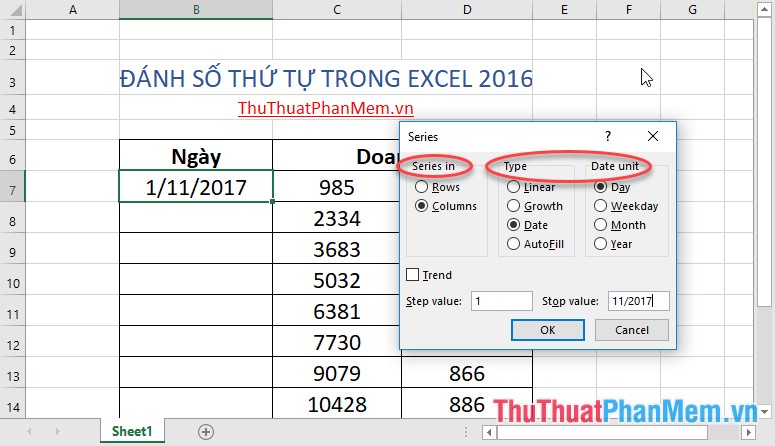
A dialog box appears with the following values selected:
- Series Series item : Select Columns
- Item Type: Select Linear value
- Step Value: Select the value to start numbering
- Stop vlaue: Enter the last value to number
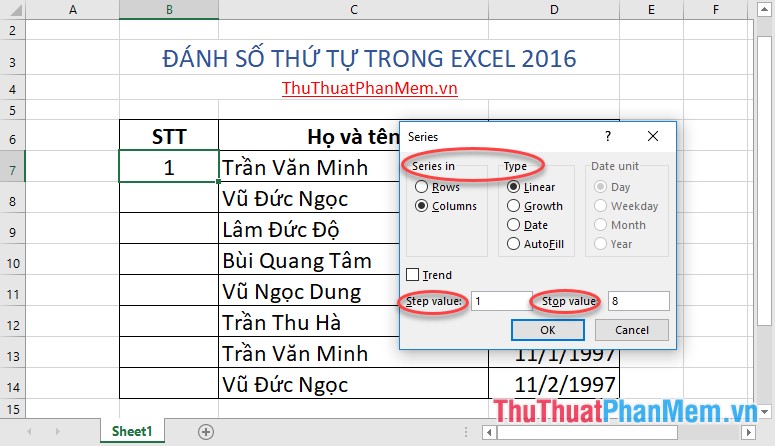
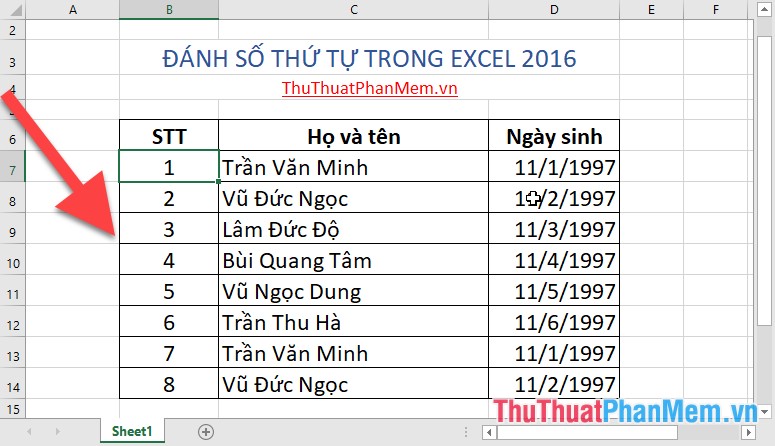
Finally click OK you have numbered as you like:
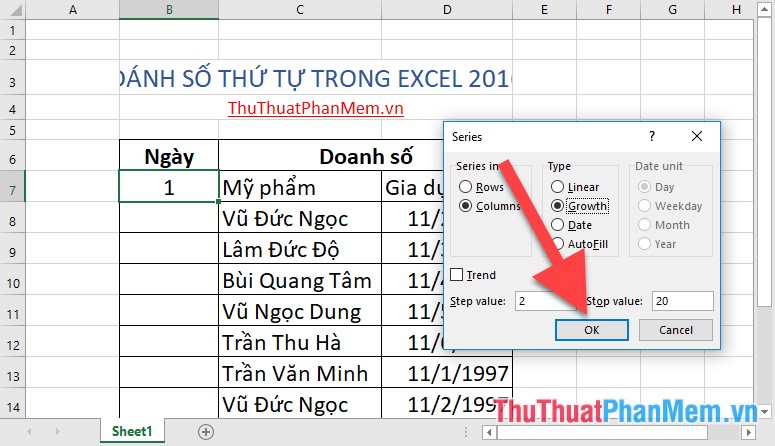
In case you want to number by exponential select the Growth feature in the Type section . Example of numbering in powers of 2 to values less than 20:
The results are numbered in powers:
2. Number the number with the date value
In case you have a monthly revenue report, you need to enter date values, as if you were simply entering data one by one so it takes time. For example, enter date values in the table:
Step 1: Enter the value of the first day to calculate revenue:

Step 2: Go to the Home tab -> Editing -> Fill -> Series:
Step 3: A dialog box appears with the following options selected:
- Series Series item : Select Columns
- Item Type: Select Date value
- Date unit: select the Day value .
- Step Value: Choose the value to start with numbered
- Stop vlaue: Enter the value of the last day to number
- Click OK results you have numbered by the date:

With simple operation, you have numbered the number of different data types. Above is a detailed guide on numbering in Excel 2016. I wish you success!
Was this article helpful?
Your feedback helps us improve.
Related Articles
 How to number columns automatically in Excel4 minutes read
 Numbering in Excel3 minutes read
 Page numbering method of type 1/2 in Excel3 minutes read
 Instructions for numbering in Excel4 minutes read
 Page numbering in Excel does not start with number 11 minutes read
 Instructions to stamp negative numbers in Excel3 minutes read
Reader Comments 0
Sign in with email or Google to join the discussion.