WindowBlinds 7 Final: 'master' beautifies Windows
WindowBlinds has long been known to many users as an ' expert ' to beautify Windows. After a long period of ' silent silence ', WindowBlinds has officially re-exported with version 7.0 with many improvements to please users.
14 points are enhanced Stardock Firm for WindowBlinds 7.0, notably: fully compatible with Windows 7, renewing the interface to make configuration easier, allowing the application of pattern effects on skin, additional 6 new skin effects for Windows Vista include Submline, Aero Metals, Corporate, Aero Woods, Aero Clay, Sabertooth; Support automatically changing skin every time you login to Windows, optimizing the Windows Window Manager (DWM) of Windows Vista, Windows 7 to help save laptop battery power.
WindowBlinds 7.0 has a capacity of 32.8MB, compatible with Windows XP / Vista / 7, 30-day trial download here. This article tests WindowBlinds 7.0 on Windows Vista.
After installation and activation, the WindowBlinds 7.0 icon will run the field in the system tray. The interactive interface of WindowBlinds 7.0 is designed to be more neat, with eight commands arranged below.
1. The Visual Styles tab : displays skin templates that are very intuitive for you to apply to Windows, including the six new styles mentioned above.
After dragging the bottom bar to browse the list of all skins, if you want to apply any skins to Windows, just double click on the skin (or drag the corresponding skin and click Apply changes button above the left corner). ) and wait a moment. If the dialog box appears, click the Continue button to confirm.

Select the type of interface you want to apply
If you are a real WindowsBlinds player, surely many of them are hard to please. To download new and better skins, you should visit the following two addresses:
http://browse.deviantart.com/?qh=§ion=&q=windowblinds
www.wincustomize.com/skins.aspx?libid=1
Most skins are available for free, in zip or wba files.
After downloading your favorite skin, if it is * .wba format, just double click on the corresponding file to install for WindowBlinds 7. For * .zip format, you need to click on the Skin Options button above WindowBlinds 7 interface, select Install new command and find that * .zip file from the dialog box opened to install.
2. The Styles tab is located next to the Visual Styles tab : lists all the built-in styles for a skin to choose from. There are skins with only one type, there are six different " variants " in the skin.
3. Card Colors : helps you change the color effect on Windows Explorer , Start menu , Taskbar by adjusting the cursor under the Color to apply field . Done, click Apply changes> Continue button to apply.
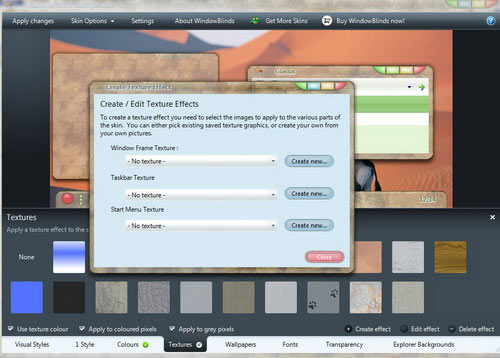
4. Textures card : allows you to apply pattern effects to Windows Explorer , Start menu , Taskbar . You can even edit the effect you just applied with the Edit effect button, or create a new effect using the Create effect button.

Create a new pattern effect
5. Card Wallpaper : support changing desktop wallpaper by clicking on the corresponding picture. Want to import more images to your library WindowBlinds 7, click Settings button on the right, click the Add folder button from the dialog box opens and find the folder containing your favorite images. Done, click Close to return to the Wallpaper tab.
6. Font Card : allows you to adjust the font size via the cursor under the field What size do you want font to be? , or replace the font type displayed on the Windows interface with a different style under the Do you want to override the font defined by the skin? . Select it, click Apply changes > Continue to apply.
7. Transparency tab : You adjust all the cursor to change the level of making transparent Start menu , Taskbar , Windows Explorer window, context menu. Done, click Apply changes > Continue .
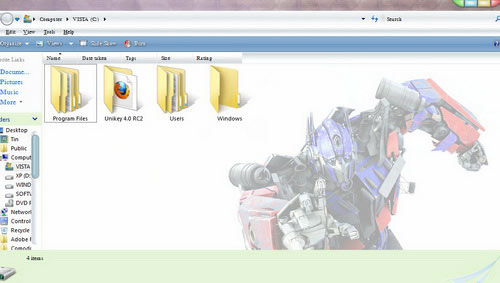
8. Explorer Backgrounds : allows you to create a common wallpaper for all folders in Windows Explorer based on one of the available templates. If you want to get a favorite image as a background for the folder, click the Create Texture button and select the image file (bmp, jpeg, png format). In the following window, adjust the cursor under the Texture Scale field if you want to change the scale of the image.
Then go to File > Save texture , name the file * .tag and click Save to save. Go back to the Explorer Backgrounds tab, find and hover over the wallpaper you just created, then click Apply changes > Continue button to apply. As a test, the folder wallpaper disappears when you maximize the Windows Explorer window.
The cursor in the Active window opacity section allows you to change the transparency of the folder wallpaper.

Wallpaper for folders
Note : To enable the feature to automatically change the skin every time you log in Windows, click the Settings button above the interface WindowBlinds 7. In the dialog box that opens, select Random skins and check the Enable option random skin changing . By default, the program will use all available skins.
If you just want to select some of the best skins to change, uncheck the box Pick a random skin from any installed skins , then check your favorite skins. Done, press OK to confirm.
Selecting the skin will change every time you log on to Windows