Table of Contents
The following guide provides a clear overview of Select, with the most relevant background, details, and practical takeaways.
Select Overview
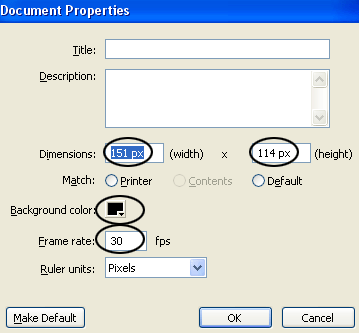
Step 1 Create a new flash file. Go to Modify > Document ( Ctrl + J ), set the flash file size to 151 width and 114 height, Frame rate to 30fps. Select the background color of the flash as black or any color you want then click OK.
Step 2 Using the Text Tool (A), go to the Properties Panel (Ctrl + F3) at the bottom of the screen. Then set the following parameters: - Select the first cell as Static Text - Select the font for the menu - Select the font size - Select the font color, in this example I choose white - Under the font size select Use Anti-alias for readability.

Then enter the name and serial number of each button in the menu as shown below
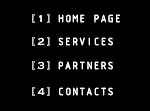
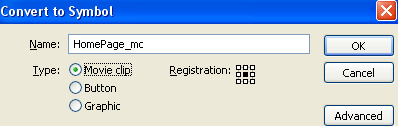
Step 3 Select the Selection Tool (V) and select the number with the first button's text (in the example ' HOME PAGE '), press F8 key (Convert to Symbol) to convert this text into a Movie Clip.
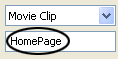
Step 4 While the new made Movie Clip is still selected, go to the Properties Panel below. In the left section, find the Instance name section and enter a name here. In this example I enter HomePage_mc
Step 5 Still select the Selection Tool (V) and double click on the movie clip. You will get to the inside of the Movie Clip

Step 6 Then select the text menu, press F8 again (Convert to Symbol) to convert it again into a Movie Clip again
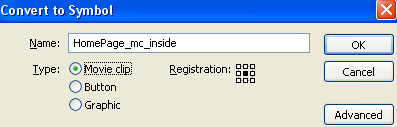
Step 7 Select frame 15 and press F6 key on the keyboard. In this frame, move the position of the text menu to the right a bit (you can use arrow keys or mouse). Step 8 Pick the Selection Tool (V) and click on select text. In the right part of the Properties Panel, you'll see the Color menu. Select Tint and set Tint to black, then choose 100% (as shown below).

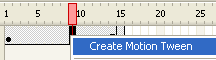
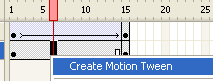
Step 9 Right-click anywhere in the gray area between the two keyframes on the timeline and choose Create Motion Tween from the menu that appears.
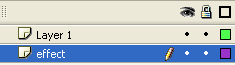
Step 10 Create a new layer and name it effect and drag it below layer 1.
Step 11 Use the Rectangle Tool (R). In the Color section of the at the time selected tool, lock the Stroke color by clicking on the pencil icon and selecting a small square with a red LINE crossed. Select the background color # FF691B and draw a rectangle of size 140x14px, then place it as shown below.

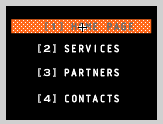
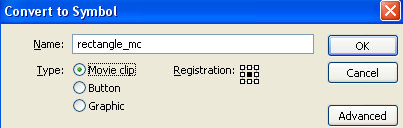
Step 12 Select the rectangle, press F8 key (Convert to Symbol) to convert the rectangle into a Movie Clip.
Step 13 Click on frame 15 and press F6 key. Go back on frame 1, select the Free Transform Tool (Q). Press and hold the Shift key and drag the rectangle size downwards as shown below
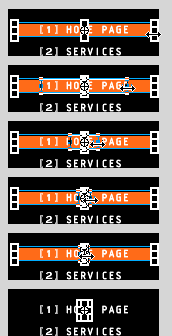
Step 14 Still select the first frame, select the Selection Tool (V) and click on the rectangle. Then go to the Properties Panel below the stage. In the right part you will see the Color menu, select Alpha and scroll down to 0%.

Step 15 Right-click anywhere in the gray area between the two keyframes and select Create Motion Tween from the menu that appears.
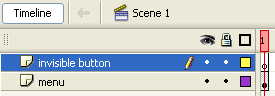
Step 16 Return to the main scene (Scene 1) Step 17 Double click on layer 1 and rename the layer to a menu. Then create a new layer above and name it invisible button.
Step 18 Select the invisible button layer and create a virtual button above the rectangle and menu item text (see image below).
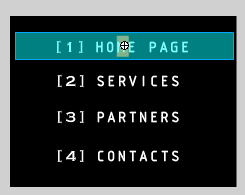
Step 19 Pick the Selection Tool (V), click on the virtual button you just created, go to the Action Script Panel (F9) and enter the following script:
On (rollOver) { _root. Mouse_over_home_mc = true; } on (rollOut) { _root. Mouse_over_home_mc = fstartlse; } on (release) { getURL ("http://www. Flashvault. Net/"); }
Step 20 Create a new layer above the invisible button layer and name it action. Step 21 Click on the first frame of layer action, go to the Action Script Panel and enter the following script:
_root. HomePage. OnEnterFrame = function () { if (mouse_over_HomePage) { _root. HomePage. NextFrame (); } else { _root. HomePage. PrevFrame (); } };
So you have completed the first button of the menu. Repeat the above steps for the other buttons, just different in that you have to name and change the URL accordingly.
FAQ
What does Macromedia Flash - Create Flash Menu Yourself: Select explain?
The following guide provides a clear overview of Select, with the most relevant background, details, and practical takeaways.
Who is most affected by Select?
Select Overview Step 1 Create a new flash file.
What are the key takeaways from this topic?
Go to Modify > Document ( Ctrl + J ), set the flash file size to 151 width and 114 height, Frame rate to 30fps.
Related Articles
 Macromedia Flash - Create Flash Menu with Sound8 minutes read
 Macromedia Flash - Create Menu Effects6 minutes read
 Macromedia Flash - Create Vertical Flash Menu: Step5 minutes read
 Macromedia Flash - Advanced Icon in the Flash Menu: Step4 minutes read
 Macromedia Flash - Create a Simple Menu: Select5 minutes read
 Macromedia Flash - Self-Designed Animated Menu5 minutes read
Reader Comments 0
Sign in with email or Google to join the discussion.