Learn about the Generative Erase feature of the Windows Photos application
Removing objects from photos is easier than ever on smartphones, but it's mostly limited to Pixels, Samsung flagships, or Google One subscriptions. Many people think that removing objects from photos requires expensive software on a computer, but the Windows Photos app is all you need to remove unwanted parts from photos. This tool is easily accessible, free, and pretty awesome!
What is Generative Erase in Windows Photos?
Generative Erase is a tool built into the Windows Photos application that allows selecting and removing objects from images. This feature is powered by AI, using Machine Learning to evaluate what the photo would look like without the object.
You don't need expensive photo editing software or a high-end phone. The Photos app is available on all Windows 10 and 11 computers. You'll see the Erase tool after updating the Windows Photos app to version 2024.11020.21001.0 or later.
How to use the Generative Erase feature in Windows Photos
Open the Photos app on your computer and find or load the image you want to edit. If the Photos app is the default photo viewer, double-click the image to open it.

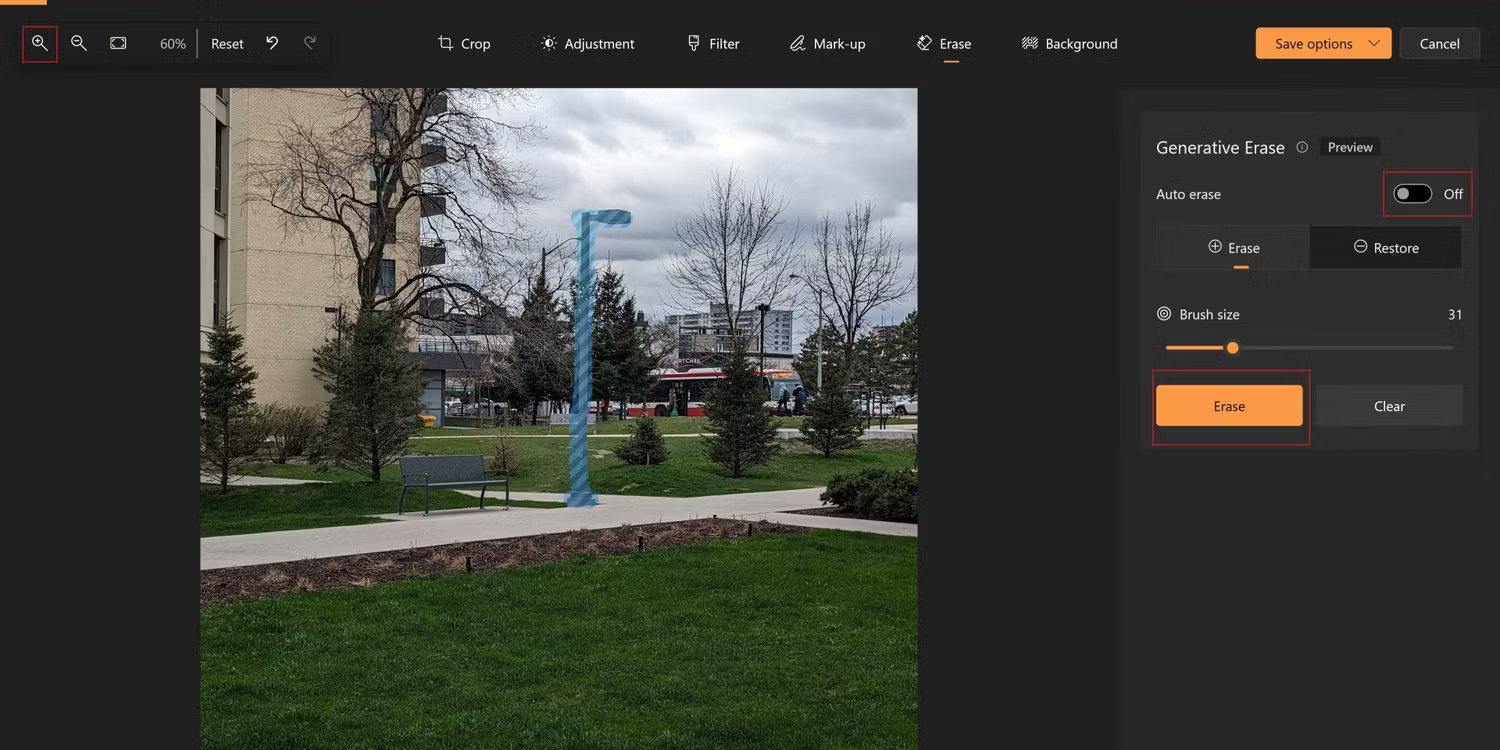
Click the Edit button in the top bar and select Erase . If you want more detailed editing, adjust the brush size and zoom in on the image.

The Auto Erase toggle is enabled by default and automatically erases objects. To erase multiple objects, turn off Auto Erase , use the brush to highlight everything you want to erase, then select Erase .

Be sure to use the brush tool correctly (the size adjustment option will help highlight objects relatively easily).
Is Generative Erase on Windows Photos good?
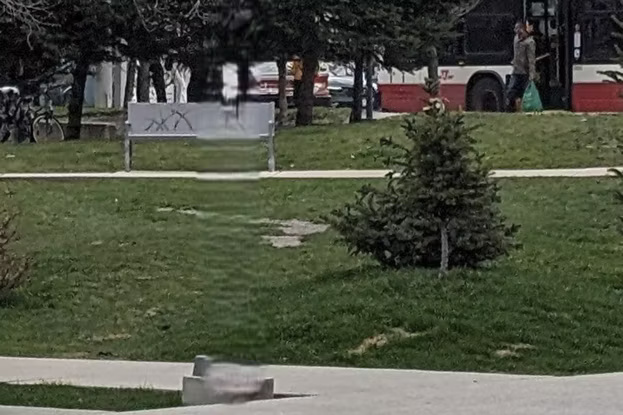
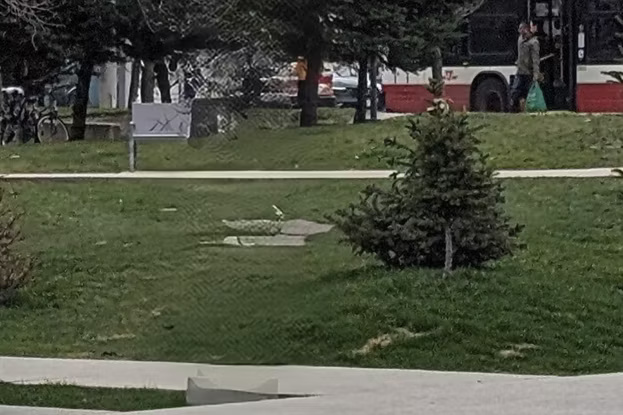
The author of the article tried to remove the lamppost in the original photo twice: Using Magic Eraser on Pixel 8 Pro and using Windows Photos. In the edited photos, you'll see they both do a pretty good job of removing the subject and adjusting the background. The second image was edited using the Windows Photos app, while the third image used Magic Eraser.


The Windows Photos app actually handled the background better and at least tried to recreate the bench behind the column. Meanwhile, Magic Eraser only removed half of the bench but recreated the tree behind the column very well.


Magic Eraser makes selecting objects much easier, while you must be very precise when using the brush tool on Windows Photos. Overall, the apps did a very good job of object removal.
While features like Magic Eraser are a big part of Google Pixel, you might be surprised to know that you also have easy and free access to an equally good tool right on Windows!
You should read it
- How to troubleshoot the Photos app doesn't work on Windows 10
- Microsoft released a series of new editing features for the Photos app on Windows 11
- Microsoft launched new features for Windows 10 Photos application
- Get back Windows Photo Viewer on Windows 10 to help you see photos faster, Photos too slow!
- Photos app on Windows 11 has been updated with new photo editing features
- How to back up and restore Photos application settings in Windows 10
 How to create a mirror image effect without expensive software
 How to Correct Colors in Gimp
 How to easily convert DALL-E 3 WebP images to JPG or PNG
 What is Photo AI? how does it use?
 What is PhotoPrism? How to use this AI-powered photo application?
 How to create a frosted glass effect in Figma