How to enable/disable application access to Generative AI in Windows 11
This guide will show you how to allow or deny apps access to Generative AI for your account or all users in Windows 11.
Table of Contents
Starting with Windows 11 build 26236 (Canary), Microsoft has added a new Generative AI section to the Privacy & security settings page . The new Generative AI section allows you to see if your app can use Generative AI features.
Method 1: Enable/disable application access to Generative AI for all users in Settings
Note : Must be logged in with admin rights to use this option.
1. Open Settings ( Win + I ).
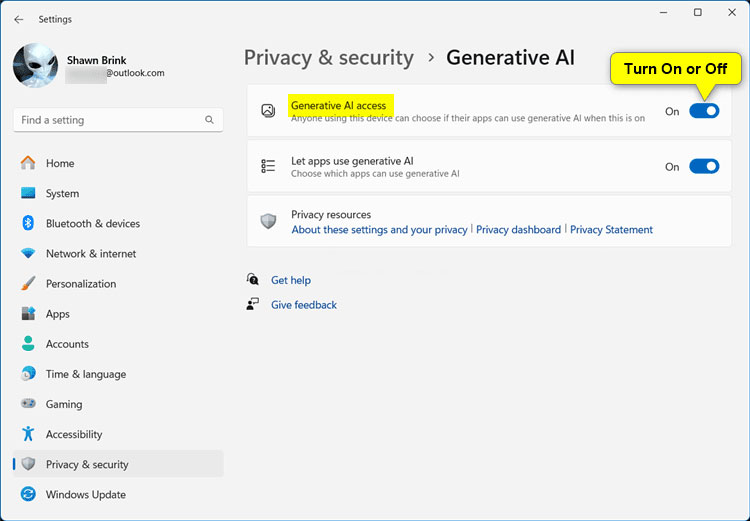
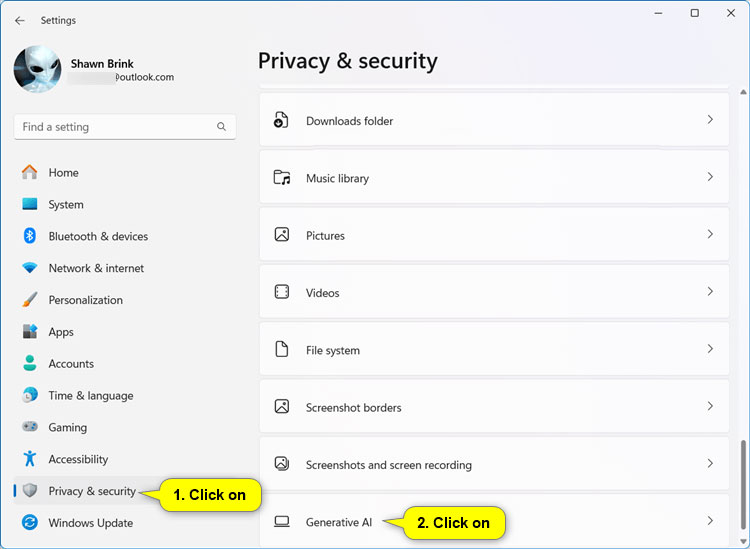
2. Click Privacy & security on the left and click Generative AI on the right in the App permissions section .

3. Enable (default) or disable Generative AI access depending on what you want.
4. Now, you can close Settings if you want.
Method 2: Enable/disable application access to Generative AI for the current user in Settings
1. Open Settings ( Win + I ).
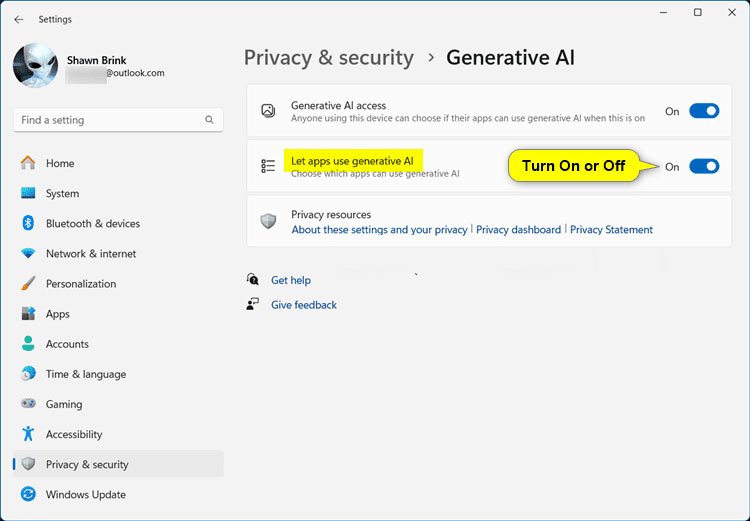
2. Click Privacy & security on the left and click Generative AI on the right in the "App permissions" section.

3. Turn on (default) or turn off Let apps use generative AI depending on what you want.
4. Now, you can close Settings if you want.
Method 3: Enable/disable access to specific applications to Generative AI for the current user in Settings
1. Open Settings ( Win + I ).
2. Click Privacy & security on the left and click Generative AI on the right in the "App permissions" section.
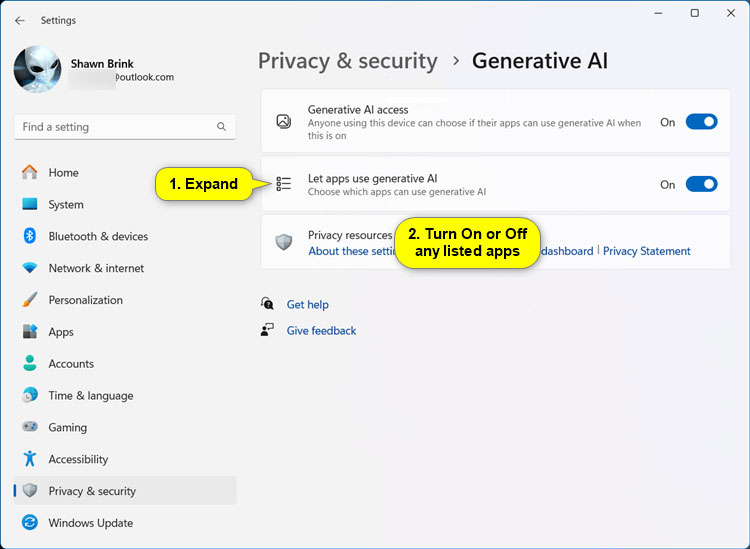
3. Click Let apps use generative AI to expand if possible.
4. Enable (default) or disable any available applications you want.
5. Now, you can close Settings if you want.
Method 4: Enable/disable application access to Generative AI for all users in Local Group Policy Editor
Note : Must be logged in with admin rights to use this option.
Local Group Policy Editor is only available in Windows 11 Pro, Enterprise, and Education editions.
1. Open Local Group Policy Editor (gpedit.msc).
2. Navigate to the policy location below in the left pane of Local Group Policy Editor.
Computer Configuration > Administrative Templates > Windows Components > App Privacy

3. In the right pane of App Privacy in Local Group Policy Editor, double-click the Let Windows apps make use of generative AI features of Windows policy to edit it.
4. Perform step 5 (enable), step 6 (disable) or step 7 (default) below as desired.
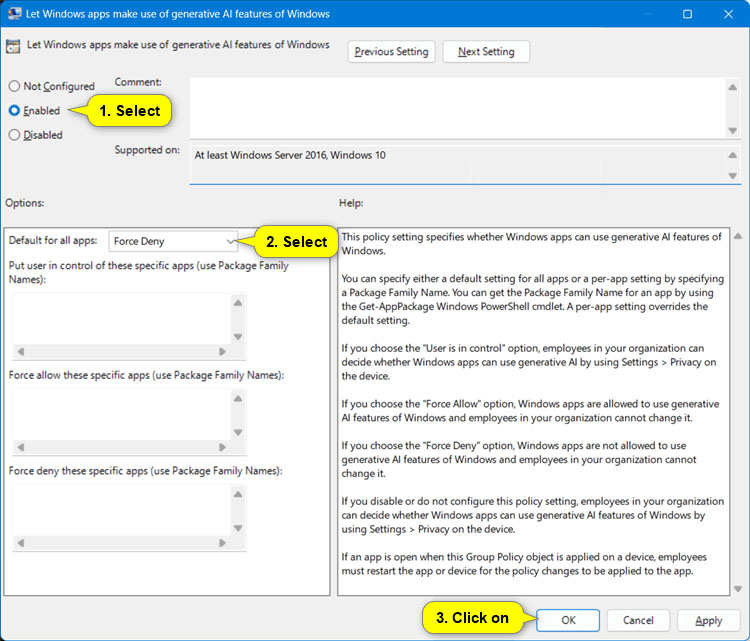
5. Always allow applications to access Generative AI for all users
A) Select Enabled.
B) Select Force Allow in the "Default for all apps" drop-down menu in Options.
C) Click OK and go to step 8 below.

6. Disable app access to Generative AI for all users
A) Select Enabled.
B) Select Force Deny in the "Default for all apps" drop-down menu in Options.
C) Click OK and go to step 8 below.
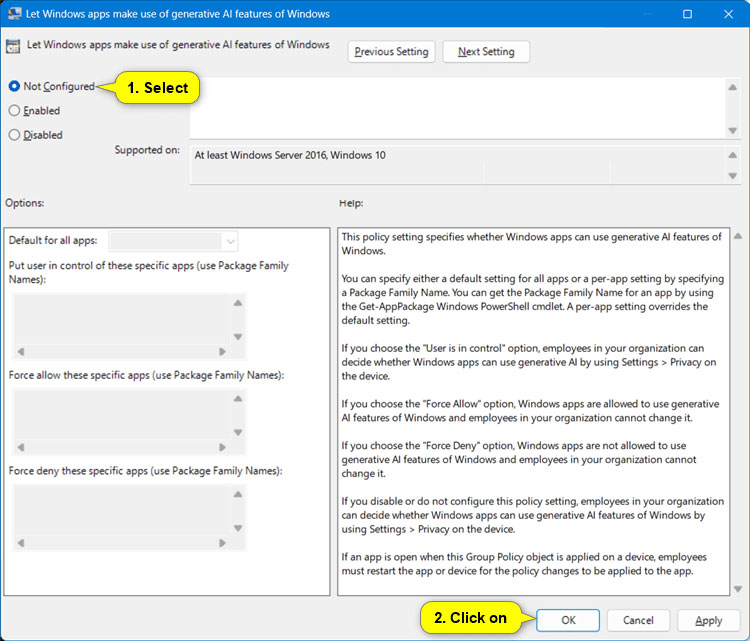
7. User-selected default applications access Generative AI
A) Select Not Configured.
B) Click OK and go to step 8 below.
8. Now, you can close the Local Group Policy Editor if you want.
Was this article helpful?
Your feedback helps us improve.
Related Articles
 What is Generative AI?8 minutes read
 5 security risks of Generative AI and how to prepare to address them.9 minutes read
 TOP Generative AI tools and applications by field9 minutes read
 Learn about the Generative Erase feature of the Windows Photos application4 minutes read
 6 Reasons Generative AI Should Not Be in Any Creative App or Software8 minutes read
 Ways to apply Generative AI in your life completely free of charge.7 minutes read
Reader Comments 0
Sign in with email or Google to join the discussion.