Keyboard shortcuts capture extremely fast screens for computers and laptops
You want to take a quick screenshot to save a moment but you don't know how to do it. In this article, TipsMake.com will show you some ways to take extremely quick screenshots for Laptops, computers.
Table of Contents
You want to take a quick screenshot to save a moment but you don't know how to do it. In this article, TipsMake.com will show you some ways to take extremely quick screenshots for Laptops, computers. Stay tuned!
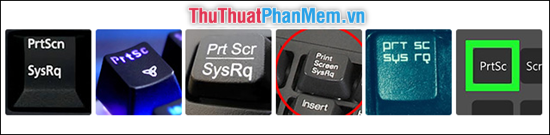
Note : A small note for you is to take screenshots most of us will use the Print Screen button. However, depending on the manufacturer of the component, the symbol of the Print Screen buttonmay show each other. TipsMake.com gives you a number of Print Screen display buttons tohelp you make it easier.
How to take a quick screenshot self-save on Windows 10
Method 1: Take a screenshot of self-save
For you using Windows 10 operating system, we can easily capture the entire screen of our computer through the key combination: Windows + PrtSc .

For some laptop keyboard shortcuts, the PrtSc button will be integrated with another function button. Now you need to use the extra Fn key, so the key combination for screenshot will be: Windows + Fn + PrtSc.
After pressing the key combination, your screen will flash 1 time. That shows that you have successfully taken the screenshot. Now go to This PC -> select Pictures . Your screenshot will appear in the Screenshots folder .

Method 2: Take regular screenshots with PrintScreen
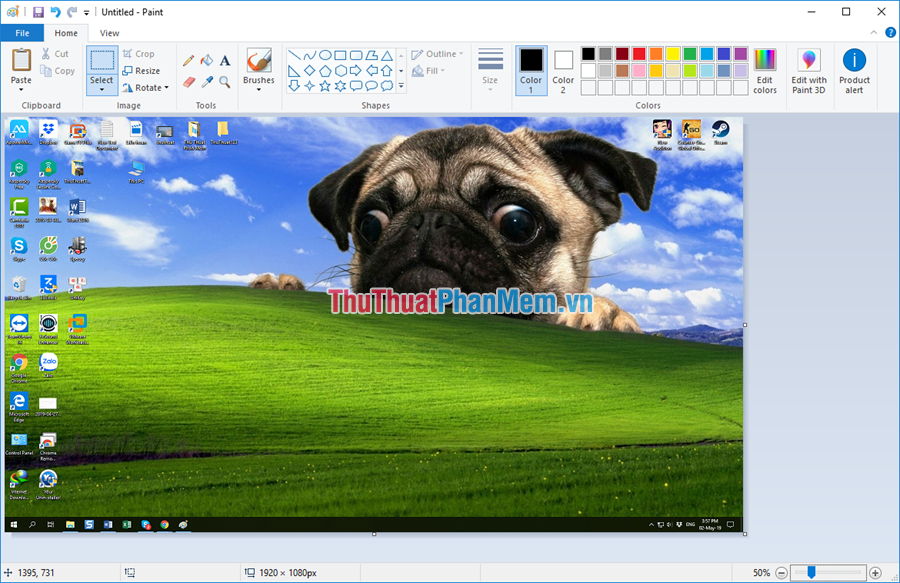
At the screen interface you want to take a picture, click PrtSc button .
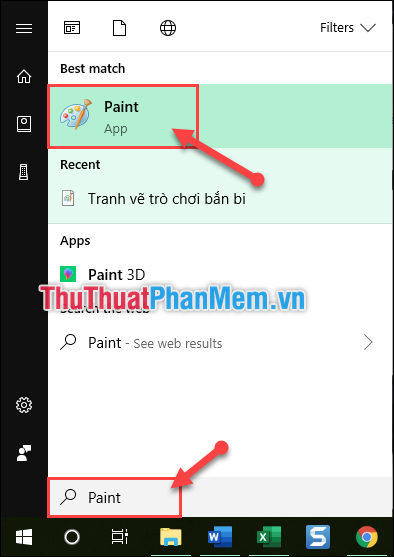
Then your screenshot will be saved in the computer's clipboard. To get that image, go to the Start Menu and open the Paint application .

Then press Ctrl + V to paste the image into Paint.
To save the image, please Save (Ctrl + S) select the folder and name the image.
Method 3: Take a picture of an area on the screen
If you want to take a picture of an area instead of the whole screen. This time you use the keystroke: Windows + Shift + S .
At this time the screen of the screen will show a translucent film covering the entire screen.
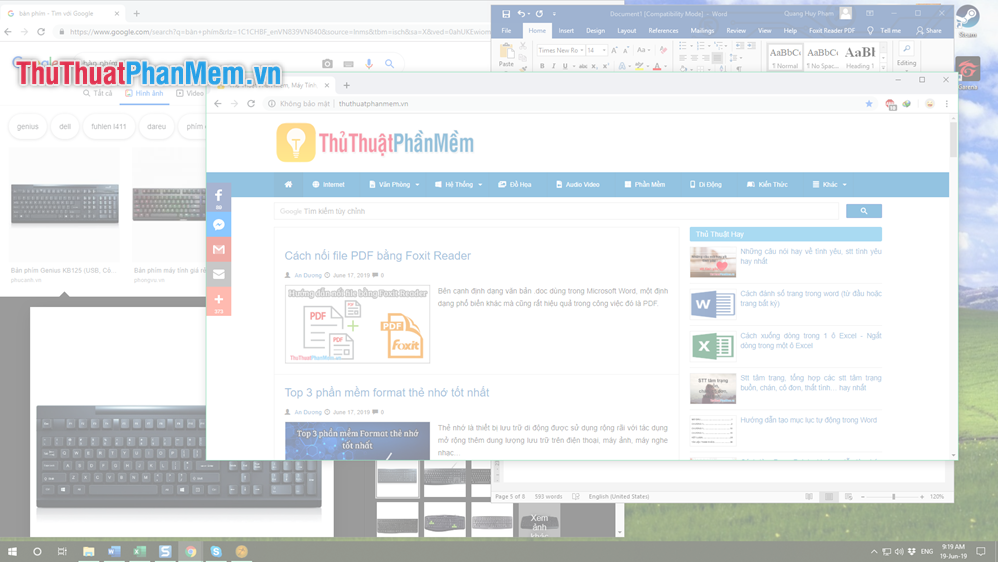
Now you can select the area you want to capture by moving and dragging the mouse to select the area.
At this point the selected area will be clearer than the surrounding and that area has also been temporarily saved to the Clipboard. Open the Paint application in the Start Menu .
Then press Ctrl + V to paste the captured area into Paint .

To save the image again, save ( Ctrl + S ) as usual.
Method 4: How to take a picture of a window on the computer screen
To take a photo of a window on the computer screen, move the mouse pointer to the window you want to take the picture, then press Alt + PrtSc .

Then you also go into Paint and paste the image of that window. And proceed to Save to save the image.
Very simple and fast right? With just a few taps, you can capture yourself using the screen image. Thank you for following the article. I wish you successful implementation!
Was this article helpful?
Your feedback helps us improve.
Related Articles
 Summary of 60+ latest keyboard shortcuts on Windows computers5 minutes read
 Windows 10 Full computer screen capture shortcut, by region4 minutes read
 MathType keyboard shortcuts - All MathType keyboard shortcuts you need to know1 minutes read
 Keyboard shortcuts in Illustrator are often used, keyboard shortcuts are commonly used in AI9 minutes read
 All the keyboard shortcuts on obscure computers11 minutes read
 Summary of the most useful Excel keyboard shortcuts you should know8 minutes read
Reader Comments 0
Sign in with email or Google to join the discussion.