Table of Contents
This guide explains how to recover Deleted Files Permanently in the Trash, with clear steps, practical tips, and important checks before you begin.

In this guide, TipsMake. com will guide you how to recover files deleted permanently in the recycle bin with Recuva software. First, download the Recuva software at https://www. ccleaner. com/recuva
Step 1: After downloading and installing the software, Recuva will offer support for scanning deleted files. Click Next to continue.

Step 2: You select All File s and then click Next .

Step 3: Select In the Recycle Bin and click Next .

Step 4: The options you tick the Enable Deep Scan and select Start .

Recuva then starts scanning and searches for deleted files for you.

Step 5: After the scan is complete, the software will list all deleted files in your trash. Please note the color before the file name.
- Excellent: The best recovery ability.
- Very Poor: The ability to recover is low.
- Unrecoverable: Unable to restore.
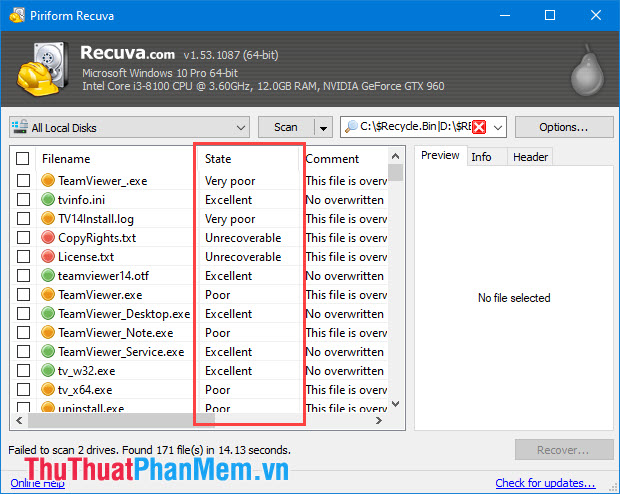
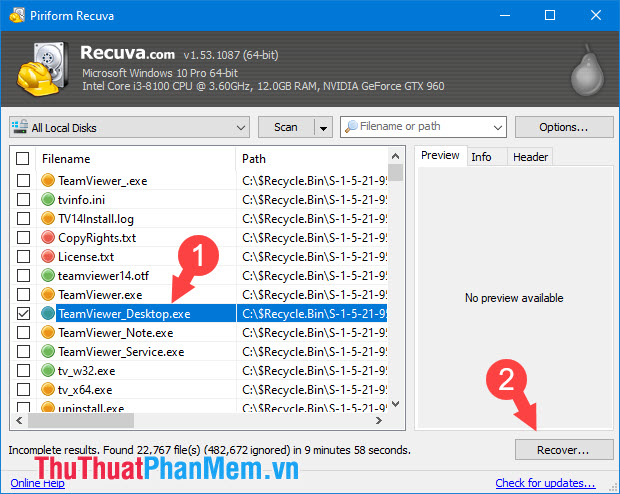
Step 6: You proceed to recover any file. For a high success rate, restore the blue files before the file name. After selecting the desired file, click Recover. to recover the file.
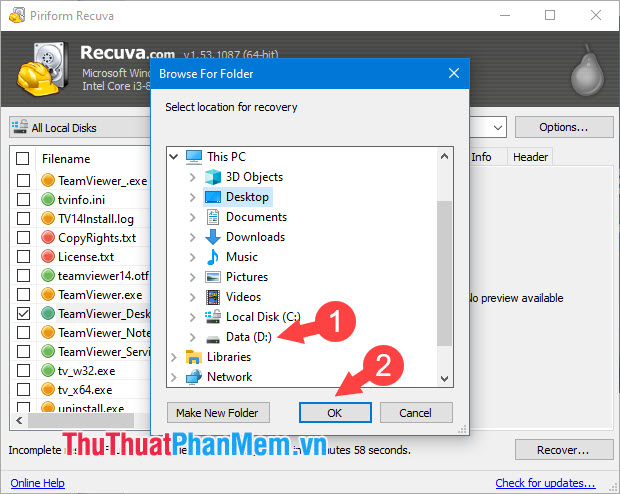
Step 7: You choose where to save the file. We should choose where to save the file to another drive such as D, E to avoid overwriting the deleted file and can not be restored.
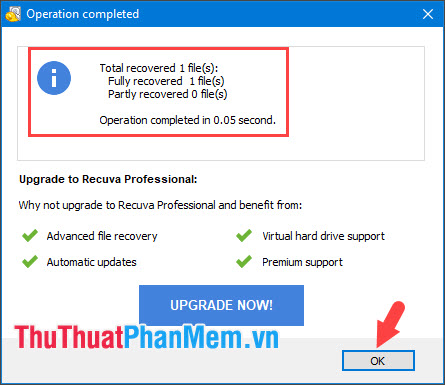
After the message " Operation completed" , you have successfully restored the file. Click OK to continue.
Step 7: You check the deleted file to see if it is back or not.
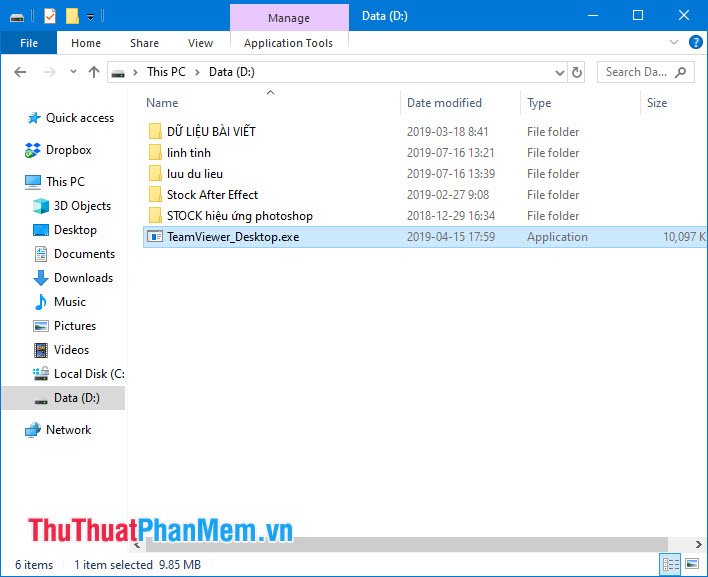
Through the article above, hope this little trick will help you in a "vital" situation to save data. Good luck!
FAQ
What should I know about Recover Deleted Files Permanently in the Trash?
Focus on the key features, requirements, limitations, and practical use cases explained in this guide.
How do I get the best results with Recover Deleted Files Permanently in the Trash?
Follow the recommended steps, use current software or information, confirm compatibility, and review settings before major changes.
Are there any risks or limitations?
Potential limitations depend on compatibility, data quality, cost, privacy, support, and how the product or method is used.
Related Articles
 How to Recover, Retrieve Deleted Files in Trash2 minutes read
 How to Recover Deleted Files on macOS4 minutes read
 How to Recover Accidentally Deleted Files in Os X7 minutes read
 How to Add Trash to Permanently Delete Files on Windows 10/118 minutes read
 How to Recover Deleted Files from the Recycle Bin5 minutes read
 The Deleted File Is Not in the Trash, Why and How to Handle It Explained9 minutes read
Reader Comments 0
Sign in with email or Google to join the discussion.