MS PowerPoint - Lesson 7: PowerPoint design template
You can create your own PowerPoint design template. Starting with a white design, add elements such as the slide background, color scheme, size and style, size and position of each content accordingly ... Then, record the file as a PowerPoint template (PowerPoint template).
You can create your own PowerPoint design template. Starting with a white design, add elements such as the slide background, color scheme, size and style, size and position of each content accordingly . Then, record the file as a PowerPoint template (PowerPoint template).
Create your own designs
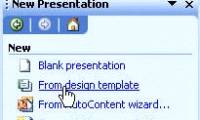
- On the Standard toolbar, click the New icon
- From the View menu, select Master and click Slide Master .
- Here are a few ways you can make the main slide:
-
To change the font format, click the text or the area containing the text. On the Format menu, click Font and then edit your selection in the Font dialog box. Click OK .
-
To change the background color, on the meu Format , click Background , select the appropriate options in the dialog box, and then click Apply.
-
To insert a picture, text or image into a slide, use the buttons on the Drawing toolbar
-
To move a text area, click it and point to the text border. When the cursor changes to a 4-way arrow, hold down the left mouse button and drag the frame to the new position. You can also resize the text areas
- After performing the alignment, format the sample slide show, from the File menu, click Save As
- From the Save As dialog box, in the File name section : type the name of the template, then in the Save as type section: click the down arrow and select Design Template
- Click Save

Note : This template will automatically be saved to the Templates folder. After you close and restart PowerPoint, the created template will be displayed in the Slide Design section, arranged in alphabetical order, under the Avaiable For Use section .
Was this article helpful?
Your feedback helps us improve.
Related Articles
 MS PowerPoint - Lesson 4: PowerPoint design template3 minutes read
 10 awesome PowerPoint templates make the presentation 'shine'8 minutes read
 Download the most beautiful Slide PowerPoint template 20212 minutes read
 4 effective PowerPoint slide templates for meetings7 minutes read
 Create slides from a template available in PowerPoint1 minutes read
 Lesson 25: Use the Template3 minutes read
Reader Comments 0
Sign in with email or Google to join the discussion.