MS PowerPoint - Lesson 4: PowerPoint design template
PowerPoint designs are available designs including color schemes, slides and main titles with custom font styles and formats, all designed for a specific purpose. After applying a PowerPont design template, every time you add a slide show & igr.
PowerPoint designs are available designs including color schemes, slides and main titles with custom font styles and formats, all designed for a specific purpose.
After applying a PowerPont design, every time you add a slide, the new slide will have the same interface as a set of sample slides. You can use the New Presentation section to create a new presentation from the design.
Create a new slideshow from the design template
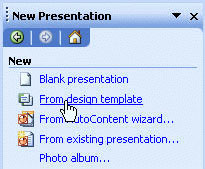
Click From design template in the New Presentation box
You will immediately see the available design templates shown below. For example, if you click on the Mountain Top template, you will see that the slide is replaced with the form shown below:
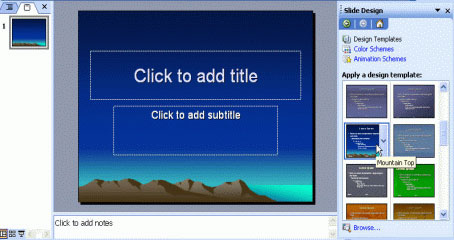
The background color of the slide is available and you just need to insert the text
PowerPoint's AutoContent Wizard
AutoContent Wizard allows you to create a slideshow based on the proposed content and design. This feature will provide the idea of creating a slideshow available to you and simply edit the necessary information or add the specific points you need to emphasize.
Create a new slide show using Autocontent Wizard
- Click on From AutoContent Wizard . in the New presentation box
- Display the AutoContent Wizard dialog box , click Next to continue.
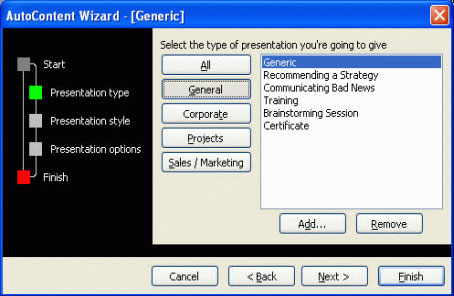
- You need to select a type of slideshow you want to create. If you click on the All button, then you can use the scroll bar to scroll down the list and select the slide show type.
Note : Some display options may not be installed on the system and you will be asked to insert the Microsoft Office installation disc to install more before using.
- Click the Next button to continue
- The next step is to decide how you will use the slideshow. Default On-screen presentation is selected.
- Click Next to continue.
- You can enter a title and footer information (footer) for the slideshow
- Click the Next button to continue
- Click Finish to complete the creation process via AutoContent Wizard.
- Then you may need to open each slide, based on the instructions created by AutoContent Wizard to edit the content accordingly.